How
This post may contain affiliate links.
Read our Disclaimer.
Leave a Comment ★★★★★
Hello, my dear friends! Olivia here, coming to you from my cozy kitchen in Burgundy. Today, I want to share one of my absolute favorite kitchen tricks: how to toast walnuts. This simple process transforms humble, raw walnuts into something truly spectacular, unlocking a deep, nutty flavor and satisfying crunch that can elevate everything from salads to desserts. I remember my grandmother showing me this technique when I was just a girl, and the warm, fragrant aroma that filled her kitchen still brings me so much comfort. Mastering how to toast walnuts is a fundamental skill that will instantly improve your cooking, and I’m so excited to guide you through every step.

Table of Contents
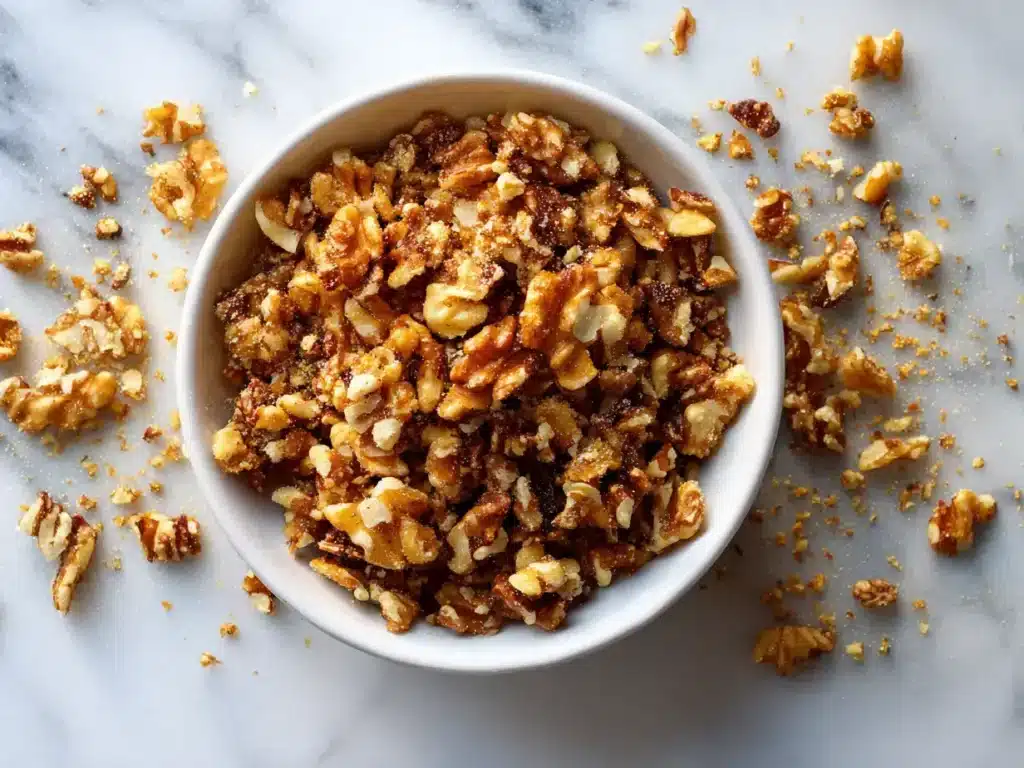
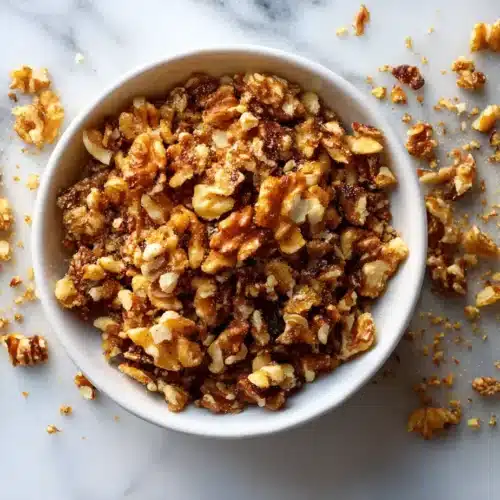
If you’ve never toasted walnuts before, you are in for a delightful surprise. Consequently, the heat from toasting works a kind of magic. It deeply enhances their natural oils, which dramatically amplifies their rich, buttery flavor. Moreover, it gives them an incredible crunch that raw walnuts simply cannot provide. Furthermore, toasting removes any slight bitterness, leaving you with a purely nutty, delicious taste.
The difference between a raw and a toasted walnut is truly night and day. Initially, raw walnuts can be somewhat soft and have a slightly astringent quality. However, after toasting, they become fragrant, crisp, and deeply flavorful. This transformation makes them the star of any dish, whether you’re making a simple roasted vegetable grain bowl or a decadent batch of cookies.
Let’s talk about that irresistible crunch! The texture of toasted walnuts is simply superior. They add a wonderful contrasting element to soft foods like yogurt, oatmeal, or baked goods. Additionally, the aroma that fills your kitchen while toasting walnuts is absolutely heavenly—it’s the smell of cozy, homemade goodness.
One of the best things about learning how to toast walnuts is its beautiful simplicity. You truly only need one thing to get started. This makes it an incredibly easy technique to master, even on a busy weeknight.
Your journey to perfect toasted walnuts begins with selecting the right raw materials. You must start with raw walnut halves that have not been previously toasted or roasted. Using pre-toasted nuts will unfortunately lead to burning. Look for walnuts that are fresh, plump, and have a uniform color for the very best results.
I cannot emphasize this enough: always check your package label! Sometimes, bags of walnuts are sold as “roasted” or “toasted.” For our purpose, we need completely raw nuts. Starting with raw walnuts gives you full control over the toasting walnuts time and level of doneness, ensuring a perfect result every single time.
You likely already have everything you need right in your kitchen drawers. You don’t require any fancy equipment to achieve perfectly toasted walnuts. Let’s quickly go over your tool options.
If you choose the oven method, you will need a standard baking sheet. I highly recommend lining it with parchment paper for effortless cleanup and to prevent any sticking. You’ll also need a spatula for transferring the hot walnuts to a cool plate afterward.
The pan toasting walnuts method is just as effective. For this, you will need a good-quality, dry skillet or frying pan. A heavy-bottomed pan distributes heat evenly, which is the best way to toast walnuts on the burner without creating any hot spots that could cause burning.
This is my preferred method for toasting walnuts in oven, especially when I need a larger batch. It’s hands-off and yields wonderfully even results. The consistent heat of the oven is ideal for achieving that perfect golden brown color.
First, always preheat your oven to 350°F (175°C). This is the ideal walnut toasting temperature. While the oven heats, line your baking sheet with parchment paper. Then, spread your raw walnut halves in a single, even layer. Crucially, make sure no pieces are overlapping so they toast uniformly.
Place the baking sheet in the preheated oven. The key to how to toast walnuts without burning them is vigilance. Toast them for 8 to 10 minutes, shaking the pan gently halfway through. Start checking at the 8-minute mark. They are done when they smell incredibly nutty and appear lightly golden.
When you only need a small handful of toasted walnuts quickly, learning how to toast walnuts on stove is the perfect solution. This method is incredibly fast and doesn’t require heating up your entire oven.
Grab a dry skillet and place it over medium heat. Add your raw walnut halves in a single layer. You do not need any oil. The dry heat will toast them perfectly. Now, shake the pan or stir the nuts frequently with a wooden spoon. This constant movement is the secret to stovetop toasted walnuts that are evenly golden and never burnt.
Keep a very close eye on them! How long to toast walnuts on the stove can vary, but it usually takes just 3 to 5 minutes. They can go from perfectly toasted to burnt in a matter of seconds. As soon as you smell that rich, toasted aroma and see them turning a shade darker, they are ready. Immediately pour them onto a cool plate to stop the cooking process.
After years of toasting nuts in my kitchen, I’ve picked up a few invaluable tips. These little tricks will help you master the art of how to roast walnuts like a true professional.
The number one rule is to never walk away from the stove or oven! Walnuts contain a high amount of oil, so they burn easily. Always use a timer. Furthermore, remember that walnuts will continue to cook for a minute after you remove them from the heat due to residual warmth. This is why transferring them to a cool surface immediately is non-negotiable.
For that perfect, even color, the single layer rule is sacred. Overcrowding the pan will steam the nuts instead of toasting them. Whether you’re toasting walnuts for salad or for a cake, shaking the pan halfway through the oven process or stirring constantly on the stovetop is the key to uniform browning and fantastic flavor.
Now for the truly fun part—using your beautifully toasted walnuts! Their enhanced flavor and crunch make them a versatile superstar in so many dishes, from breakfast to dessert.
Toasted walnuts add a wonderful depth to savory dishes. They are fantastic sprinkled over a green salad, adding protein and crunch. They also make a wonderful garnish for honey roasted carrots or a simple baked cod fillet. Try mixing them into grain dishes like my favorite roasted vegetable grain bowl for a satisfying lunch.
This is where they truly shine! Toasted walnuts are a baker’s best friend. They are essential in my classic cranberry orange bread and absolutely divine in maple walnut muffins. You can also chop them up and fold them into cookie dough for flourless chocolate cookies or use them as a topping for peanut butter bars.

Proper storage is crucial because the oils in toasted walnuts can turn rancid if not stored correctly. You’ve put in the effort to toast them perfectly, so let’s make sure they stay that way!
Allow your oven roasted walnuts to cool completely before storing them. Any residual warmth will create steam and make them soft. For short-term use, place them in an airtight container or a resealable plastic bag. Then, store them in a cool, dark cupboard for up to two weeks. This is perfect for toasting walnuts for salad toppings throughout the week.
For longer storage, your freezer is your best friend. Place the cooled, toasted walnuts in a freezer-safe bag, squeeze out all the air, and seal it tightly. Properly stored, they will keep well for up to three months. This way, you always have toasted walnuts on hand for recipes like pecan pie muffins or brown butter chocolate cookies without any last-minute effort.
Yes, you can! However, you must be extra careful because smaller pieces toast much faster and can burn easily. Reduce the cooking time and check them every minute or so.
No, you do not need any oil. Walnuts naturally contain enough oil to toast beautifully on their own in a dry pan or oven.
This usually happens if they were stored before cooling completely, trapping steam. Always let them cool fully on a plate before putting them in a container.
For large batches, the oven method is absolutely your best bet. Use multiple baking sheets if needed, but remember to rotate them halfway through for even heat distribution.
Absolutely! The same principles apply to almonds, pecans, and hazelnuts. Just adjust the time slightly, as different nuts have different oil contents and densities.
A bitter smell almost always means they are burnt. Unfortunately, you cannot salvage burnt walnuts. Next time, use a slightly lower heat and check them sooner.
Learning how to toast walnuts is one of those small but mighty skills that will genuinely change your cooking. It’s simple, fast, and the payoff in flavor is immense. I encourage you to try both the oven and stovetop methods to see which you prefer. Keep a bag of raw walnuts in your pantry, and you’ll always be just minutes away from adding a gourmet touch to your meals. Now, go forth and toast! I’d love to hear how you use your toasted walnuts in your next creation.

Welcome to Mac Recipes! I'm here to prove that amazing home-cooked meals don't need to be complicated. From weeknight dinners to weekend treats, I create recipes that fit into your busy life—delicious, doable, and always worth making.
More About Me