Halloween Popcorn With Marshmallows And Candy Corn
This post may contain affiliate links.
Read our Disclaimer.
Leave a Comment ★★★★★
As the crisp autumn air settles in and the leaves begin to turn, my mind always drifts to my favorite holiday: Halloween. It’s not just about the costumes and the spooky decorations; it’s about the joy of creating and sharing special Halloween treat ideas with family and friends. I love filling my home with the warm, sweet smells of seasonal baking, and today, I want to share some of my most cherished recipes that are sure to delight both kids and adults alike. From spooky desserts to simple party snacks, these creations will make your celebration unforgettable.

Table of Contents
Gathering the right components is the first magical step toward creating unforgettable Halloween candy ideas. For instance, a well-stocked pantry makes the process so much smoother and more enjoyable. Meanwhile, using quality ingredients always results in a better flavor and texture for your spooky desserts.
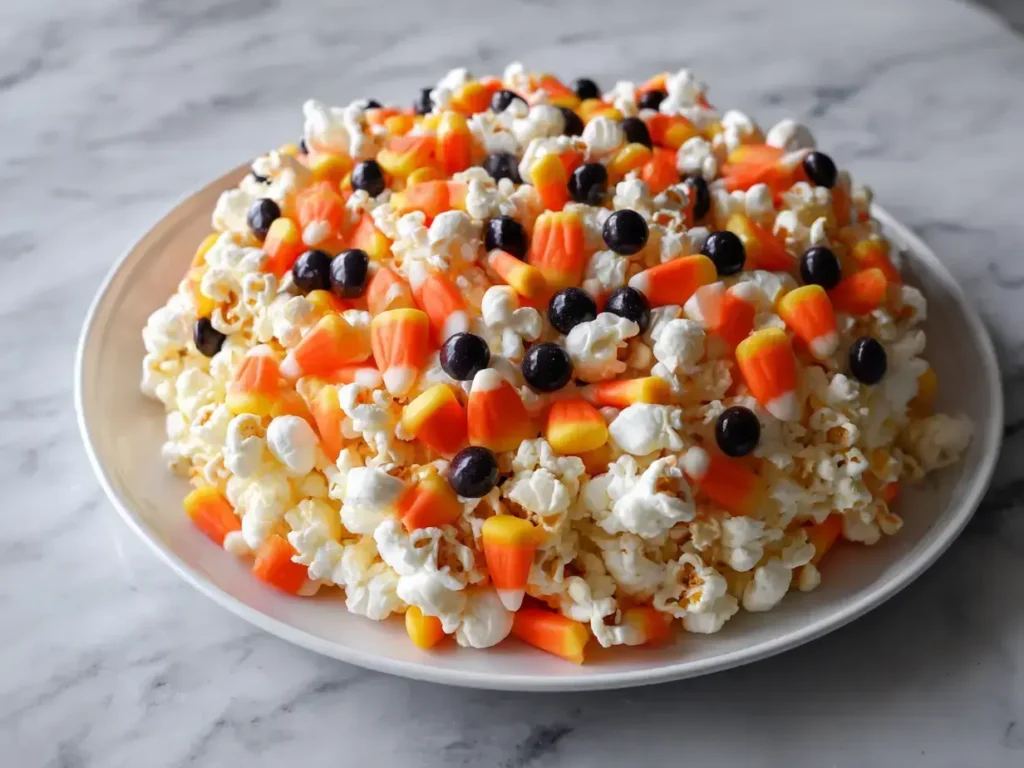
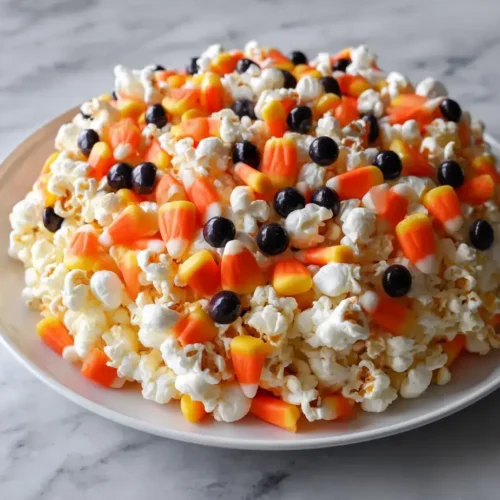
Your base ingredients form the foundation of your creepy Halloween desserts. I always start with fresh popcorn, making certain to remove every single unpopped kernel for safety. Additionally, candy corn provides that classic, chewy sweetness we all associate with the season. Finally, black candy-coated chocolates or semi-sweet chips introduce a fantastic spooky vibe and a rich chocolate flavor.
The binding agent for many treats, like our featured popcorn balls, is a simple marshmallow coating. Use classic white marshmallows as they melt into a perfectly smooth consistency. Furthermore, unsalted butter allows you to control the salt level, while a dash of vanilla extract adds a warm, cozy note. Don’t forget a few drops of vibrant orange food coloring gel to achieve that quintessential Halloween hue!
These festive popcorn balls are a classic for a reason; they are incredibly simple to make and endlessly customizable. They are the ultimate easy Halloween treats for a school party or a spooky movie night at home. Consequently, they always disappear from the platter first!
First, place your prepared popcorn in a very large bowl. Then, in a heavy-bottomed pot, slowly melt your butter and marshmallows over low heat, stirring continuously until the mixture is completely smooth. This patience prevents burning and ensures a glossy, perfect coating. Immediately after removing from heat, stir in the vanilla, salt, and that festive orange color.
Pour the hot marshmallow mixture over the popcorn and gently fold it all together with a greased spatula. Then, add your candy corn and black chocolates, distributing them evenly. Most importantly, grease your hands well with butter or spray to prevent sticking, and firmly press the mixture into a pan. Let it set completely at room temperature for at least an hour before cutting into bars or breaking into chunks.
If you are searching for a truly simple Halloween bark recipe, look no further. This is one of the easiest DIY Halloween treats you can possibly make. It requires no baking and is a fantastic activity to do with children, as they can help with the decorating.
Begin by melting high-quality chocolate—either dark, milk, or white—in a double boiler or microwave in short bursts. Spread the melted chocolate evenly onto a parchment-lined baking sheet. You can even swirl different colors together for a marbled, monster-like effect. This creates a perfect canvas for your toppings.
Before the chocolate sets, press your Halloween-themed toppings into it. Think candy corn, broken pieces of orange and black candy, pretzel sticks for bones, or even spooky sprinkles. Then, simply place the tray in the refrigerator to harden completely. Once set, break it into uneven, creepy chunks for serving. It’s a wonderfully versatile Halloween party snack.
These sweet little phantom cookies are always a hit and are surprisingly simple to create. They are a timeless addition to any platter of Halloween treat ideas. Moreover, they pair beautifully with a warm cup of apple cider on a cool October evening.
You can use a simple sugar cookie base or even a store-bought dough to save time. Roll the dough and use a ghost-shaped cookie cutter or simply form teardrop shapes with your hands. Bake until they are just lightly golden around the edges and allow them to cool completely on a wire rack before decorating. For a different take on cookies, my peanut butter bars offer a no-bake alternative.
Whip up a simple royal icing or use white melting candies to coat the cookies. Then, use small black icing dots to create cute, friendly faces. The key is to let the base icing set completely before adding the facial details so they don’t run. This creates a clean, professional look that will impress all your guests.
These creepy cookies are a hilarious and spooky dessert that never fails to get a reaction. They are a fantastic DIY Halloween treat that looks much more complicated than they actually are. Therefore, they are perfect for bakers of all skill levels.
Use a basic almond-flavored sugar cookie dough for an authentic taste. Take small pieces of dough and roll them into finger-shaped logs. Then, use a knife to create knuckle indentations and press a sliced almond firmly into one end to create the witch’s fingernail. Bake until firm, and you will have a tray of deliciously creepy digits.
After the cookies have cooled, you can add even more detail. For example, brush the “cuticle” area with a tiny bit of red icing for a gruesome effect. Alternatively, you can leave them plain for a more classic look. These are always the star of any Halloween party snacks table.
Unleash your creativity with these playful monster cupcakes! They are the perfect canvas for wild colors and silly faces, making them ideal for easy Halloween treats that kids absolutely adore. Plus, you can use any cupcake recipe you love as the base.
Start with your favorite chocolate or vanilla cupcake recipe. I often use my go-to recipe for fudgy chewy brownies baked in a cupcake pan for a denser treat. After they cool, frost them with a thick layer of brightly colored buttercream—think green, blue, or purple—to give them that perfect monster skin tone.
This is where the real fun begins! Use candy eyes, piped chocolate mouths, licorice tentacles, or even colored coconut for fur. Let your imagination run wild to create a whole menagerie of friendly monsters. These monster cupcakes are guaranteed to be the centerpiece of your celebration.

Offering a few healthier options is a great way to balance out the sugar rush. These healthy Halloween snacks are just as fun and creative as their sugary counterparts. They are perfect for parents looking for a little nutritional balance.
You can create so many fun designs with fresh produce. For example, make clementine “pumpkins” with a small piece of celery for the stem. Another idea is to create a plate of banana ghosts by dipping half a banana in yogurt and adding chocolate chip eyes. Additionally, you can make apple slice mouths with almond sliver teeth.
For a savory option, Halloween mummy dogs are always a massive hit. Simply wrap crescent roll strips around hot dogs to create bandages, leaving a space for the eyes. Bake until golden brown and add two mustard eyes. Another great idea is to serve a creepy crudité platter with a green hummus “slime” dip. For another savory-sweet combo, my brown butter brookie is a unique crowd-pleaser.
Presentation is key for Halloween, and proper storage ensures your delicious creations stay fresh. A little planning makes your Halloween party snacks both beautiful and safe to eat.
Use thematic platters and serving dishes to enhance your spread. A black slate board looks fantastic for displaying cookies and bark. Similarly, you can use hollowed-out pumpkins as bowls for popcorn balls or candy. Layer different treats at varying heights to create a visually exciting display that wows your guests before they even take a bite.
Most of these Halloween treat ideas should be stored in a single layer in an airtight container at room temperature. However, treats with perishable ingredients like cream cheese frosting should be refrigerated. Generally, most cookies and bars will stay fresh for 3-4 days. For longer storage, many of these can be frozen. For more dessert inspiration, browse our full dessert category for recipes like this stunning churro cheesecake.
Absolutely! In fact, they are a great make-ahead option. You can prepare them up to two days in advance. Simply store them in an airtight container at room temperature separated by layers of parchment paper to prevent sticking.
If you are not a fan of candy corn, you can easily substitute it with other Halloween candy ideas. Try using dried fruit, peanuts, or even peanut butter chips for a different flavor and texture profile.
I highly recommend using a gel-based food coloring instead of a liquid one. Gel colors are much more concentrated, so you need less to achieve a bold, vibrant orange without making your marshmallow mixture runny.
Many of these recipes are easily made nut-free. For the popcorn balls, ensure your chocolate candies are from a nut-free facility. For the witch fingers, simply omit the almond nail and use a sunflower seed or a piece of white candy instead.
This usually happens if the marshmallows are overheated or not stirred constantly. Always use low heat and keep stirring until smooth. If it’s still sticky, gently kneading a little extra popcorn into the mixture can help absorb the excess moisture.
You can, but I recommend using a natural, lightly buttered or plain variety. Avoid heavily buttered or flavored popcorn, as it can clash with the sweet marshmallow coating and make the final treat too salty.
The best part of Halloween is the memories you create in the kitchen and around the table. Don’t stress about perfection; the slightly crooked smile on a ghost cookie or the messy monster cupcake often has the most charm. So put on some festive music, gather your little goblins or your friends, and have fun experimenting with these Halloween treat ideas. The joy is in the making and the sharing. From my home in Burgundy to yours, I wish you a spooky, sweet, and absolutely delicious Halloween celebration! For a classic dessert any time of year, try my beloved NYT original plum torte.

Welcome to Mac Recipes! I'm here to prove that amazing home-cooked meals don't need to be complicated. From weeknight dinners to weekend treats, I create recipes that fit into your busy life—delicious, doable, and always worth making.
More About Me