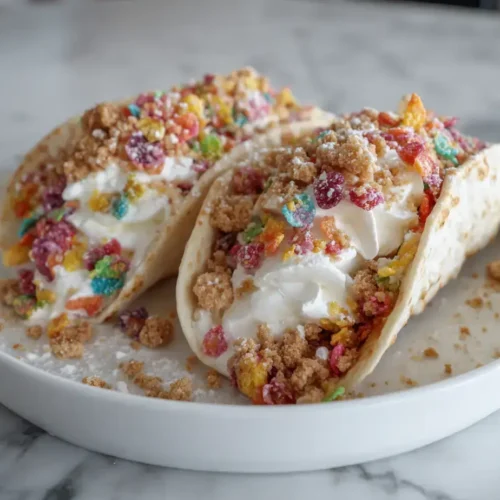
Fun Fruity Pebbles Cheesecake Tacos
This post may contain affiliate links.
Read our Disclaimer.
Leave a Comment ★★★★★
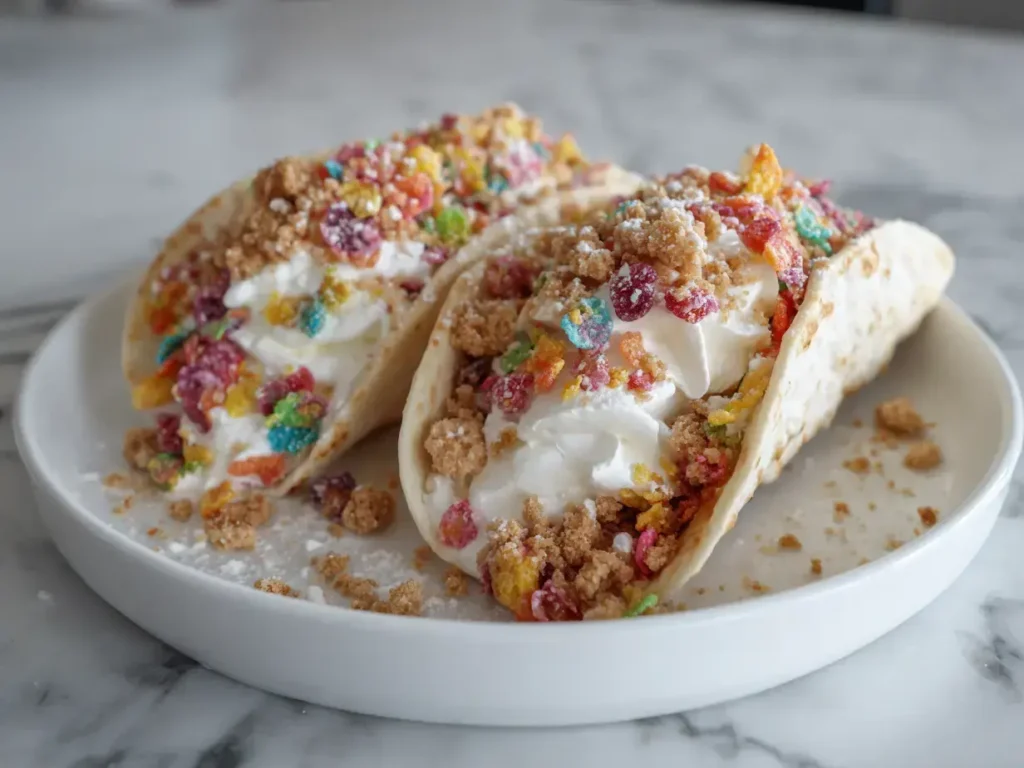
Remember the pure, unadulterated joy of a Saturday morning cartoon session, a bowl of brightly colored cereal in your lap? That’s the exact feeling I wanted to capture with this recipe for Fruity Pebbles cheesecake tacos. As a mom who’s hosted more birthday parties than I can count, I’m always on the lookout for fun and easy dessert ideas that bring a smile to everyone’s face. These aren’t just tacos; they’re a trip down memory lane, packaged in a handheld, no-bake dessert that’s as fun to make as it is to eat. Imagine a crispy, cinnamon-sugar tortilla shell filled with a cloud-like rainbow cheesecake filling, bursting with the nostalgic crunch of that classic cereal. It’s the perfect surprise for a kids birthday party dessert or a colorful finish to a family dinner.

Table of Contents
Frankly, this recipe is a game-changer for anyone who loves a great dessert without a lot of fuss. First of all, these are no bake dessert tacos, which means you don’t have to turn on the oven for the filling. As a result, your kitchen stays cool, and the process is much simpler. Moreover, the combination of the warm, spiced shell and the cool, creamy filling is absolutely divine. It’s a textural dream come true.
The magic truly happens when the cinnamon from the shell meets the sweet, fruity notes of the cereal. Meanwhile, the creamy cheesecake filling acts as the perfect bridge, creating a balance that is both familiar and excitingly new. This easy cereal dessert recipe transforms simple ingredients into something spectacular. Furthermore, the visual appeal is instant; these are some of the most colorful dessert tacos you will ever make, guaranteed to be the star of any dessert table.
Whether you’re serving adults at a backyard BBQ or kids at a sleepover, these tacos are a universal hit. They are the perfect kids birthday party dessert because they are handheld, mess-controlled, and incredibly fun. Additionally, you can easily set up a homemade dessert tacos recipe bar where everyone can customize their own, making it an interactive activity. For more crowd-pleasing ideas, check out our popular S’mores Bars, which are always a hit with a hungry crowd.
Great desserts start with great ingredients, and this one is no exception. Fortunately, you likely have most of these items in your pantry already. The key is quality and preparation. For instance, using full-fat cream cheese and real heavy whipping cream will give you the richest, most stable filling. Let’s break down the components for these cereal crust cheesecake tacos.
For the shells, small 6-inch flour tortillas are ideal because they create a perfect handheld size. I recommend brushing them generously with melted unsalted butter; this helps the cinnamon-sugar mixture adhere and promotes even browning. Speaking of which, the combination of granulated sugar and ground cinnamon is non-negotiable. It creates that essential crispy cereal dessert shell texture we’re after. Conversely, if you’re in the mood for another baked treat with a wonderful crust, my NYT Original Plum Torte is a classic for a reason.
The heart of these tacos is the rainbow cheesecake filling. The most critical step here is ensuring your cream cheese is softened to room temperature. This prevents lumpy filling and allows it to whip up smoothly with the powdered sugar and vanilla. Then, whipping the heavy cream to stiff peaks is what gives the filling its light, mousse-like quality. Finally, gently folding in the Fruity Pebbles cereal ensures you get those delightful bursts of color and crunch in every single bite of these cheesecake stuffed tacos.
You don’t need any specialty equipment to make these delightful tacos. However, a few standard tools will make the process much smoother and faster. Having everything ready before you start is a habit I swear by, especially for a recipe with multiple components like this Fruity Pebbles no bake dessert.
Your oven and a standard baking sheet are key for creating the perfect taco shells. Furthermore, a pastry brush is indispensable for evenly applying the butter. You’ll also need a wire rack for cooling the shells properly; this keeps them crisp. For another recipe that uses your oven to create something magical, try these Fudgy Chewy Brownies.
An electric hand mixer or a stand mixer is highly recommended for whipping the cream and beating the cream cheese. It saves time and effort, ensuring a perfectly smooth filling. Additionally, you will need a set of mixing bowls in various sizes and a flexible rubber spatula for gently folding the ingredients together. This careful folding is what keeps the filling airy and prevents the cereal from getting soggy.
Now for the fun part! Let’s walk through the process together. I’ll guide you through each stage to ensure your Fruity Pebbles cheesecake tacos turn out perfectly on the first try. Remember, the goal is a crisp shell and a fluffy, stable filling.
First, preheat your oven to 375°F (190°C). Then, take your small tortillas and lightly coat the outside of each one with melted butter using a pastry brush. In a small bowl, mix the granulated sugar and cinnamon. Next, sprinkle this mixture evenly over the buttered tortillas. Now, carefully drape each tortilla over two parallel bars of your oven rack to form a U-shape. Bake them for 7-10 minutes, watching closely until they are golden brown and firm. Finally, use tongs to transfer the hot shells to a wire rack to cool completely.
While the shells cool, start on the filling. In a large bowl, beat the softened cream cheese with an electric mixer on medium speed until it’s completely smooth. Gradually add the powdered sugar and vanilla extract, beating until the mixture is fluffy. In a separate bowl, whip the heavy cream on high speed until stiff peaks form. Then, gently fold the whipped cream into the cream cheese mixture using a rubber spatula until no white streaks remain. Finally, fold in 1 1/2 cups of Fruity Pebbles cereal until they are just distributed.
Once you’ve mastered the basic recipe, feel free to get creative! This formula is wonderfully adaptable. For example, you can easily tailor these colorful dessert tacos to different dietary needs or flavor preferences. Here are some of my favorite twists and tips.
You can absolutely change up the cereal! Cocoa Pebbles would create a fantastic chocolate version. Alternatively, for a fruity explosion, try mixing in some mini marshmallows or even a tablespoon of fruit powder. If you love the combination of peanut butter and jelly, swirl in some strawberry jam and use a peanut butter cup cereal for a different kind of sweet taco dessert. For another no-bake peanut butter treat, these Peanut Butter Bars are always a winner.
My number one tip is to work quickly once the shells are baked and cooled. Assemble the tacos just before serving to prevent the shells from getting soft. Additionally, make sure your cream cheese is truly at room temperature to avoid a lumpy filling. If you’re preparing for a party, you can bake the shells a day ahead and store them in an airtight container. Then, make the filling a few hours before and keep it chilled until you’re ready to assemble. This festive cereal treat is all about planning.
Presentation is part of the fun with these tacos. Because they are so visually striking, you can create a real “wow” factor with very little effort. Think about how you can make these fun and easy dessert ideas even more special for your guests.
Arrange the finished tacos on a large platter or a rustic wooden board. Sprinkle a handful of extra Fruity Pebbles around the base for a pop of color. You could even add a dollop of extra whipped cream on top of each taco and place a maraschino cherry on it for a retro vibe. For another stunning dessert that looks as good as it tastes, this Chocolate Easter Egg Nest Cake is a showstopper.
These tacos are rich, so they pair beautifully with a glass of cold milk for the kids or a cup of coffee for the adults. If you’re serving them as part of a larger spread, consider lighter options on the side, like a fruit salad. They also make a fantastic ending to a Mexican-themed dinner, following savory dishes like our Creamy Garlic Pasta or alongside Cheesy Garlic Bliss Bread.

While these tacos are best enjoyed immediately, a little planning can make party day much less stressful. Understanding how to store the components will ensure your homemade dessert tacos recipe is a success, even when prepared in advance.
If you have any assembled tacos left over (a rare occurrence in my house!), store them in a single layer in an airtight container in the refrigerator. However, be aware that the shells will soften over time. They will still taste delicious, but they will lose their signature crunch. The filling, on the other hand, can be stored separately in an airtight container in the fridge for up to 2 days.
For the best results, I recommend a component-based make-ahead approach. You can bake the taco shells up to 2 days in advance. Once completely cooled, store them in an airtight container at room temperature. The cheesecake filling can be made 1 day ahead and kept covered in the refrigerator. When you’re ready to serve, simply give the filling a quick stir, spoon it into the shells, and garnish. This method keeps your crispy cereal dessert perfectly textured.
The versatility of this recipe is one of its greatest strengths. It’s more than just a recipe; it’s a tool for creating happy memories. From casual weeknights to major celebrations, these Fruity Pebbles cheesecake tacos fit right in.
These tacos are the perfect project for a lazy weekend afternoon. Get the kids involved in sprinkling the cinnamon sugar or filling the shells. They are also ideal for potlucks, baby showers, or as a bright, cheerful kids birthday party dessert. For another fantastic party dessert, my Churro Cheesecake is always a crowd-favorite.
With their vibrant colors, these tacos are a natural fit for holidays like Easter, Christmas, or the Fourth of July. You can even coordinate the cereal colors to match the holiday theme. They are the ultimate festive cereal treat, bringing a sense of fun and whimsy to any gathering. For more inspiration for your next celebration, browse our entire collection of delicious desserts.
Absolutely! Simply use your favorite gluten-free flour tortillas and ensure your Fruity Pebbles cereal is a certified gluten-free version. The rest of the ingredients are naturally gluten-free.
I recommend assembling them no more than an hour before serving. The moisture from the filling will eventually make the shells soft. For best results, keep the components separate until you’re ready to eat.
Yes, this recipe is very adaptable. Cocoa Pebbles, Cap’n Crunch, or even Cinnamon Toast Crunch would all work wonderfully, creating a different flavor profile for your dessert tacos.
A runny filling usually means the heavy cream wasn’t whipped to stiff peaks, or the cream cheese was too cold. Make sure your cream cheese is soft and whip the cream until it holds its shape firmly.
Yes! You can drape them over the side of a loaf pan or a folded piece of foil. The goal is just to create a U-shape so they bake into a perfect taco form.
I don’t recommend it. Full-fat cream cheese provides the best structure and richest flavor for the filling. Low-fat versions contain more water and can result in a softer, less stable mousse.
Creating these Fruity Pebbles cheesecake tacos always brings me so much joy. They are a reminder that the best recipes are often the ones that combine simplicity with a little bit of magic. I hope this fun and easy dessert idea brings a burst of color and a whole lot of happiness to your table. So gather your ingredients, preheat that oven, and get ready to create a new family favorite. Don’t forget to share your creations with me—I love seeing how you bring these recipes to life in your own kitchen!

Welcome to Mac Recipes! I'm here to prove that amazing home-cooked meals don't need to be complicated. From weeknight dinners to weekend treats, I create recipes that fit into your busy life—delicious, doable, and always worth making.
More About Me