Transform your next gathering into an unforgettable spectacle with this stunning charcuterie wall, a vertical masterpiece of savory meats, creamy cheeses, and sweet accompaniments. It’s a brilliant party food display that maximizes space and becomes the centerpiece of conversation, ready to assemble in about an hour. Perfect for game-day entertaining or elegant cocktail parties, this edible wall art invites guests to graze and mingle with ease.
I first discovered the magic of a vertical charcuterie display while traveling through Italy, where antipasti is treated with the same reverence as the main course. The artistry of arranging food upward felt so natural, turning a simple snack into a breathtaking focal point. I love pairing this spectacular setup with other make-ahead favorites for a stress-free spread, like my Crockpot Salisbury Steak Meatballs for a hearty option or a comforting dish of Sheet Pan Lasagna. It’s perfect for occasions where you want to enjoy your guests rather than being stuck in the kitchen.
Four Reasons This Charcuterie Wall Wins
- Stunning Visual Impact: Creates an immediate “wow” factor that transforms any party space.
- Space-Saving Solution: Frees up valuable table space for drinks and other dishes.
- Interactive Guest Experience: Encourages mingling as guests explore the different levels.
- Effortless Customization: Easily adapt the ingredients to match any season or dietary preference.
Essential Supplies for Your Wall Display
Be sure to see the recipe card below for the full listing of ingredients, instructions, notes, and estimated nutritional information.
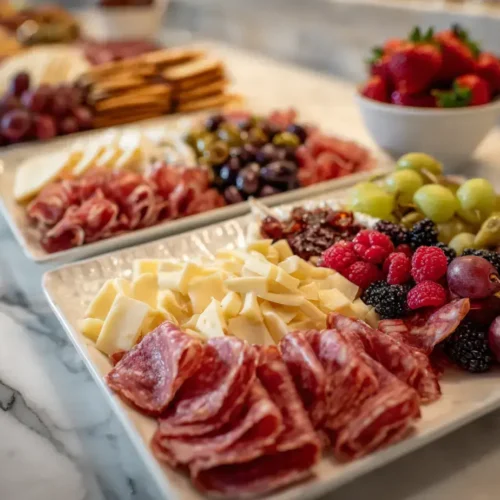
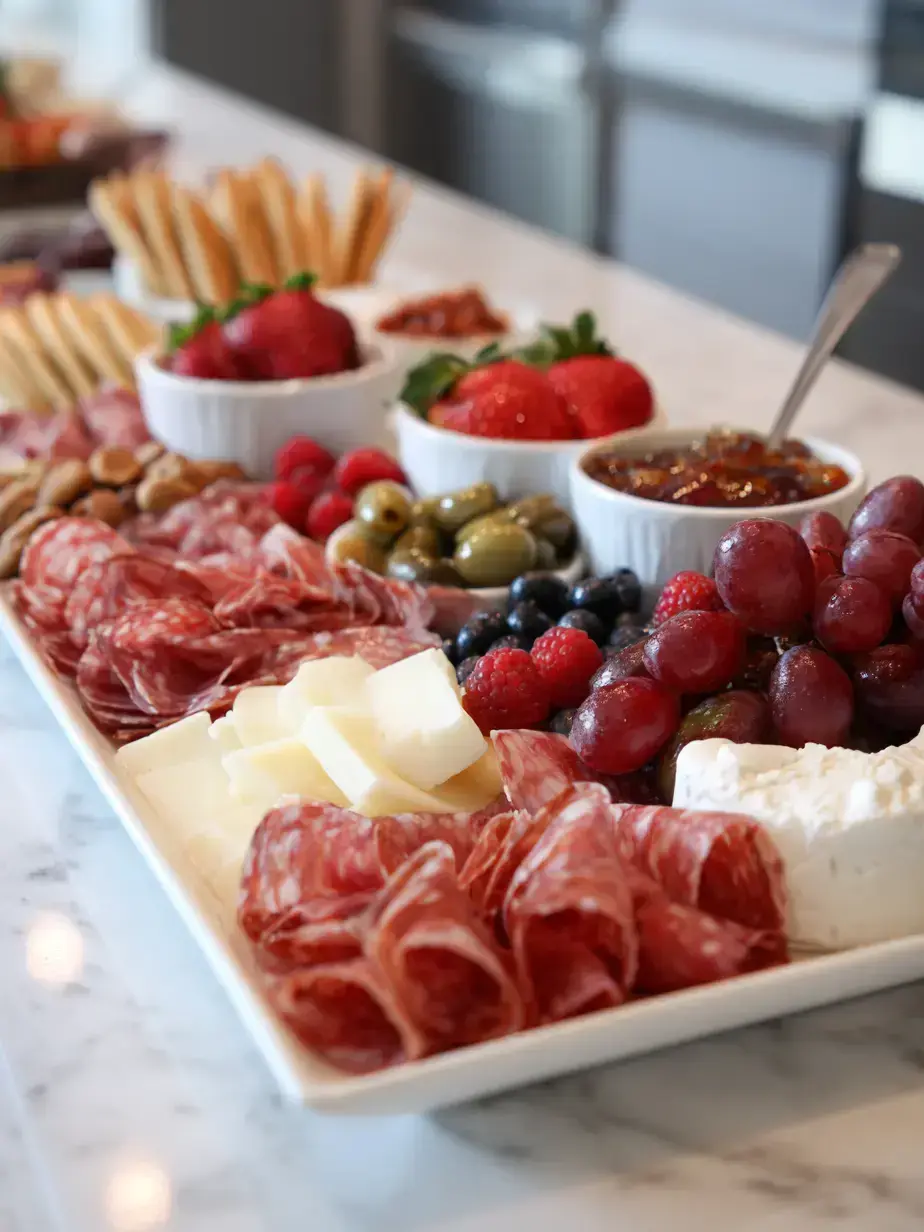
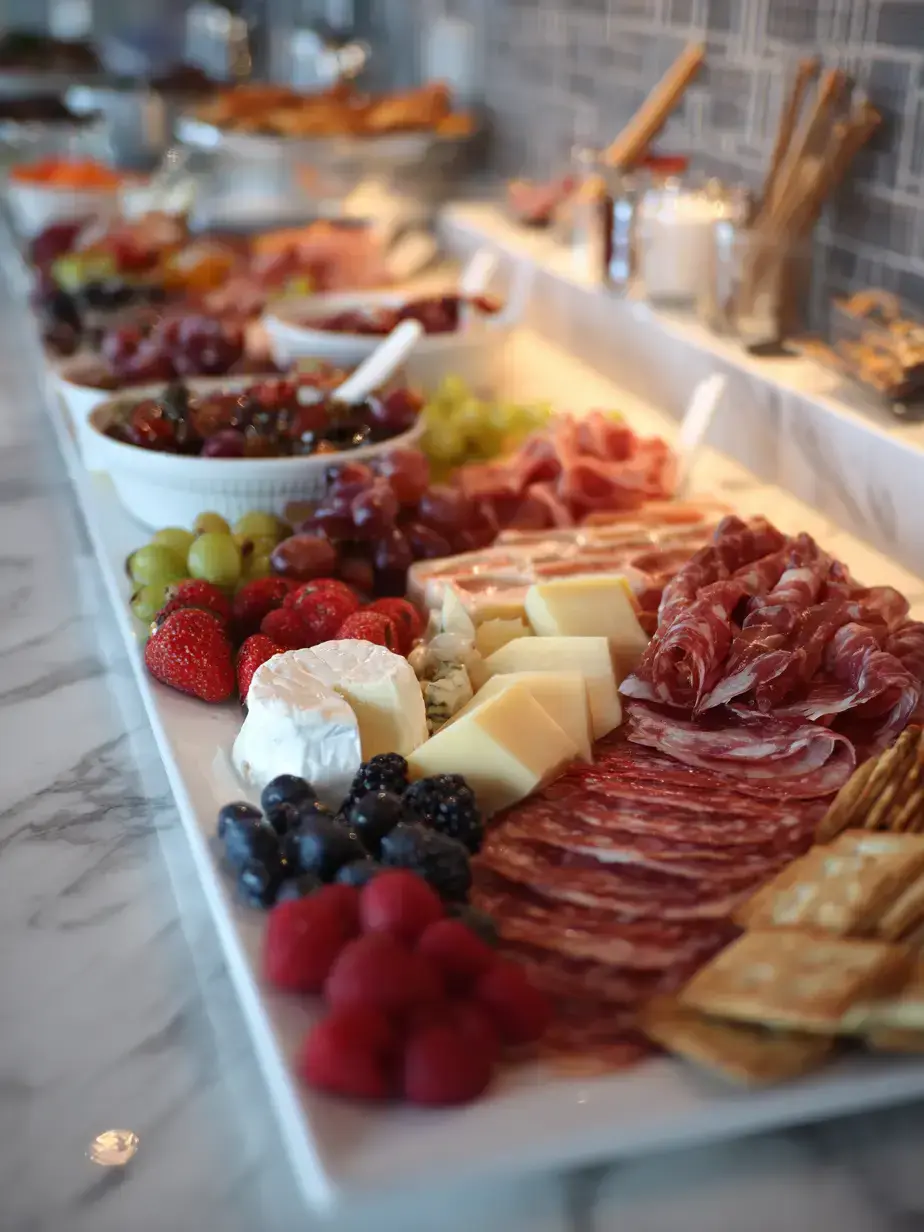
Meats & Cheeses
- Assorted Cured Meats: Choose a variety like prosciutto and salami for contrasting textures.
- Firm Cheese: Cubes of cheddar or Gruyère hold their shape well on skewers.
- Soft Cheese: A whole brie or goat cheese adds creamy elegance to the display.
- Fresh Mozzarella: These small balls are perfect for threading and provide a mild flavor.
Accompaniments & Display
- Mixed Olives and Grapes: Offer a briny and sweet contrast to the rich cheeses.
- Fresh Berries and Dried Apricots: Introduce vibrant color and a chewy, tart element.
- Artisanal Crackers and Breadsticks: Provide the essential crunchy base for all the toppings.
- Fig Jam and Honey: Sweet spreads that beautifully complement both the meats and cheeses.
- Wooden Skewers and Hooks: The fundamental tools for building your secure vertical display.
Charcuterie Wall
Create a stunning charcuterie wall with cured meats, cheeses, fruits, and nuts. Perfect for parties and gatherings.
Prep Time 1 hour hr
Total Time 1 hour hr
Course Appetizer
Cuisine American
Servings 1 display
Calories 320 kcal
cutting board
knife
measuring cups
measuring spoons
small bowls
skewers
Meats
- 1 pound thinly sliced assorted cured meats (prosciutto, coppa, salami)
Cheeses
- 10 ounces firm cheese (cheddar or Gruyère), cut into cubes or slices
- 8 ounces soft cheese (brie or goat cheese)
- 6 ounces small fresh mozzarella balls, drained
Fruits & Accompaniments
- 1 cup mixed olives (Castelvetrano and Kalamata)
- 1 cup red grapes, washed and dried
- 1 cup green grapes, washed and dried
- 8 ounces fresh berries (strawberries, blueberries, raspberries), washed and dried
- 4 ounces dried apricots
- 4 ounces assorted nuts (almonds, walnuts)
Crackers & Spreads
- 6 ounces artisanal crackers, various shapes
- 4 ounces thin breadsticks
- 4 ounces fig jam or fruit spread
- 4 fluid ounces honey
Display Items
- small serving bowls for jam and honey
- wooden skewers or small metal hooks
- small sturdy clips or adhesive strips optional
Prepare your charcuterie wall base by ensuring it is clean, stable, and food-safe. If using a pegboard, insert hooks or pegs securely. If using a large wooden board, pre-drill small holes for skewers or attach small food-safe adhesive clips as desired for hanging lighter items.
Arrange the larger components first to establish your layout. Secure whole pieces of soft cheese onto a skewer or a small plate attached to the wall. For firm cheeses, thread the cubes onto short skewers or place them into small, secure bowls that can be attached to the wall.
Prepare the cured meats by folding or ruffling them for visual appeal. Fan out slices of prosciutto, fold salami into quarters or roll into cones, and carefully secure individual pieces or small bunches onto skewers or hooks. Distribute the meats evenly across the display.
Add the fruits and vegetables. Thread grapes and fresh berries onto skewers, ensuring they are stable. Arrange olives in small, secure bowls or place them carefully onto shallow pegs. Intersperse the dried apricots by either skewering them or placing them alongside other items.
Fill in any gaps with crackers, breadsticks, and nuts. Secure breadsticks by inserting them into loops or directly into pegs. Crackers can be displayed in small, secure baskets, or if lightweight, carefully clipped onto the wall. Place small handfuls of nuts into miniature bowls or directly onto the display if there are ledges.
Incorporate the dips and spreads. Fill two small, secure bowls with fig jam and honey, respectively. Carefully attach these bowls to the charcuterie wall, ensuring they are stable and easily accessible for guests.
Take a final look at the charcuterie wall, adjusting any items for aesthetics and security. Ensure all elements are stable and won’t easily fall. Step back to assess the overall balance and visual appeal, making any necessary adjustments to create an inviting and plentiful display.
Ensure your wall base is clean and food-safe. Use clips or adhesive strips for a secure display on different surfaces.
Keyword appetizer board, charcuterie wall, party food
Creative Variations for Your Display
- Mediterranean Theme: Focus on olives, hummus, feta cheese, and pita bread for a Greek-inspired twist.
- Dessert Charcuterie Wall: Feature mini pastries, chocolate-dipped fruits, cookies, and sweet cheeses.
- Brunch Board: Include mini waffles, yogurt parfaits in small cups, and smoked salmon skewers.
My Pro Tips for a Stable Display
- Secure Your Base First: Double-check that all hooks and pegs are firmly in place before adding any food items to prevent accidents.
- Balance Weight Distribution: Place heavier items like cheese wheels lower on the wall and lighter skewers higher up for stability.
- Prepare Just Before Serving: Assemble the wall close to guest arrival to ensure meats don’t dry out and cheeses stay at ideal temperature.
- Have a Backup Plan: Keep a tray underneath to catch any accidental drops and have extra supplies handy for quick fixes.
How to Store Your Leftover Components
- Store: Disassemble the wall and store meats, cheeses, and perishables in separate airtight containers in the refrigerator for up to 3 days.
- Freeze: Firm cheeses and some cured meats can be frozen for up to 2 months, though texture may change slightly upon thawing.
- Reheat: This display is meant to be served cold, but you can briefly warm breadsticks in a 300°F oven for 5 minutes if desired.
- Make-Ahead Tip: You can cube cheeses, prepare skewers, and fill bowls a day ahead, keeping them covered in the fridge until assembly.
Frequently Asked Questions
What is the best board to use for a charcuterie wall?
A food-safe pegboard or a large, sanded wooden board works wonderfully. The key is choosing a sturdy base that can securely hold hooks or skewers. I recommend ensuring the surface is clean and smooth to prevent any splinters or contamination.
How do you attach food to a charcuterie wall?
Use a combination of small food-safe hooks, wooden skewers, and secure bowls. Skewers are perfect for cheeses, fruits, and rolled meats, while small bowls attached with sturdy clips hold olives, dips, and nuts safely in place.
How far in advance can you make a charcuterie wall?
For the best quality, assemble your charcuterie wall no more than 1-2 hours before your event. You can prep all components the day before, but wait to build the display to keep items fresh and prevent sogginess.
What can I use instead of a board for a charcuterie wall?
Get creative with a framed wire grid, a vintage window frame with hooks, or even a clean, decorative tray mounted on the wall. The goal is any stable surface that allows for vertical arrangement. For more creative party ideas, check out these Halloween Treat Ideas.
More Party-Perfect Recipes to Try
Create Your Own Edible Masterpiece
This charcuterie wall is more than just food, it’s a conversation-starting piece of art that makes hosting feel effortless. The combination of textures and flavors, from salty meats to sweet honey, ensures there’s something for every palate. I hope this inspires you to look at your wall space as a new canvas for your next gathering.