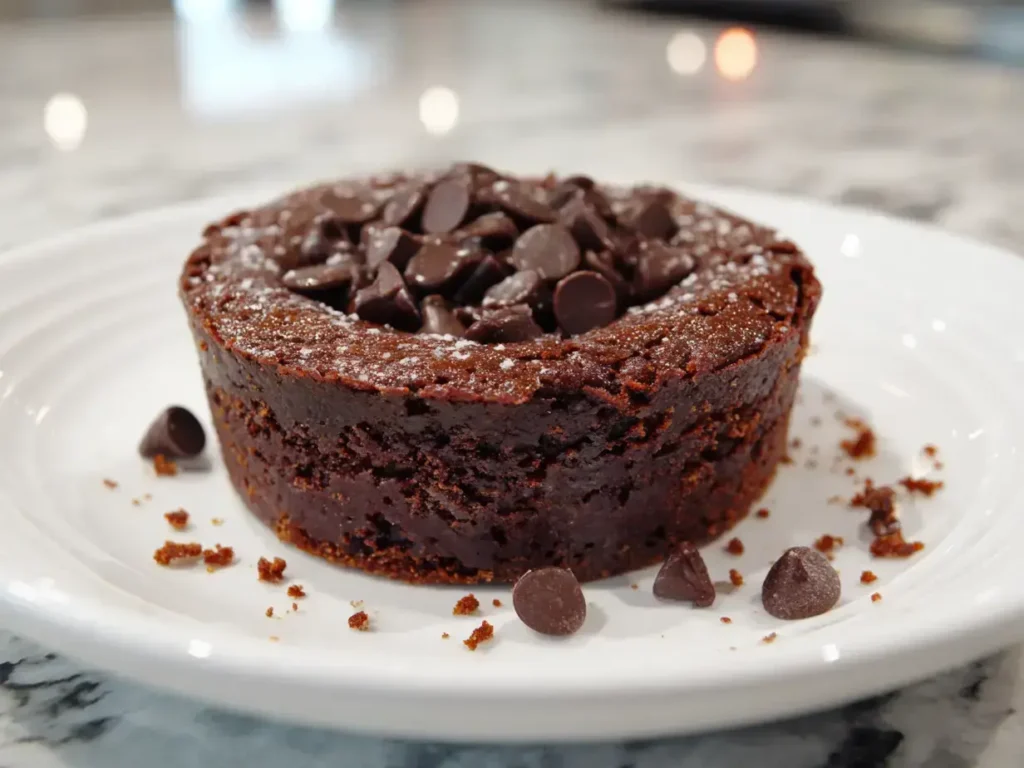
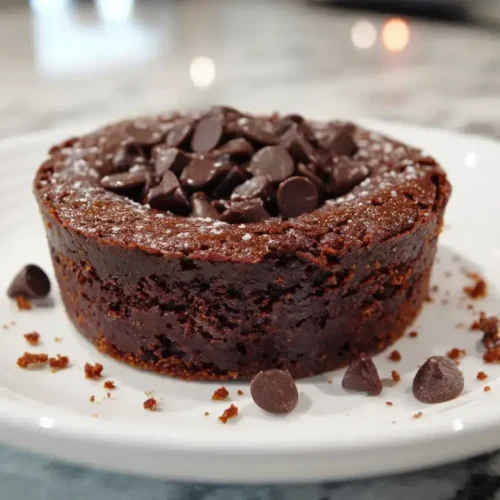
Rich Deep Dish Brownie
This post may contain affiliate links.
Read our Disclaimer.
Leave a Comment ★★★★★
Hello, my dear baking friends. There’s something incredibly comforting about the rich, decadent aroma of chocolate wafting through the kitchen, isn’t there? I vividly remember my grandmother’s deep dish brownie, a thick, fudgy masterpiece that was the crowning glory of every family gathering. Today, I want to share my ultimate recipe for this classic treat. This isn’t just any dessert; it’s a warm, gooey center hug in a pan. We’ll walk through every step together to create the best brownie recipe you’ve ever tasted from scratch. So, preheat those ovens and let’s create some magic.

Table of Contents
This deep dish brownie recipe stands out because it strikes the perfect balance between a chewy edge and a fantastically fudgy center. Many homemade brownie recipes can be cakey or dry, but this one guarantees pure, unadulterated chocolate bliss in every single bite. The secret lies in the ratio of fat to flour and the careful mixing process.
Creating that authentic fudgy chocolate brownie texture requires more fat than flour. We use a generous amount of melted butter and rich cocoa powder. This combination ensures a dense, moist crumb that simply melts on your tongue. Additionally, using room temperature eggs helps emulsify the batter, contributing to that signature smooth, thick consistency you crave.
A great deep dish brownie should be intensely chocolatey without being overly sweet. The granulated sugar provides the necessary sweetness to balance the bitterness of the unsweetened cocoa. Meanwhile, the pinch of salt is not an afterthought; it’s a crucial ingredient that makes the chocolate flavor pop and prevents the dessert from tasting one-dimensional.
Using high-quality ingredients is the first step toward baking success. Each component in this thick chocolate brownie recipe plays a specific role. For instance, I always recommend using real unsalted butter for its pure, creamy flavor. Furthermore, pure vanilla extract makes a noticeable difference compared to artificial imitations.
Let’s break down the cast of characters: Melted butter provides richness and that desirable chewy texture. Sugar adds sweetness and helps create a shiny, crackly top. Eggs bind everything together and add structure. Vanilla enhances the overall chocolate flavor. Flour gives just enough structure, while cocoa powder delivers the intense chocolate punch. Finally, chocolate chips offer delightful pockets of molten chocolate.
I cannot stress enough how much the quality of your cocoa powder and chocolate chips matters. A good Dutch-processed cocoa will give you a darker, richer color and flavor. Similarly, high-quality chocolate chips will melt perfectly, creating those irresistible gooey centers. This attention to detail transforms a simple brownie batter recipe into a gourmet experience.
You don’t need a kitchen full of fancy gadgets to make this decadent chocolate dessert. However, a few key tools will make the process smoother and your results more consistent. First and foremost, a good-quality 9×9-inch square pan is non-negotiable for achieving the proper depth.
A set of sturdy mixing bowls, a reliable whisk, and a flexible rubber spatula are your best friends here. The spatula is perfect for folding in the chocolate chips without overmixing the batter. Also, a sifter for the cocoa and flour prevents lumps and ensures a silky batter. An oven thermometer is a fantastic investment to guarantee your oven temperature is accurate.
For a true brownie in a skillet experience, you can absolutely use a well-seasoned 10-inch cast-iron skillet! It creates a fabulous crispy edge. Otherwise, a light-colored metal baking pan is ideal because it conducts heat evenly, preventing the edges from burning before the center is done. Glass or ceramic pans may require a slight adjustment in baking time.
Now, for the fun part—let’s make some brownies from scratch! These steps are simple, but following them carefully is key to success. First, always remember to preheat your oven. This ensures a consistent temperature from the moment your pan goes in, which is one of the most vital brownie baking tips I can give you.
Start by preheating your oven to 350°F (175°C). Then, take a moment to properly prepare your pan. Grease it thoroughly with butter or non-stick spray, making sure to get into all the corners. You can also line it with parchment paper for super easy removal. This little step saves so much frustration later!
In a large bowl, whisk together the melted butter and sugar until they are completely combined and smooth. Next, add your eggs one at a time, whisking vigorously after each one until the mixture becomes slightly pale and thickened. Stir in the vanilla. Then, sift your dry ingredients together—this is crucial for a lump-free batter. Gently fold the dry mix into the wet ingredients until just combined, and then fold in the chocolate chips.
Baking is a science, and a few expert tips can make the difference between good and great brownies. The most common mistake is overbaking, which leads to cakey or dry results. You want that fudgy texture, so trust the toothpick test! It should come out with a few moist crumbs attached, not clean.
Everyone loves gooey center brownies. The key is to pull them from the oven at the exact right moment. Remember, the brownies will continue to cook slightly from residual heat as they cool in the pan. If you want an even richer, pie-like experience, check out our incredible brown butter brookie recipe for a brownie and cookie hybrid.
I know it’s hard, but you must let your deep dish brownie cool completely before you slice into it. This allows the structure to set, giving you those clean, sharp edges. If you cut them while warm, they will be messy and fall apart. For another dessert that requires patience, our churro cheesecake is worth the wait.
Now for the best part: serving your masterpiece! A warm deep dish brownie is a dessert unto itself, but a few simple additions can make it feel extra special. A scoop of vanilla ice cream slowly melting over a warm square is my all-time favorite combination. The hot and cold contrast is simply divine.
Drizzle warm caramel or chocolate sauce over the top for a truly decadent chocolate dessert. A sprinkle of flaky sea salt heightens the chocolate flavor beautifully. For a festive twist, add a dollop of whipped cream and a few fresh berries. If you love bar desserts, you might also enjoy our easy s’mores bars for a campfire classic.
This rich dessert pairs wonderfully with a glass of cold milk, a hot coffee, or even a red wine with notes of berry. It’s the perfect ending to a family dinner or the star of your book club gathering. For more brownie dessert ideas, explore our recipe for monster cookie brownies that are always a hit with kids and adults alike.

If by some miracle you have leftovers, storing them properly keeps them fresh and delicious. First, always ensure the brownies are completely cool before you store them. Any residual warmth will create steam, making them soggy and promoting mold.
For short-term storage, keep them in an airtight container at room temperature for up to 3 days. You can place a piece of bread in the container; it will help keep the brownies soft by releasing moisture! For longer storage, refrigerate them for up to a week. Let them come to room temp before eating for the best texture. For another treat that stores well, try our chewy lemon cookies.
These thick chocolate brownies freeze beautifully. Wrap individual squares tightly in plastic wrap and then place them in a freezer bag. They will keep for up to 3 months. Thaw them on the counter or warm them slightly in the microwave for a quick, satisfying treat. This method also works perfectly for our pecan pie muffins.
Even experienced bakers run into hiccups sometimes. Don’t worry; most issues are easy to fix! If your brownies turned out cakey, you likely overmixed the batter or used too much flour. Remember to spoon and level your flour for accuracy.
If the center sunk, the batter might have been underbaked or had too much leavening. This recipe doesn’t use baking powder or soda, so that shouldn’t be an issue here. For oily brownies, your butter might have been too hot when mixed, or you may need to try a different brand of cocoa powder. If you enjoy troubleshooting recipes, our guide for red velvet cinnamon rolls has more helpful tips.
If your edges are burning but the center is raw, your oven temperature could be off. An oven thermometer is a cheap and invaluable tool. Also, avoid using a dark metal pan, as it absorbs more heat. If you need to, you can tent the pan with foil halfway through baking to prevent the top from over-browning.

Welcome to Mac Recipes! I'm here to prove that amazing home-cooked meals don't need to be complicated. From weeknight dinners to weekend treats, I create recipes that fit into your busy life—delicious, doable, and always worth making.
More About Me