Decadent Chocolate Oreo Brownie
This post may contain affiliate links.
Read our Disclaimer.
Leave a Comment ★★★★★
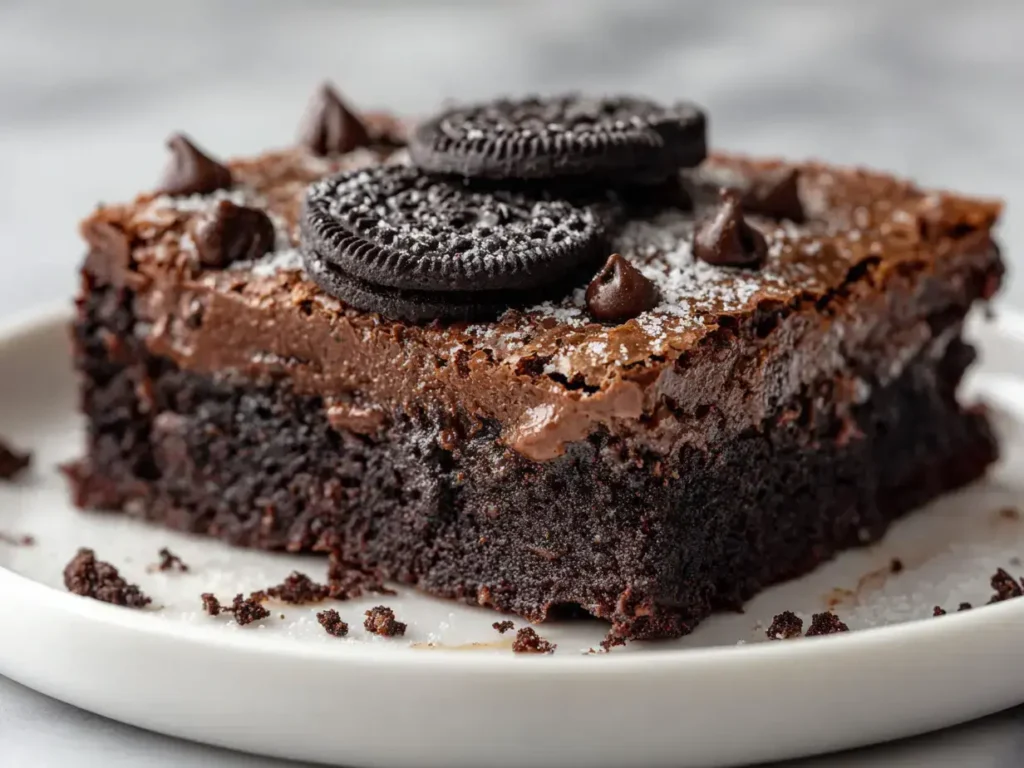
Nothing transports me back to my childhood kitchen in Burgundy quite like the smell of baking brownies, and this Oreo brownie recipe is a modern twist on that classic comfort. It combines the nostalgic, fudgy goodness of a homemade brownie with the irresistible crunch and cream of an Oreo cookie. This recipe is perfect for anyone looking to create a show-stopping dessert that’s surprisingly simple to make. I remember my own kids’ faces lighting up when I first pulled a pan of these out of the oven; they are a true crowd-pleaser for bake sales, potlucks, or just a sweet family treat. Today, I’ll guide you through every step to ensure your Oreo brownie recipe turns out perfectly every single time.

Table of Contents
Every great baking adventure starts with quality ingredients lined up on the counter. For this homemade Oreo brownie recipe, we use simple pantry staples that work together to create something magical. Remember, the quality of your chocolate and cocoa powder truly makes a difference in achieving that deep, rich flavor we all crave.
First and foremost, select a high-quality unsweetened cocoa powder and semi-sweet chocolate chips. I prefer Dutch-process cocoa for its smooth, less acidic taste, but any good brand will work. For the chocolate chips, I find the classic Nestle Toll House morsels melt perfectly into these chocolate Oreo brownies. Meanwhile, if you adore the combination of chocolate and peanut butter, you must try our incredible peanut butter bars for another decadent treat.
You might wonder if you need a special type of Oreo. For this easy Oreo brownie recipe, classic original Oreos are absolutely the best choice. Their familiar flavor and sturdy structure hold up beautifully during baking. Don’t use the double-stuff variety, as the extra cream can make the brownies overly moist. Just the standard, perfect-for-dunking Oreo cookie is what you need for these Oreo cookie brownies.
You don’t need any fancy gadgets to make these Oreo dessert bars, just a few reliable tools from your kitchen. Having everything ready before you start makes the process feel like a relaxing therapy session rather than a chaotic scramble. So, let’s get your workspace set up for success.
A large mixing bowl, a sturdy whisk, and a flexible rubber spatula are your best friends for this recipe. Accurate measuring is key, so use proper measuring cups for dry ingredients and a liquid measuring cup for your melted butter. A fine-mesh sieve for sifting your cocoa and flour will help avoid lumps in your fudgy Oreo brownies batter, ensuring a smooth, professional texture.
A light-colored metal 9×13-inch baking pan is ideal for even heat distribution. Glass or ceramic pans can sometimes cause the edges to over-bake, so I highly recommend metal. If you love bar recipes, our collection of s’mores bars uses a similar pan and is another fantastic option for your next baking project.
This one simple step is the secret to getting perfectly shaped Oreo brownie squares that don’t stick to the pan. I’ve learned this the hard way over the years—there’s nothing more frustrating than a beautiful brownie that crumbles when you try to take it out. A little prep work here saves a lot of hassle later.
Start by greasing your pan lightly with butter or a non-stick spray. Then, cut a piece of parchment paper to fit the length of the pan, leaving a generous overhang on two opposite sides. This creates “handles” that allow you to lift the entire slab of Oreo brownie bars out in one piece after cooling. It makes cutting them into neat squares an absolute breeze.
Parchment paper is non-negotiable for clean edges and easy cleanup. Aluminum foil can work in a pinch, but it sometimes sticks. Trust me, taking this extra minute to line your pan will make you feel like a professional pastry chef. For another recipe where pan prep is key, check out our method for peach upside down cakes.
Now for the fun part: creating that lush, chocolatey batter. The method for this brownie recipe with Oreos is straightforward, but a few tips will guarantee a fudgy, not cakey, texture. We want these brownies to be dense, moist, and intensely chocolatey—the perfect base for our Oreo layer.
In your large bowl, whisk together the melted unsalted butter, granulated sugar, and pure vanilla extract. Whisk it until it’s completely smooth and silky. Then, add your room-temperature eggs one at a time, whisking vigorously after each addition. You’ll see the mixture turn thick and glossy, which is exactly what you want for chewy Oreo brownies.
Sift the all-purpose flour, unsweetened cocoa powder, and salt right into the wet ingredients. This sifting step incorporates air and prevents lumps. Then, use your rubber spatula to gently fold the dry ingredients into the wet. Be careful not to overmix! Stop as soon as no streaks of flour remain. Overmixing is the enemy of a fudgy texture. Fold in one cup of the chocolate chips, and your batter is ready.
This is where the magic happens and your Oreo brownie recipe transforms into something extraordinary. The layering creates a delightful surprise in every bite—a soft brownie, a crunchy cookie, and a melty chocolate chip. It’s a textural dream come true.
Pour just half of your brownie batter into the prepared pan. Use your spatula to spread it into a smooth, even layer that covers the entire bottom. This first layer acts as a delicious foundation for the Oreos to rest on, preventing them from sinking directly to the bottom of the pan during baking.
Now, gently place your whole Oreo cookies in a single layer over the batter. You’ll likely get 4 rows of 3 cookies, for 12 total. Press them down lightly so they adhere to the batter. Don’t worry about covering every millimeter; just get them evenly distributed. Carefully spread the remaining batter over the cookies, covering them as best you can. Sprinkle the remaining ½ cup of chocolate chips on top for an extra chocolate punch. If you enjoy layered desserts, our brown butter brookie combines two classics in one pan.
Baking is the final step where your kitchen will fill with an aroma that brings everyone running. The key to the best Oreo brownie recipe is knowing exactly when to take them out of the oven. We’re aiming for fudgy, not dry, so keep a close eye as the timer winds down.
Preheat your oven to 350°F (175°C) and make sure it’s fully heated before the pan goes in. Bake your creation for 30-35 minutes. Rotate the pan halfway through baking to promote even browning. The brownies are done when the top is set and looks crackly, and the edges begin to pull away slightly from the sides of the pan.
This is the most important test. Insert a toothpick into the center of the pan. For fudgy Oreo brownies, you want it to come out with a few moist crumbs clinging to it, not completely clean. A clean toothpick means they are over-baked. Remember, they will continue to set as they cool. If you’re a cinnamon fan, the baking technique for our cinnamon roll sugar cookies is also all about perfect timing.
I know it’s hard, but patience is essential here. Allowing your Oreo brownie bites to cool completely is critical for achieving the right texture and getting clean cuts. Rushing this step will lead to a gooey mess, even if it’s a delicious one!
Place the entire pan on a wire rack and let the brownies cool to room temperature. This can take a good hour or two. The wire rack allows air to circulate, preventing the bottom from getting soggy. Once cool, use the parchment paper handles to lift the entire slab out of the pan and onto a cutting board.
For neat squares, use a large, sharp knife. Wipe the blade clean between cuts for the sharpest edges. You can cut them into larger bars or smaller, two-bite Oreo brownie bites. They are rich, so smaller squares are often perfect. Serve them on a lovely plate and watch them disappear.

If, by some miracle, you have leftovers, you’ll want to store them properly to maintain that delicious texture. These Oreo dessert bars keep wonderfully, making them a fantastic make-ahead dessert for the week.
Keep your brownies in an airtight container at room temperature for up to 4 days. Layering them with parchment paper will prevent them from sticking together. They are fantastic slightly warmed in the microwave for about 10 seconds, which makes the chocolate chips gooey again.
Absolutely! These freeze exceptionally well. Individually wrap the squares in plastic wrap and then place them in a freezer-safe bag or container. They will keep for up to 3 months. Thaw them at room temperature whenever a chocolate craving strikes. For another freezable favorite, our chewy lemon cookies are a bright and zesty option.
Yes, you can! Use your favorite family-sized brownie mix prepared according to the package directions. Then, simply follow the same layering instructions with the Oreos and extra chocolate chips. It’s a great shortcut for an easy Oreo brownie recipe.
The Oreo cookies will soften as they bake nestled in the moist brownie batter. This is perfectly normal! They transform into a soft, cake-like texture that blends beautifully with the fudgy brownie, creating a unique and delicious experience.
For a marbled effect, you can create Oreo brownies with cream cheese. Simply beat 8 oz of softened cream cheese with 1/4 cup sugar and one egg. Drop spoonfuls over the batter after adding the Oreos and swirl gently with a knife before baking.
While this particular recipe requires baking, you can make no bake Oreo brownies by creating a base with crushed Oreos, butter, and a simple no-bake fudge mixture set in the refrigerator. They are a different but equally tasty treat!
A cakey texture usually results from overmixing the batter or using too much flour. Always measure your flour by spooning it into the cup and leveling it off. Also, remember to fold, not beat, the dry ingredients until they are just combined.
You can experiment! Mint Oreos create a fantastic chocolate-mint version, and peanut butter Oreos would be delicious. Just be aware that flavors with extra filling might make the brownies a bit softer.
This Oreo brownie recipe is more than just a list of ingredients; it’s a passport to creating joyful moments and sweet memories around your own kitchen table. It’s a wonderfully forgiving recipe that delivers impressive results, whether you’re a seasoned baker or just starting out. I hope you feel inspired to preheat your oven, line your pan, and bake a batch of these decadent treats. Don’t forget to share them with someone you love—after you’ve snuck the first warm square for yourself, of course. Happy baking!

Welcome to Mac Recipes! I'm here to prove that amazing home-cooked meals don't need to be complicated. From weeknight dinners to weekend treats, I create recipes that fit into your busy life—delicious, doable, and always worth making.
More About Me