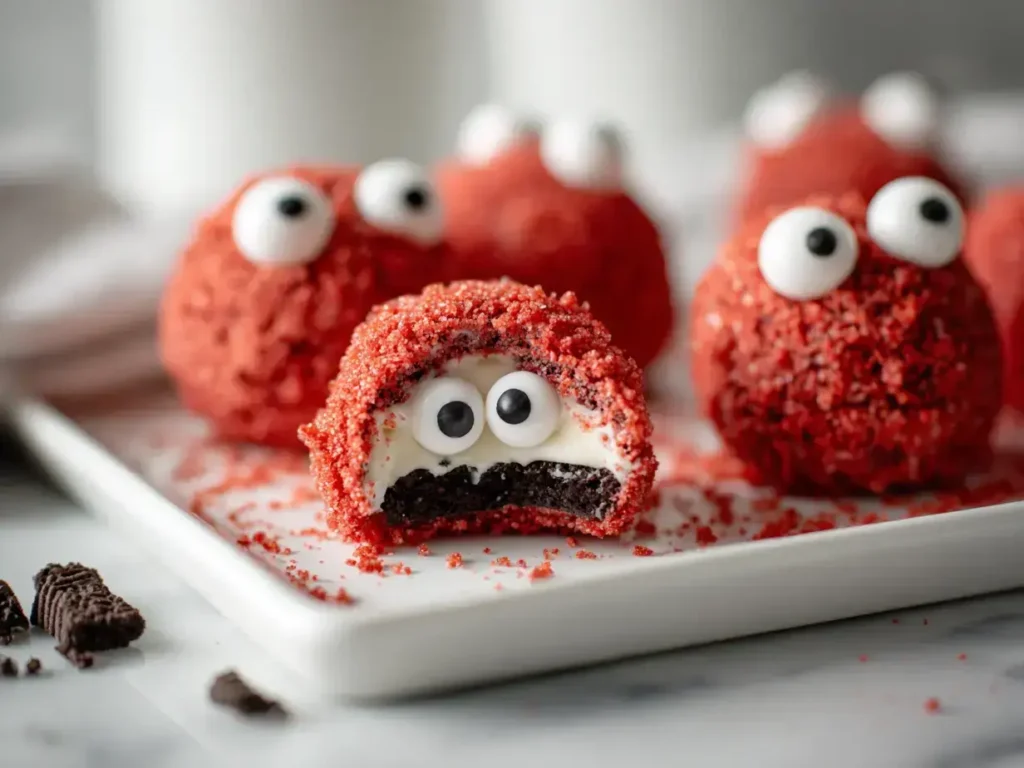
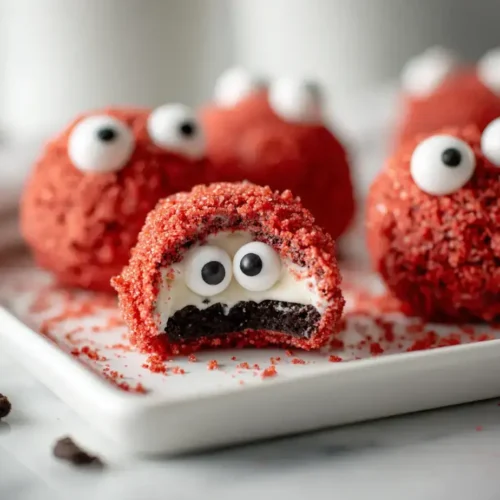
Mummy Oreo Cream Cheese Balls
This post may contain affiliate links.
Read our Disclaimer.
Leave a Comment ★★★★★
Autumn in Burgundy always stirs up my fondest memories. The crisp air, the rustle of leaves, and most importantly, the joyful buzz of preparing for Halloween with my kids. Every year, we’d spend an afternoon in the kitchen, laughing and creating spooky treats that were more fun than frightening. That’s the spirit behind this easy mummy oreo balls recipe. It’s a no-bake Halloween treat that perfectly captures the playful magic of the season. These adorable mummy truffles are not only simple to make but are also a guaranteed hit at any Halloween party. Best of all, they involve little hands, making them a cherished family activity and a fantastic kid-friendly Halloween recipe. Let’s get started!

Table of Contents
Honestly, this recipe holds a special place in my heart. I first started making these mummy oreo truffles when my son was in preschool, and they were an instant sensation. The beauty of these Halloween Oreo balls lies in their incredible simplicity. You only need a handful of ingredients, most of which you probably already have in your pantry. Furthermore, there’s no oven required, which is a huge win during the busy holiday season. This makes them one of the most reliable quick Halloween treats you can possibly imagine.
These cream cheese Oreo balls are the ultimate Halloween party dessert. They look impressive and whimsical sitting on a platter, but they are surprisingly easy to assemble. Moreover, the decorating process is where the real fun begins. Kids absolutely love placing the candy eyes and drizzling the white chocolate to create the mummy’s bandages. It’s a fantastic, low-mess activity that results in a delicious and spooky Halloween snack everyone can enjoy.
For us moms, these treats are a beautiful way to create new traditions. The combination of Oreos and cream cheese is a classic one, reminiscent of other beloved no-bake desserts. It reminds me of the simple joy found in my other favorite recipes, like my incredibly popular peanut butter bars. This mummy oreo balls recipe delivers that same timeless, crowd-pleasing flavor in a fun, festive package that will have everyone smiling.
Gathering your ingredients is the first simple step. Thankfully, this short list is easy to manage. I always recommend using full-fat, brick-style cream cheese for the best texture. Also, choosing a high-quality white chocolate will make your coating much smoother and more delicious. Here’s your complete shopping list for these easy mummy cookies.
For the Oreo balls themselves, you only need two things. First, a full standard package of Oreo cookies. While the classic original flavor is perfect, feel free to get creative. Second, you need one 8-ounce block of cream cheese, softened to room temperature. This softening is crucial for achieving a smooth, lump-free dough that’s easy to roll into perfect balls for your mummy oreo balls recipe.
The magic of the mummy transformation happens here. You will need a bag of white chocolate baking chips, not candy melts, for the best flavor. A tiny teaspoon of coconut oil added to the chocolate helps it melt to a perfectly dippable consistency. Finally, the most important detail: a small tub of candy eyes. These are non-negotiable for creating the adorable mummy eyes dessert that everyone will adore.
You won’t need any fancy equipment for this project. A good food processor is the fastest way to achieve those perfectly fine Oreo crumbs. However, if you don’t have one, a sturdy zip-top bag and a rolling pin work wonderfully—it’s a great way to let out some pre-Halloween excitement! Beyond that, a few basic bowls and tools are all you need to create these white chocolate Oreo balls.
You will need a large mixing bowl for combining your crumbs and cream cheese. I prefer a rubber spatula for mixing, but clean hands are actually the best tool for the job to ensure everything is fully incorporated. A small cookie scoop, like you might use for my fudgy chewy brownies, is fantastic for portioning the mixture evenly. This guarantees all your mummy truffles will be the same cute size.
A microwave-safe bowl is perfect for melting the chocolate in short bursts. Have a fork or a specialized dipping tool on hand to coat the balls smoothly. Finally, keep some parchment or wax paper on a baking sheet ready to receive the dipped truffles. A toothpick is the secret weapon for creating those perfect, wispy bandage lines across your mummy oreo pops.
Now for the fun part—let’s make these adorable treats! The entire process is broken down into simple, manageable steps. Just follow along, and you’ll have a tray of spooky Oreo pops in no time. The key is patience, especially during the chilling steps. Trust me, taking the time to chill the balls properly makes the dipping process infinitely easier and leads to a much prettier final product.
Begin by pulsing the entire package of Oreos in your food processor until they become uniform fine crumbs. You should have about three and a half cups. Then, transfer these dark, delicious crumbs to a large bowl. Add your softened cream cheese and mix thoroughly. Initially, use a spatula, but don’t be afraid to get in there with your hands towards the end to make sure no white streaks remain. The mixture will be thick and pliable.
Use your scoop or a tablespoon to portion the mixture, then roll each portion into a neat one-inch ball. Place them on a parchment-lined tray and pop them into the fridge for a firm 30 minutes. This chill time is non-negotiable! Meanwhile, melt your white chocolate chips with the coconut oil in 30-second intervals, stirring well each time, until completely smooth. Finally, dip each chilled ball, tap off the excess, and return it to the tray.
This is where your personality shines through! Decorating these mummy oreo truffles is incredibly simple, but a few insider tips can take them from cute to absolutely professional-looking. The goal is to create the illusion of haphazard mummy bandages, which is wonderfully forgiving. If you love making fun desserts, you’ll appreciate this creative process as much as crafting a chocolate Easter egg nest cake.
Work quickly after dipping, while the white chocolate is still wet. Immediately press two candy eyes into the top third of the ball to form the face. Then, use your toothpick or the tip of a small spoon to drizzle thin, squiggly lines of the reserved melted chocolate over the ball, draping some lines over the eyes to look like bandages. Don’t overthink it! The messier and more random the lines, the more authentic your mummy Oreo cookie monsters will appear.
If your chocolate coating starts to thicken and set before you finish decorating, simply pop it back in the microwave for five to ten seconds. If the eyes won’t stick, use a tiny dot of melted chocolate as edible glue. Remember, these are scary Halloween snacks, so they don’t need to be perfect. A little character and imperfection only add to their charm, making them look uniquely handmade and delightful.
You’ve crafted these adorable treats, now it’s time to show them off! Presentation is key to making your Halloween party desserts truly stand out. A beautifully arranged platter makes these mummy oreo balls recipe creations the centerpiece of your spooky spread. Think about your theme and have fun with it. These treats are so versatile they can complement anything from a classic haunted house vibe to a cute monster mash.
Arrange your finished mummy truffles on a dark-colored plate or a rustic wooden board to make the white chocolate pop. You can scatter a few autumn leaves or faux spider webs around for effect. For a larger party, consider pairing them with other spooky sweets, like these terrifyingly good s’mores bars, to offer a variety of textures and flavors. This creates a dessert table that appeals to every guest.
For a kids’ party, make the presentation interactive. Label them with a fun sign like “Mummy’s Eyeballs” or “Tombstone Truffles.” You could even create a “build-your-own-mummy” station with the undipped balls, bowls of melted chocolate, and eyes, letting the kids decorate their own. It’s a fabulous activity that doubles as a delicious favor, making these kid-friendly Halloween recipes a huge hit.

One of the best things about this mummy oreo balls recipe is its fantastic make-ahead potential. You can easily prepare these no-bake Halloween treats a day or two before your event, freeing up your time for other party preparations. Proper storage is simple and ensures your delicious creations stay fresh and tasty until you’re ready to serve them to your eager guests.
Always store your finished mummy oreo truffles in a single layer in an airtight container in the refrigerator. They will keep beautifully for up to one week. For longer storage, you can freeze them for up to two months. Place them in a single layer on a parchment-lined tray until frozen solid, then transfer to a freezer bag or container. This method prevents them from sticking together, much like the strategy for my brown butter brookie pieces.
To spread out the work, you can prepare the Oreo and cream cheese mixture days ahead. Simply roll the balls, place them on a tray, cover tightly with plastic wrap, and refrigerate for up to three days before you plan to dip and decorate them. You can also melt the chocolate and have it ready, though I find melting it fresh right before dipping yields the smoothest results for your white chocolate Oreo balls.
While the classic version is always a winner, part of the joy of cooking is making a recipe your own. This versatile base welcomes all sorts of delicious twists. Experimenting with different Oreo flavors can completely transform these easy mummy cookies into a new experience every time. It’s a great way to use this recipe throughout the year, not just at Halloween!
Try using peppermint Oreos for a festive Christmas version, or golden Oreos for a vanilla-based treat. For a peanut butter lover’s dream, use peanut butter Oreos—it would be a perfect companion to my classic churro cheesecake. You can even roll the completed truffles in sprinkles, colored sugar, or crushed nuts before the chocolate sets to add extra color and crunch for different holidays and occasions.
While white chocolate is traditional for the mummy look, don’t feel limited. You can dip the balls in dark or milk chocolate and then use white chocolate just for the drizzled bandages, creating a cool contrast. For a truly decadent treat, use orange-colored white chocolate for a pumpkin-themed mummy! The possibilities are endless, making this one of the most adaptable quick Halloween treats in your repertoire.
Absolutely! Place the Oreos in a large, sturdy zip-top bag, seal it tightly, and use a rolling pin to crush them into fine crumbs. It works perfectly and is a great task for kids to help with.
Simply add another tiny drop of coconut oil (or a teaspoon of shortening) and microwave for another 10 seconds. Stir well, and it should return to a smooth, dippable consistency.
Candy eyes are widely available in the baking aisle of most major grocery stores, craft stores like Michaels, or online retailers like Amazon, especially during the Halloween season.
I don’t recommend it. Full-fat cream cheese provides the best texture and flavor, binding the crumbs together perfectly. Low-fat varieties can make the mixture too soft and difficult to roll.
You can decorate them up to 3 days before serving. Just keep them stored in an airtight container in the refrigerator to keep the chocolate firm and the eyes in place.
Yes! Check the labels on your candy eyes, as some brands are nut-free. You can also make simple eyes by dabbing two small dots of black icing onto the white chocolate coating.
This mummy oreo balls recipe is more than just a list of instructions; it’s an invitation to create joyfully delicious memories. These spooky Halloween snacks perfectly blend simplicity, creativity, and that unbeatable Oreo and cream cheese flavor we all love. They are the ultimate fuss-free, no-bake Halloween treat that will earn you rave reviews at any gathering. I hope this recipe finds its way into your family’s tradition, much like my cherished NYT original plum torte does for mine. For more inspiring ideas, always remember to browse all our fantastic creations on the dessert category page. Now, gather your ingredients, summon your little helpers, and get ready to make some deliciously spooky magic! Happy Halloween from my kitchen to yours.

Welcome to Mac Recipes! I'm here to prove that amazing home-cooked meals don't need to be complicated. From weeknight dinners to weekend treats, I create recipes that fit into your busy life—delicious, doable, and always worth making.
More About Me