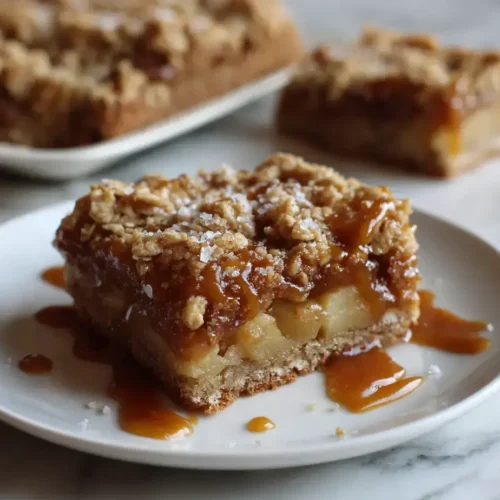
Fresh Salted Caramel Apple Bars
This post may contain affiliate links.
Read our Disclaimer.
Leave a Comment ★★★★★
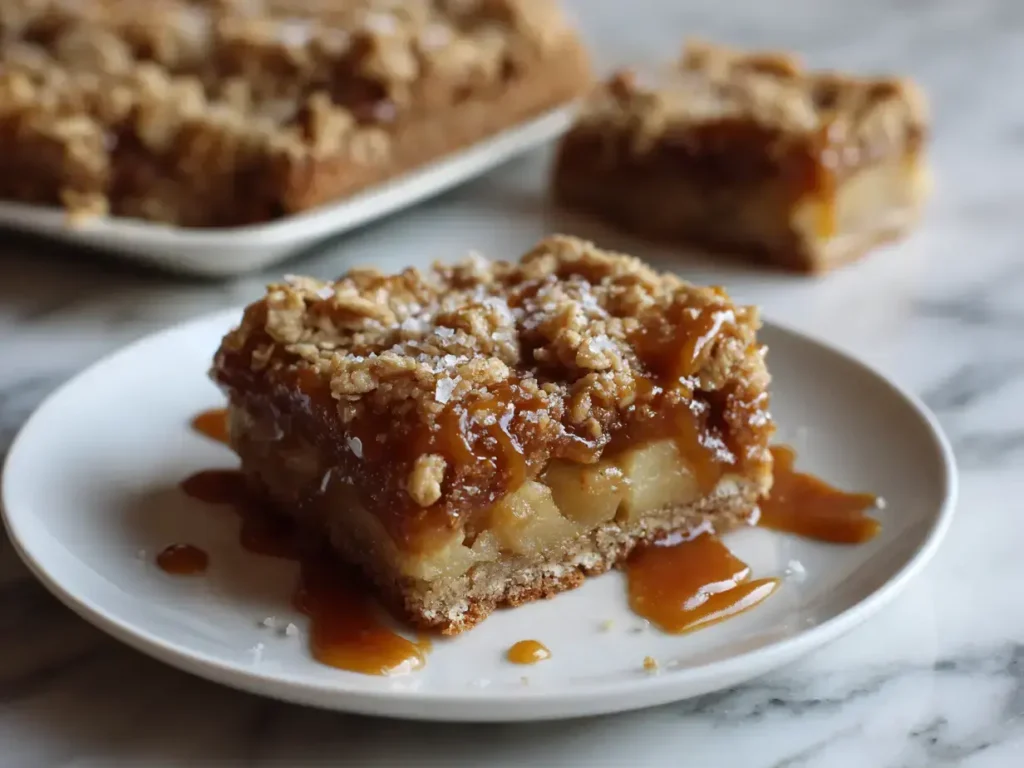
Autumn whispers its arrival with the crisp snap of leaves and a familiar craving for warm, cozy desserts. Frankly, my mind always wanders back to the county fair, where the smell of sugary, buttery treats filled the air. I’ve taken that nostalgic feeling and baked it right into these incredible salted caramel apple bars. They perfectly combine a buttery oat crust, a spiced apple filling, and a decadent caramel drizzle, all finished with a sprinkle of flaky sea salt. Honestly, they are the ultimate easy apple dessert recipe for any fall gathering or a simple weeknight treat. Let’s get baking!

Table of Contents
If you need a quick and satisfying dessert, this recipe is your answer. Firstly, these bars are incredibly simple to make, requiring no fancy equipment or complicated techniques. Moreover, they capture the essence of a classic caramel apple squares dessert but in a much easier, more shareable form. You get all the flavor of a homemade apple pie with a fraction of the effort, making them a perfect last-minute homemade caramel sauce delight.
These bars are wonderfully versatile. For instance, they are a guaranteed hit at potlucks and holiday parties. Meanwhile, they also make a lovely after-school snack with a glass of cold milk. Essentially, their portable nature makes them superior to a messy slice of pie, so you can enjoy them anywhere.
Another huge bonus is the ingredient list. You likely have most of these items in your pantry right now. With just flour, oats, sugar, and butter, you are well on your way. Consequently, this ease makes whipping up a batch of these salted caramel apple bars a spontaneous joy, not a planned chore.
Gathering your ingredients beforehand makes the entire process smooth and enjoyable. I always find that using high-quality components truly elevates the final product from good to unforgettable. Here’s a closer look at what you’ll need for this particular salted caramel apple bar recipe.
The base of these bars is a humble yet perfect combination of textures. All-purpose flour and old-fashioned rolled oats create a hearty, crumbly foundation that holds everything together. Light brown sugar introduces a deep molasses sweetness, while a pinch of salt and baking soda balances the flavors and aids in texture. Finally, melted unsalted butter binds it all into those delightful crumbs we love.
The star of the show is, of course, the apples. I firmly believe a tart apple like Granny Smith is non-negotiable for baking with apples because it holds its shape and provides a bright contrast to the sweet caramel. Speaking of caramel, using a good-quality jarred sauce saves time, but if you’re inspired, a homemade caramel sauce adds a special touch. Finally, a sprinkle of flaky sea salt on top is the magic key that makes all the flavors pop.
Selecting the right apple is perhaps the most critical step for perfect apple crumble bars. You want a variety that can withstand the heat of the oven without turning into mushy applesauce. Texture and flavor are your guiding principles here.
Granny Smith apples are my absolute top pick for any easy apple dessert recipes. Their bright, tangy flavor cuts through the richness of the caramel and buttery crust beautifully. Furthermore, their firm flesh maintains a pleasant texture after baking, giving you a satisfying bite in every square. Other excellent choices include Honeycrisp for a sweet-tart balance or Braeburn for a more complex spiced flavor.
On the other hand, I typically avoid very juicy or tender apples like Red Delicious or McIntosh for this application. They tend to break down too much during baking, releasing excess moisture that can make your dessert bars with caramel soggy. Sticking with a sturdy variety ensures your bars have structure and the perfect mouthfeel.
Now for the fun part—bringing these salted caramel apple bars to life! This process is straightforward, but a few pro tips along the way guarantee a flawless result. So, preheat your oven and let’s create something wonderful together.
First, always line your baking pan with parchment paper, leaving an overhang on two sides. This simple step is a lifesaver for cleanly removing the bars later. Then, simply whisk your dry ingredients—flour, oats, brown sugar, baking soda, and salt—in a large bowl. Next, pour in the melted butter and stir with a fork until clumps form. The mixture should hold together when you pinch it.
Now, press about two-thirds of this oat mixture firmly into the pan to form your crust. Then, spread your finely chopped apples in a uniform layer over the crust. After that, drizzle that gorgeous caramel sauce evenly over the apples. Finally, sprinkle the remaining oat mixture over the top to create a lovely crumbly texture and don’t forget that essential pinch of flaky sea salt!
Achieving bakery-quality salted caramel apple bars at home is easier than you think. These simple, tried-and-true tips will help you avoid common pitfalls and ensure your dessert is a stunning success every single time.
This is the hardest part, but it is crucial. You must let the bars cool completely in the pan on a wire rack. I know it’s tempting to dig in, but this patience allows the caramel to set. Otherwise, you’ll have a messy, gooey situation when you try to cut them—delicious, but not as neat. For a clean slice, cooling is non-negotiable.
Ovens can vary, so keep an eye on your bars towards the end of the bake time. You’re looking for a golden brown topping and visible bubbles around the edges where the caramel is peeking through. This is your sign that the bars are perfectly baked and ready to come out. If you love bar desserts, you might also enjoy our recipe for incredible fudgy chewy brownies for another guaranteed crowd-pleaser.
Once your bars have cooled, it’s time for the best part: enjoying them! These treats are fantastic on their own, but a little extra flair never hurts. Here’s how to serve and keep your spiced apple squares tasting fresh.
For a truly decadent experience, serve these bars slightly warm with a scoop of vanilla ice cream. The contrast between the warm, gooey caramel dessert and the cold, creamy ice cream is simply divine. Alternatively, a dollop of freshly whipped cream adds a lovely touch of elegance for a dinner party dessert.
Store any leftover bars in an airtight container at room temperature for up to 2 days. For longer storage, keep them in the refrigerator for up to 5 days. You can enjoy them cold, or let them come to room temperature for a softer texture. They also freeze beautifully for up to 3 months; just thaw in the refrigerator overnight.

If you adored making these salted caramel apple bars, I have a feeling you’ll love exploring other simple treats on the site. From classic cakes to other fabulous bars, there’s always a new recipe to try for your next baking adventure.
Sometimes, a timeless cake is exactly what you need. For a beautifully simple fruit dessert, my NYT Original Plum Torte is a reader favorite for good reason. It’s elegant, effortless, and celebrates seasonal fruit perfectly. It’s a must-try for any home baker.
If you’re a fan of bar desserts, you are in the right place! Our site is filled with options. For a chocolate and peanut butter fix, these peanut butter bars are irresistible. If you’re craving a taste of summer, these no-bake s’mores bars are a fantastic choice. And for a spectacular celebration dessert, this churro cheesecake is always a showstopper.
Once you’ve mastered the classic salted caramel apple bar recipe, feel free to get creative! This recipe is a wonderful template that welcomes personal touches and flavor twists. Here are a couple of ideas to inspire your next batch.
For an even cozier, autumn-spiced version, try adding a teaspoon of cinnamon and a pinch of nutmeg to the oat mixture. The warm spices complement the apples and caramel magnificently, creating a flavor profile that reminds me of my favorite peach upside down cakes but with a fall twist. It’s a simple change with a huge impact.
If you want to emphasize the wholesome oat flavor, you can easily transform these into oatmeal apple bars. Simply increase the amount of rolled oats by another half cup and reduce the flour by the same amount. This creates a chewier, heartier texture that is absolutely delicious for a breakfast treat or an afternoon snack.
Absolutely! While Granny Smith is recommended for its tartness and structure, other firm apples like Honeycrisp, Braeburn, or Jonagold work well too. Just avoid very soft varieties like Red Delicious to prevent a mushy filling.
If your caramel is too thick to drizzle easily, warm it gently for a few seconds in the microwave. This will loosen it up perfectly for an even distribution over the apple layer.
Yes, you can. Substitute the all-purpose flour with a 1:1 gluten-free baking blend. Ensure your oats are certified gluten-free, as oats are often processed in facilities with wheat.
Sogginess is usually caused by two things: using a very juicy apple variety that released too much water, or not allowing the bars to cool completely before cutting. Cooling lets the caramel and juices set.
It’s best to use old-fashioned rolled oats for the right texture. Quick oats are cut smaller and absorb more moisture, which could result in a denser, less crumbly bar.
For the cleanest slices, use a sharp knife and wipe it clean between each cut. Chilling the bars in the refrigerator for an hour after they’ve cooled at room temperature can also make slicing easier.
I hope this salted caramel apple bars recipe finds its way into your regular baking rotation and creates many sweet memories for you and your family. It’s a dessert that truly encapsulates the warmth and joy of the fall season. From my kitchen to yours, happy baking! Don’t forget to check out our other recipes, like the savory comfort of a Cajun sausage and rice skillet for a hearty dinner or the irresistible cheesy garlic bliss bread for your next party.

Welcome to Mac Recipes! I'm here to prove that amazing home-cooked meals don't need to be complicated. From weeknight dinners to weekend treats, I create recipes that fit into your busy life—delicious, doable, and always worth making.
More About Me