Easy Breadcrumbs Making
This post may contain affiliate links.
Read our Disclaimer.
Leave a Comment ★★★★★

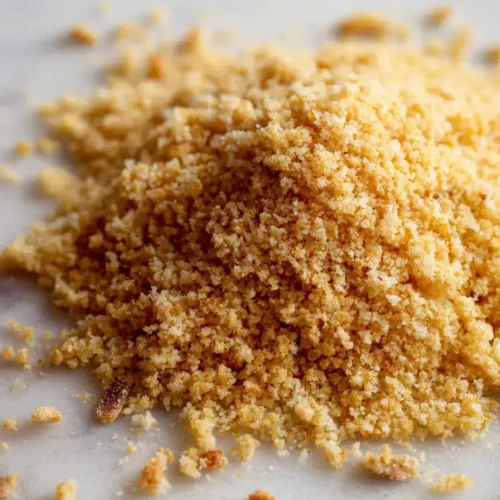
Making your own Homemade Breadcrumbs is one of the easiest kitchen shortcuts for adding bold flavor and zero fuss to your cooking. This simple DIY breadcrumbs recipe turns leftover stale bread into a pantry superstar, perfect for crispy coatings and flavorful toppings in minutes.


I love how this recipe respects your time. With just 10 minutes of active prep and 20 minutes in the oven, you can have a batch of Homemade Breadcrumbs ready in about 30 minutes total. This is the kind of quick, efficient kitchen project I adore.
You can easily fit this into a busy weeknight. For an even faster version, try using my method for Cheesy Garlic Bliss Bread as your base. The hands-off baking time is perfect for multitasking. You can prepare a side dish or simply relax while your kitchen fills with the amazing aroma of toasting bread.
As someone who loves global flavors but is always health-smart, I appreciate recipes that are easy to adapt. This DIY breadcrumbs recipe is naturally low in sugar, making it a great option for those who are sugar-conscious. For even more control, you can choose a whole-grain bread as your base.
After making countless batches, I’ve picked up a few spice shortcuts that make all the difference. Here are my top tips for elevating your Homemade Breadcrumbs.
When you make your own Homemade Breadcrumbs, you’re in charge of the nutrition. Compared to many store-bought versions, you can avoid unnecessary additives and control the sodium. Using whole-grain bread increases the fiber content, which is great for digestive health.
Olive oil, a staple in my kitchen for its global health benefits, provides heart-healthy monounsaturated fats. This recipe is a fantastic way to reduce food waste, which is a win for your wallet and the planet. For another healthy, from-scratch staple, check out my Easy Homemade Dill Pickle Spice Blend. You can learn more about the benefits of a Mediterranean diet from reputable sources like the American Heart Association.
If you’re looking to lighten things up, you can easily reduce the oil in this recipe by half. The bread will still toast, though the crumbs may be a bit less rich. For a different flavor profile, try making crumbs from Corn Bread, which can add a subtle sweetness.
I love keeping a jar of these breadcrumbs on hand for instant crunch. They’re my go-to for topping Garlic Parmesan Potato Wedges or mixing into meatballs for a perfectly tender texture. They add a wonderful crust to baked fish or a sprinkle of cozy comfort on mac and cheese.

Think beyond the usual! Use them as a binder for Homemade Pizza Rolls or as a crunchy salad topping. My international mindset says to experiment—add smoked paprika for a Spanish vibe or curry powder for an Indian twist.
Even a simple recipe has its pitfalls. Here’s how to avoid the most common issues when learning how to make breadcrumbs.
Using fresh, soft bread: This is the biggest mistake. Fresh bread steams instead of toasting, resulting in a chewy, not crispy, texture. Always use bread that is a day or two old and noticeably dry.
Overcrowding the pan: If the bread cubes are too crowded on the baking sheet, they’ll steam rather than bake. Spread them in a single, even layer for the crispiest results. This is a key step for perfect Homemade Breadcrumbs.
Grinding the bread while it’s warm: Patience is key! If you process the bread before it has cooled completely, the residual heat will create steam, making your crumbs soft and clumpy. I remember learning this the hard way with a batch of Cheddar Bay Biscuits crumbs that turned into a paste.
For more general cooking tips, resources like Food Network’s how-to guides can be very helpful. The secret is giving the bread enough space and time to dry out properly.
I always make a double batch because these crumbs are so versatile. To keep them fresh, store your cooled Homemade Breadcrumbs in an airtight container in a cool, dark pantry. They’ll stay perfectly crisp for up to two weeks.
For longer storage, you can freeze them for up to three months. I sometimes like to make a sweet variation using Cranberry Orange Bread for topping desserts. Just let the frozen crumbs thaw at room temperature before using.
This recipe is the epitome of my cooking philosophy: globally inspired, locally quick. Making your own Homemade Breadcrumbs is a small act that makes your cooking so much better. It’s efficient, reduces waste, and gives you complete control over flavor.
I encourage you to give it a try this week. Once you see how easy it is, you’ll never go back to the store-bought kind. If you enjoy this from-scratch approach, you might also love my Classic Banana Bread, Chocolate Banana Bread, or Vegan Zucchini Bread for other simple baking projects. The satisfaction of using your own Homemade Breadcrumbs is a flavor and texture upgrade you can feel good about.
If you love the feeling of making kitchen basics from scratch, you’re going to want to try these other simple and satisfying recipes. They all share that same spirit of wholesome, efficient cooking.
Homemade Dinner Rolls – Soft, fluffy rolls that are perfect for soaking up every last bit of sauce on your plate.
Homemade Oven Chips – A healthier take on fries that delivers maximum crispiness with minimal effort.
Homemade Sweet Pickles – A tangy, sweet condiment that elevates sandwiches and burgers instantly.
Sturdy, day-old bread like a French baguette, sourdough, or a basic sandwich loaf works best for Homemade Breadcrumbs. The bread needs to be slightly dry and stale so it toasts crisply instead of steaming. Avoid very soft, fresh bread for the best texture in your breadcrumbs recipe.
When stored correctly in an airtight container in a cool, dry pantry, your DIY breadcrumbs will stay fresh and crisp for about 2 weeks. For longer storage, you can freeze them for up to 3 months. This makes batch-making your Homemade Breadcrumbs a very efficient kitchen habit.
Absolutely! If you don’t have a food processor, place the cooled, toasted bread cubes in a sturdy zip-top bag. Use a rolling pin to crush them into crumbs. You’ll have more control over the texture, allowing you to make everything from coarse Homemade Croutons to fine powder.
Traditional Homemade Breadcrumbs are made from baked bread, resulting in a finer, denser crumb. Panko is made from bread cooked by electrical current, creating a light, airy, flaky texture. Your homemade version will be more versatile for binding and topping, while panko is specifically designed for an ultra-crispy coating.

Welcome to Mac Recipes! I'm here to prove that amazing home-cooked meals don't need to be complicated. From weeknight dinners to weekend treats, I create recipes that fit into your busy life—delicious, doable, and always worth making.
More About Me