Stunning Red Velvet Cinnamon Rolls
This post may contain affiliate links.
Read our Disclaimer.
Leave a Comment ★★★★★
Hello, my dear friends! Is there anything more comforting than the scent of warm cinnamon wafting through the house on a quiet morning? It immediately transports me back to my grandmother’s kitchen in Burgundy, where every weekend felt like a special occasion. Today, I’m overflowing with excitement to share a recipe that blends that beloved, cozy cinnamon flavor with the sheer joy of a classic American treat: our spectacular red velvet cinnamon rolls. These stunning swirls are not just a breakfast pastry; they’re a centerpiece, a conversation starter, and a hug in edible form. Perfect for holiday mornings, birthday brunches, or anytime you want to sprinkle a little magic into your day, these rolls combine a tender, faintly chocolatey dough with a generous cinnamon-sugar filling, all crowned with a luscious cream cheese glaze. Let’s create some new memories together.

Table of Contents
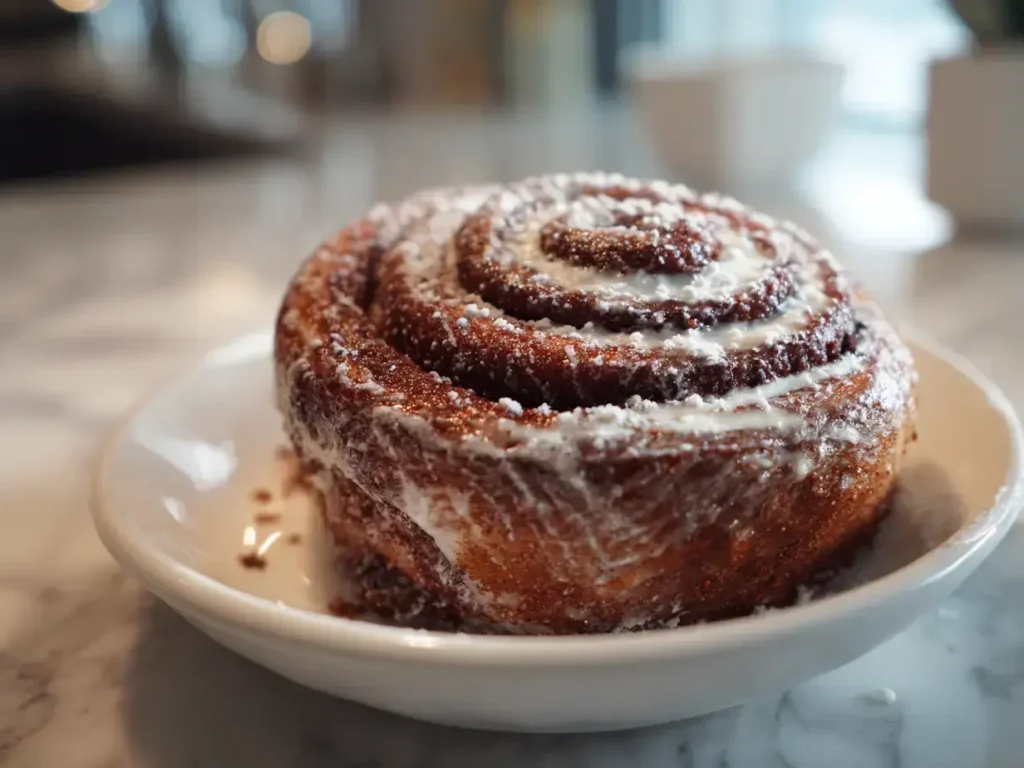
First of all, these red velvet cinnamon rolls are a true showstopper. Their vibrant crimson swirl peeking out from beneath a snowy white glaze is simply breathtaking on any table. Furthermore, the flavor is an unforgettable combination of warm, spicy cinnamon and the subtle, rich depth of cocoa. Unlike some holiday breakfast pastries that can be dry, this recipe yields an incredibly soft, pillowy texture that just melts in your mouth. Moreover, making them from scratch is a deeply rewarding experience. The process of kneading the dough and watching it rise is a wonderful way to slow down and savor the moment. Ultimately, this recipe is perfect for bakers of all levels who want to create something truly special.
The magic of these rolls lies in the harmonious balance of flavors. The cocoa powder isn’t overpowering; instead, it provides a sophisticated background note that complements the cinnamon beautifully. Consequently, each bite is a delightful surprise. The cream cheese glaze, meanwhile, adds a tangy sweetness that cuts through the richness perfectly. This isn’t just another red velvet dessert idea; it’s a elevated classic that will have everyone asking for the recipe.
Baking these homemade cinnamon rolls is about more than just the final product. It’s about the experience. I vividly remember my daughter’s face when she helped me roll out the dough for the first time, her little hands carefully sprinkling the cinnamon sugar. These are the moments we cherish. This recipe is designed to be approachable, encouraging you to gather your loved ones in the kitchen. Whether it’s for a festive Christmas morning or a simple Saturday treat, you’re creating traditions that will last a lifetime.
Success in baking always starts with quality ingredients. For these red velvet cinnamon rolls, each component plays a specific role in creating the perfect texture and taste. Let’s walk through what you’ll need. Importantly, make sure your egg and butter are at room temperature to ensure they incorporate smoothly into the dough. This simple step makes a significant difference in achieving a uniform, tender crumb. Also, use a good-quality red food coloring gel for a vibrant color without adding excess liquid. Here’s a quick checklist to make your grocery trip a breeze.
The dough for these rolls is an enriched yeast dough, meaning it contains butter, sugar, and eggs for richness. The warmed milk activates the yeast, which is the engine that makes the dough rise. The cocoa powder and red food coloring are, of course, what give these red velvet baking recipes their signature look and hint of flavor. Don’t be tempted to skip the salt; it’s crucial for balancing the sweetness and strengthening the gluten structure. As you combine these elements, you’ll create a soft, elastic dough that’s a joy to work with.
The filling is a simple yet powerful trio: softened butter, brown sugar, and cinnamon. Using light brown sugar instead of granulated adds a lovely caramel note and a hint of moisture. For the best cinnamon roll icing, your cream cheese must be fully softened. If it’s even slightly cold, you’ll end up with a lumpy glaze. Sifting the powdered sugar is another non-negotiable step for a silky-smooth finish. This attention to detail transforms these rolls from good to absolutely extraordinary.
You don’t need a professional bakery’s worth of equipment to make amazing red velvet cinnamon rolls. However, a few key tools will make the process much smoother and more enjoyable. First, a stand mixer with a dough hook attachment is a fantastic helper for kneading, but strong arms and a floured surface work just as well. You’ll also need a reliable kitchen scale or measuring cups, a rolling pin, and a sharp knife or piece of unflavored dental floss for cutting the rolls cleanly. A 9×13-inch baking pan is the perfect vessel for creating a pan of gooey cinnamon rolls that bake up perfectly together.
Beyond the basics, a few other items are incredibly useful. A pastry brush is great for greasing the bowl and pan. A kitchen thermometer takes the guesswork out of warming the milk to the perfect temperature for the yeast—around 110°F (43°C) is ideal. Additionally, a light-colored kitchen towel to cover the dough while it rises is essential. If you love baking delicious fruit desserts like I do, you likely already have these tools on hand.
When it comes time to slice your rolled dough, a sharp knife is your best friend. A dull knife will squish and drag the dough, resulting in misshapen rolls. Alternatively, many bakers swear by the dental floss method: simply slide a piece of unflavored floss under the roll, cross the ends over the top, and pull. This technique gives you a perfectly clean cut every single time, ensuring your sweet breakfast rolls bake evenly and look beautiful.
Now for the fun part: bringing the dough to life! This process is magical, and following these steps carefully will guarantee a light and airy texture for your red velvet cinnamon rolls. First, combine the warmed milk, yeast, and a teaspoon of sugar in a large bowl. Let it sit for 5-10 minutes until it becomes foamy. This “proofing” step is critical—it confirms your yeast is active and ready to work. If the mixture doesn’t foam, your yeast may be old, and it’s best to start over. Meanwhile, in a separate bowl, whisk together the melted butter, remaining sugar, egg, cocoa powder, red food coloring, vanilla, and salt.

Once your yeast is foamy, pour in the butter and cocoa mixture and whisk until smooth. Gradually stir in 3 cups of flour with a wooden spoon until a shaggy dough forms. Then, turn it out onto a floured surface. Now, knead for 5-7 minutes, adding the remaining flour a little at a time only if the dough is too sticky. You’re looking for a smooth, elastic ball that springs back slowly when poked. This kneading process develops the gluten, which gives the rolls their wonderful structure. Think of it as a little arm workout with a delicious reward!
Place your beautiful red dough ball into a greased bowl, turning it once to coat it lightly. Cover the bowl with a clean kitchen towel and let it rest in a warm, draft-free spot. This is where patience comes in. Let the dough rise for 1 to 1.5 hours, or until it has doubled in size. To test, gently press two fingers into the dough; if the indentation remains, it’s ready. This slow rise is essential for developing flavor and creating those incredibly airy pockets that make homemade cinnamon rolls so divine.
While your dough is rising, you can prepare the simple yet transformative filling. The goal here is to create a spreadable paste that will melt into gooey, cinnamon-y goodness during baking. In a small bowl, combine the softened butter, packed light brown sugar, and ground cinnamon. Use a fork or a small spatula to mix them together until they form a uniform paste. The butter should be soft enough to mix easily but not melted. If you’re a cinnamon lover, feel free to add an extra half teaspoon for a more pronounced spice flavor. This filling is the heart of every great easy cinnamon roll recipe.
The consistency of your filling is key. If it’s too runny, it will leak out of the rolls as you roll them up. If it’s too thick, it will be difficult to spread evenly. You’re aiming for a texture similar to a thick frosting. If your kitchen is warm and the butter becomes too soft, you can pop the mixture into the refrigerator for 10-15 minutes to firm up slightly. This filling is so versatile, it would also be wonderful in other easy bar recipes for a cinnamon twist!
You might wonder why we use brown sugar instead of white granulated sugar for the filling. The answer is molasses. Brown sugar contains molasses, which adds a deep, caramel-like flavor and a touch of moisture. This moisture helps create that irresistible, slightly sticky, and gooey cinnamon rolls texture we all crave. As the rolls bake, the brown sugar melts and caramelizes, creating a syrupy layer between the soft swirls of dough. It’s a small detail that makes a world of difference.
Once your dough has doubled in size, it’s time to shape your red velvet cinnamon rolls. Gently punch down the dough to release the air bubbles. Then, turn it out onto a lightly floured surface and roll it into a 16×12-inch rectangle. Try to get the edges as even as possible for uniform rolls. Next, use an offset spatula or the back of a spoon to spread the cinnamon filling evenly over the entire surface, leaving about a half-inch border along one long edge. This border will help you seal the roll neatly.
Now, carefully roll the dough into a tight log, starting from the long edge opposite the border. Pinch the seam firmly to seal it. Here comes the tricky part: cutting. Use a sharp serrated knife or dental floss to cut the log into 12 equal pieces. I find marking the log with a knife first helps guide my cuts. Place the rolls cut-side up in a greased 9×13-inch baking pan. Cover the pan and let the rolls rise again for 30-45 minutes until they are puffy and touching. This second rise is what gives you those wonderfully light and fluffy soft cinnamon roll recipe results.
While the rolls are rising, preheat your oven to 375°F (190°C). When the rolls are puffy, bake them for 20-25 minutes. You’ll know they’re done when the tops are lightly browned and the centers are set. Be careful not to overbake, as this can dry them out. The aroma filling your kitchen will be absolutely heavenly! When they come out, let them cool in the pan for about 10 minutes before frosting. They are just as delightful as other rich chocolate treats, but with their own unique flair.
No red velvet cinnamon rolls are complete without a luxurious cream cheese glaze. This is the crowning glory! While the rolls are cooling slightly, prepare the glaze. In a medium bowl, beat the softened cream cheese until it’s completely smooth and free of lumps. Gradually add the sifted powdered sugar and vanilla extract, beating until well combined. Finally, add the milk one tablespoon at a time until you reach your desired consistency. Some prefer a thick layer that holds its shape, while others like a thinner glaze that soaks into the warm rolls. It’s your masterpiece, so make it your own!
The secret to a perfect cream cheese frosting recipe is patience and starting with truly soft cream cheese. If your cream cheese is even a little cold, you’ll end up with tiny lumps. Taking the time to beat the cream cheese alone first is a non-negotiable step for a silky-smooth finish. Sifting the powdered sugar is equally important. It might seem like an extra dish to wash, but it prevents those pesky little sugar clumps from ruining your beautiful cinnamon roll glaze. For a different twist, you could even add a pinch of orange zest.
Once your rolls have cooled for about 10 minutes (they should still be very warm), it’s time to drizzle on the glaze. You can spoon it over the top, spread it with a knife, or for a professional look, put it in a zip-top bag, snip off a corner, and pipe it back and forth over the rolls. The warmth from the rolls will slightly melt the glaze, creating a irresistible river of sweetness. Serving them warm is highly recommended, as that’s when the texture is at its absolute peak. They are the ultimate crowd-pleasing dessert for any gathering.
Congratulations, you’ve baked a stunning pan of red velvet cinnamon rolls! Now, let’s talk about enjoying them to the fullest. These rolls are best served warm, when the glaze is slightly melted and the interior is soft and pillowy. They are a show-stopping addition to any brunch spread or a special treat for holiday celebrations. If you have any leftovers (a rare occurrence in my house!), they can be stored in an airtight container at room temperature for up to two days. For longer storage, I have some great tips to keep them tasting fresh.

To recapture that just-baked magic, reheating is key. Simply place a roll on a microwave-safe plate and heat it for 15-20 seconds. Alternatively, you can warm them in a 300°F (150°C) oven for 5-10 minutes. This will soften the roll and make the glaze creamy again. I do not recommend freezing the rolls after they are glazed, as the frosting can become watery upon thawing. Instead, freeze the unglazed baked rolls for the best results, which leads us to our next point.
These red velvet cinnamon rolls are fantastic for make-ahead Christmas morning breakfast ideas. You can freeze them before the second rise or after they are baked but not glazed. To freeze unbaked rolls, arrange the cut rolls in a pan, cover tightly with plastic wrap and foil, and freeze. The night before you want to bake them, move them to the refrigerator to thaw and rise. Then, bake as directed. For baked rolls, let them cool completely, wrap the pan tightly, and freeze. Thaw overnight and warm in the oven before glazing. This method is as easy as using a simple cake mix but with a homemade touch!
Yes, you can! Simply mix the instant yeast directly with the flour. You can skip the initial proofing step in the milk, as instant yeast doesn’t require it.
The most common cause is expired yeast. Always check the expiration date. Alternatively, the liquid may have been too hot and killed the yeast, or the rising spot may have been too cold.
Absolutely. Without the coloring, you’ll have delicious chocolate cinnamon rolls. The flavor will be just as wonderful, though you’ll lose the classic red velvet appearance.
Use a gel-based food coloring rather than a liquid one. Gels are more concentrated, so you need less and they don’t thin out the dough, resulting in a much more intense color.
Definitely! After assembling the rolls in the pan, cover them tightly and refrigerate overnight. In the morning, let them sit at room temperature for about an hour to rise, then bake.
For a simpler cinnamon roll glaze, you can make a plain vanilla glaze with powdered sugar, milk, and vanilla. For a dairy-free option, a simple powdered sugar and plant-based milk glaze works well.
My dear friends, I hope this recipe for red velvet cinnamon rolls brings as much joy to your kitchen as it has to mine. Baking these beautiful, festive swirls is a labor of love that pays off in every delicious, gooey bite. They are more than just a recipe; they are an experience, a way to slow down and create something wonderful for yourself and the people you love. Whether you’re serving them on a crisp Christmas morning or a sunny Sunday afternoon, I know they’ll become a cherished tradition. So, tie on your apron, preheat that oven, and get ready to fill your home with the incredible aroma of baking. Don’t forget to check out our recipe for a savory counterpart, like this delightful Cheesy Garlic Bliss Bread, to complete your menu. Happy baking!

Welcome to Mac Recipes! I'm here to prove that amazing home-cooked meals don't need to be complicated. From weeknight dinners to weekend treats, I create recipes that fit into your busy life—delicious, doable, and always worth making.
More About Me