Scratch Red Velvet Cake
This post may contain affiliate links.
Read our Disclaimer.
Leave a Comment ★★★★★
Hello, my dear baking friends! There’s something truly magical about a classic Red Velvet Cake that brings back floods of warm memories. I can still picture my grandmother in her cozy kitchen, carefully mixing that vibrant batter, the whole house filling with the sweet, comforting aroma. This iconic Southern dessert, with its signature crimson hue and impossibly tender crumb, is a showstopper for any occasion. Today, I’m sharing my tried-and-true, heartfelt recipe for the absolute best homemade Red Velvet Cake. We’ll walk through every step together, ensuring you create a moist, flavorful masterpiece topped with the dreamiest cream cheese icing you’ve ever tasted.

Table of Contents
Before we preheat our ovens, let’s take a quick moment to appreciate the fascinating story behind this beloved dessert. Interestingly, the origins of this Southern Red Velvet tradition are often debated among food historians. Many believe it first gained popularity in the United States during the Great Depression, thanks in part to the Adams Extract Company. Their clever marketing campaigns helped cement its status as a classic.
The unique name comes from the cake’s distinctive texture and color. Originally, the slight red tint came from a chemical reaction between natural cocoa powder (which contains anthocyanin) and acidic ingredients like buttermilk and vinegar. This reaction created a subtle, earthy red-brown hue. Of course, modern recipes use red food coloring to achieve that brilliant, bold crimson we all know and love today.
This cake’s journey from a regional specialty to a national icon is a delicious tale. Its popularity absolutely skyrocketed after it was featured in the 1989 film Steel Magnolias, fashioned into an armadillo-shaped groom’s cake! That moment in pop culture, combined with its timeless appeal, secured its place in the pantheon of great American cakes, much like the beloved peach upside-down cake.
Creating an unforgettable homemade Red Velvet cake starts with choosing high-quality ingredients. Each component plays a crucial role in achieving that perfect balance of flavor, moisture, and structure. Let’s break down the key players in our Red Velvet recipe.
Your dry ingredients form the backbone of your cake. Always use fresh, accurately measured all-purpose flour for the best structure. Don’t skip the sifting! Furthermore, use a good-quality, non-alkalized cocoa powder. This type is more acidic and works in harmony with our other ingredients to develop the classic flavor profile, unlike the Dutch-processed cocoa often used in a fudgy brownie recipe.
This is where the magic truly happens. Real Red Velvet buttermilk is non-negotiable. Its tangy acidity is essential for tenderizing the gluten and creating that signature slight tang. For the fat, vegetable oil is my go-to because it results in a supremely moist Red Velvet crumb that stays soft for days. And yes, that distilled white vinegar is a secret weapon—it reacts with the baking soda for an incredible lift.
A little bit of preparation makes the entire baking process smooth and enjoyable. First, gather all your tools. You’ll need two 9-inch round cake pans, a stand mixer or sturdy hand mixer, several mixing bowls, a whisk, and a rubber spatula. I also highly recommend a kitchen scale for the most accurate measurements, which is a tip I always share for baking perfect cookies.
Properly preparing your pans is the single best way to prevent a cake disaster. Grease the pans thoroughly with butter or baking spray. Then, add a tablespoon of flour to each pan and tap and shake it around until the entire interior surface is coated. Finally, line the bottom with a parchment paper circle. This triple method guarantees your layers will release perfectly every single time.
Please, please don’t forget to bring your cold ingredients to room temperature! This is a critical step for a smooth, emulsified batter that bakes evenly. Take your eggs and buttermilk out of the fridge about 30-45 minutes before you start baking. Room temperature ingredients blend together seamlessly, creating a uniform batter that rises beautifully in the oven.
Now for the fun part—bringing our easy Red Velvet cake to life! Follow these steps carefully, and you’ll be rewarded with a flawless Red Velvet layer cake. Remember, the key is to mix with care and not overwork the batter once the flour is added.
Start by preheating your oven to 350°F (175°C). In a medium bowl, whisk together your flour, sugar, baking soda, salt, and cocoa powder until they are perfectly combined and lump-free. In a separate large bowl, vigorously whisk the vegetable oil, room-temperature buttermilk, eggs, red food coloring, vanilla, and vinegar. Whisk until the mixture is a stunning, uniform bright red and fully emulsified.
Gradually add the dry ingredients to the wet ingredients. Use a rubber spatula to gently fold them together just until the last streaks of flour disappear. Overmixing is the enemy of a tender crumb! Divide the beautiful red batter evenly between your prepared pans. Bake for 25-30 minutes, until a toothpick inserted into the center comes out clean. Let the cakes cool in the pans for 10 minutes before turning them out onto a wire rack to cool completely.
What is a magnificent Red Velvet Cake without its crowning glory? The classic cream cheese icing is a tangy, sweet, creamy complement that simply cannot be beat. This frosting is famously versatile and also makes a wonderful topping for cinnamon-spiced desserts.
You only need a few simple ingredients for a flawless frosting. Use full-fat brick cream cheese and real unsalted butter, both softened to room temperature. This ensures a smooth, lump-free consistency. Confectioners’ sugar sweetens and stabilizes the frosting, while a splash of pure vanilla extract enhances the flavor beautifully.
In the bowl of a stand mixer fitted with a paddle attachment, beat the softened cream cheese and butter together on medium speed until they are completely smooth and creamy. This should take about 2 minutes. Gradually add the sifted confectioners’ sugar with the mixer on low speed to avoid a sugar cloud. Once incorporated, add the vanilla, increase the speed to high, and whip for another 2-3 minutes until the Red Velvet frosting is light and fluffy.
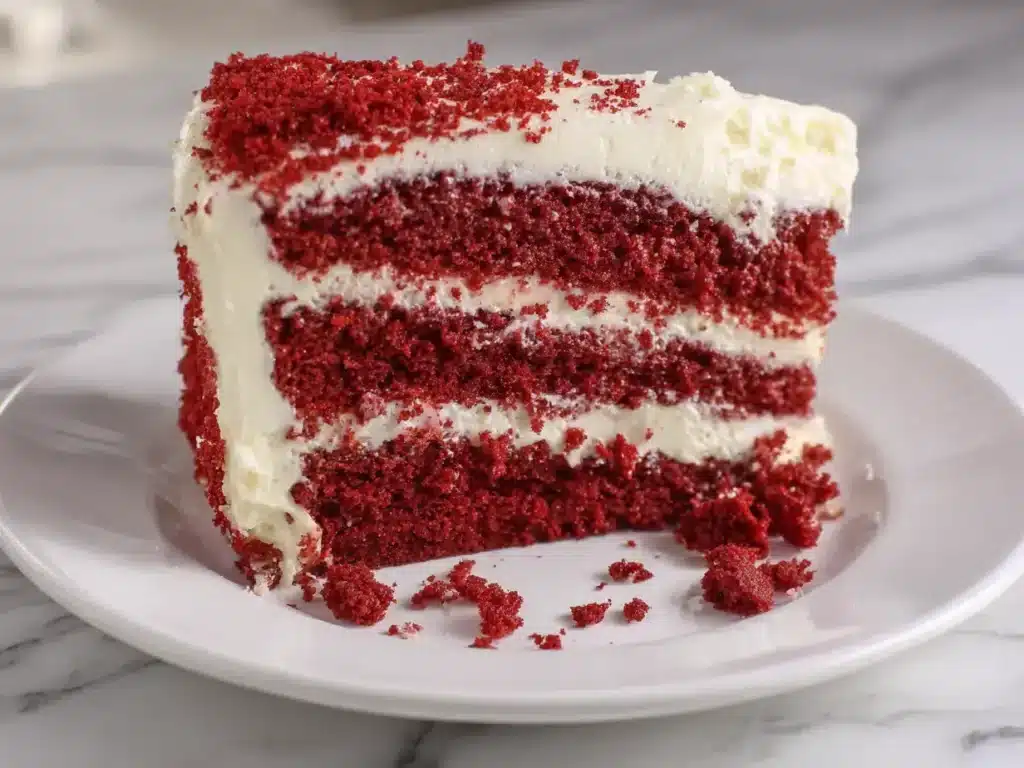
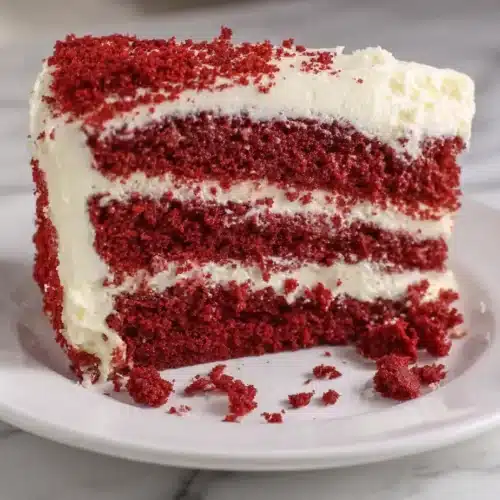
Once your cake layers are completely cool, it’s time for the grand assembly. This is where your beautiful Red Velvet layer cake truly takes shape. If you have a cake turntable, now is the time to use it! A long offset spatula will also be your best friend during this process.
First, use a serrated knife or a cake leveler to carefully slice off any domed tops from your cake layers to create a flat surface. Place one layer on your cake stand or serving plate. Spread a generous, even layer of cream cheese icing over the top, almost to the edges. Gently place the second cake layer on top, ensuring it is centered and level.
Apply a thin layer of frosting all over the cake to create a “crumb coat.” This initial layer traps any loose crumbs and provides a smooth base for your final coat. Chill the cake for about 15-20 minutes to set the crumb coat. Finally, apply the remainder of your frosting in a thick, beautiful final layer. Use your offset spatula to create smooth sides and swirls on top, just like you would for a stunning churro cheesecake.
Your masterpiece is complete! Now, let’s talk about how to serve and keep it fresh. For the cleanest slices, use a sharp knife dipped in hot water and wiped dry between each cut. This technique gives you gorgeous, crumb-free pieces that showcase those stunning red layers against the white frosting.
This rich cake is perfect on its own, but a few accompaniments can make it even more special. I love serving it with a cold glass of milk, a hot cup of coffee, or even a scoop of vanilla bean ice cream. For a festive touch, garnish individual plates with a few fresh raspberries or a sprinkle of extra cake crumbs.
Because of the perishable cream cheese frosting, your cake must be stored in the refrigerator. Cover it loosely with a cake dome or place it in a large airtight container. It will keep beautifully for up to 4 days. For longer storage, you can freeze unfrosted cake layers wrapped tightly in plastic wrap for up to 3 months, similar to how you’d store a spiced fall cake.

The classic recipe is divine, but sometimes it’s fun to mix things up! This versatile batter can be transformed into so many other delightful treats. Whether you’re making a batch of Red Velvet cupcakes for a party or some Red Velvet cookies for a lunchbox, the possibilities are endless.
To make cupcakes, simply line a muffin tin with paper liners and fill each cup about 2/3 full with batter. Bake at the same temperature for 18-22 minutes. For cookies, you can use a similar flavor profile to create chewy, cake-like treats that are always a hit, much like these peanut butter bars. You can even try a Red Velvet without dye version using beet juice for a natural color.
Don’t be afraid to get creative! You can add a handful of white chocolate chips to the batter, or swirl the batter with a cheesecake filling for a marbled effect. For the holidays, consider baking the cake in a sheet pan and using cookie cutters to create festive-shaped cake pops. This batter is your canvas, so have fun with it!
Absolutely! While it won’t have the classic bright red color, you can make a Red Velvet without dye.\ The reaction between the cocoa and acids will give it a reddish-brown hue. For a natural red color, you can experiment with beet powder, though the flavor might be slightly earthier.
The most common culprit for a dry Red Velvet Cake is overbaking or overmixing the batter. Always set a timer and check for doneness a few minutes early. Also, measure your flour correctly—scooping it directly from the bag packs it down, leading to too much flour and a dry cake. Use the spoon-and-level method for accuracy.
You can, but cream cheese frosting is the traditional pairing for a reason! Its tangy flavor perfectly balances the sweet, mild cocoa notes of the cake. If you’re not a fan, a simple vanilla buttercream or even a whipped chocolate ganache would also be delicious, similar to the topping on s’mores bars.
For that classic, bold red color, use a high-quality gel food coloring instead of liquid. Gel colors are more concentrated, so you need less to achieve a vibrant shade without throwing off the liquid balance of your batter. Add it slowly until you reach your desired color intensity.
Yes, you can bake the layers up to two days in advance. Let them cool completely, then wrap them tightly in plastic wrap and store at room temperature. Frost the cake the day you plan to serve it for the freshest taste and best texture. The unfrosted layers also freeze beautifully for up to 3 months.
If you don’t have buttermilk, you can make a quick substitute. Simply add 1 tablespoon of white vinegar or lemon juice to a measuring cup, then add enough regular milk to reach the 1-cup line. Stir and let it sit for 5-10 minutes until it slightly curdles. This will work in a pinch!
Baking this timeless Red Velvet Cake is about so much more than following a Red Velvet recipe—it’s about creating a moment of joy and sharing something made with love. I hope this guide gives you the confidence to bake this stunning dessert and create your own beautiful memories around the table. So preheat that oven, put on your favorite apron, and get ready to bake the best Red Velvet cake of your life. Happy baking!

Welcome to Mac Recipes! I'm here to prove that amazing home-cooked meals don't need to be complicated. From weeknight dinners to weekend treats, I create recipes that fit into your busy life—delicious, doable, and always worth making.
More About Me