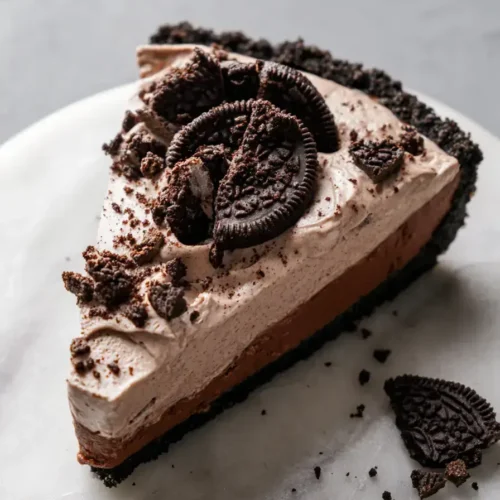
Easy No-Bake Oreo Pie
This post may contain affiliate links.
Read our Disclaimer.
Leave a Comment ★★★★★
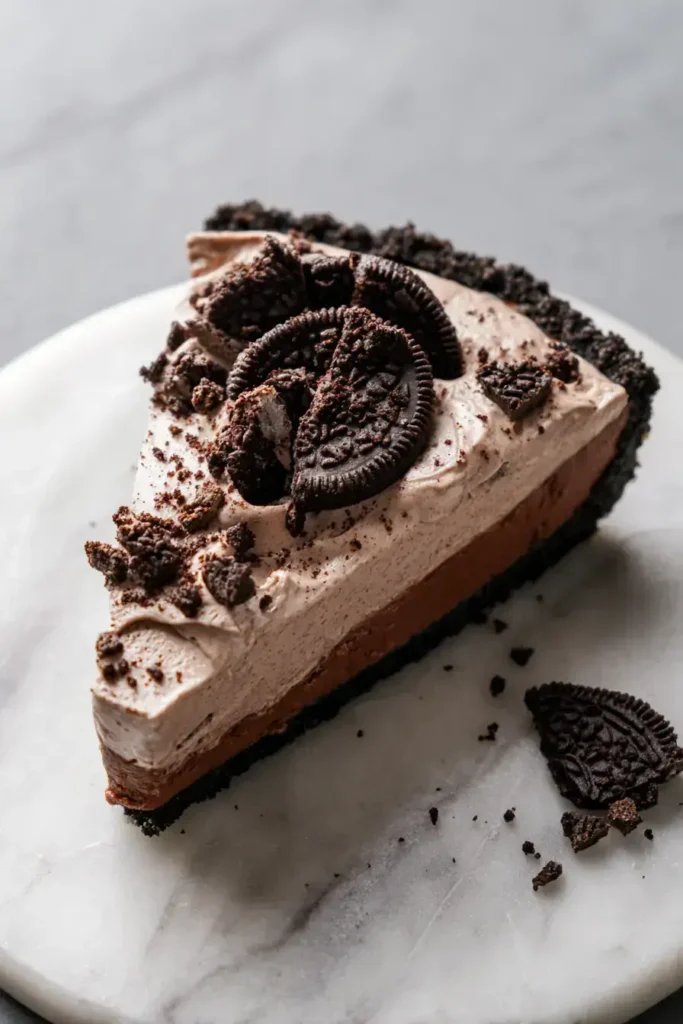
Creating a Oreo Chocolate Mousse Pie is like wrapping your family in a chocolate hug. This easy chocolate dessert requires no oven, just a few simple steps and a heart full of love. I learned this no-bake pie recipe from my Nonna, who believed the best memories are made around a sweet, creamy treat. From our table to yours, this is a family secret you’ll want to pass down.


My dear, let me put your mind at ease. This is one of those blessed recipes that asks for your patience, not your sweat. Your active prep time is just 20 minutes. Can you believe it?
There is no cook time at all for this no-bake pie. The “work” is simply mixing with love. The total hands-on time is those same 20 minutes. However, the pie needs at least 4 quiet hours in the refrigerator to set properly.
This makes it a perfect make-ahead dessert for a weekend gathering. You can prepare it in the calm of the afternoon. Then, it’s ready to shine after dinner. For another quick, family-friendly treat that uses similar pantry staples, you must try my easy Oreo brownie recipe.
In our family, we believe everyone deserves a sweet ending. So, let’s talk about making this dessert more sugar-conscious. With a few smart swaps, you can create a version that’s just as loving.
First, for a lower glycemic index, you can replace the granulated sugar with a natural sweetener like stevia or xylitol. Use a brand that measures cup-for-cup like sugar. Second, consider using a sugar-free instant chocolate pudding mix and a reduced-fat cream cheese.
Finally, remember that portion size is your friend. Serving a slightly smaller slice can make any dessert more glucose-friendly. The joy is in the shared experience, after all.
Over the years, I’ve learned a few tricks that make all the difference. These are the little touches that turn a good pie into a great one, made with love and a bit of know-how.
Flavor Swap: For a festive twist, use mint or peanut butter Oreos instead of the classic. It changes the entire character of this easy chocolate dessert beautifully.
Diet Tweak: To make it gluten-free, simply use a certified gluten-free chocolate cookie crust and gluten-free sandwich cookies. The texture remains perfect.
Texture Fix: Ensure your cream cheese is very soft. If you’re in a hurry, you can soften it in the microwave using 10-second bursts. This prevents lumps in your creamy mousse pie filling.
Storage Tip: For the cleanest slices, dip your knife in hot water and wipe it dry between each cut. This is a traditional recipe trick that guarantees beautiful serving. For more ideas on handling creamy desserts, see how I assemble a stunning holiday trifle recipe. And if you love the combination of cookies and cream, you’ll adore these playful mummy Oreo balls for Halloween.
Now, let’s talk nourishment. While this is a celebratory dessert, it’s good to understand what you’re enjoying. Every ingredient brings something to the table, even in a treat.
The cocoa powder provides flavonoids, which are plant compounds with antioxidant properties. The milk in the pudding layer offers calcium and vitamin D, which are essential for strong bones. Furthermore, sharing a dessert like this Oreo Chocolate Mousse Pie supports mental well-being by fostering connection and joy around the table.
For a deeper dive into the components of desserts, the American Heart Association has excellent resources on balanced eating. If you’re looking for other creamy dessert options, my raspberry mousse is a lovely fruit-forward choice. For a classic baked option, you can’t go wrong with a rich German chocolate cake.
Perhaps you want all the flavor but with a lighter touch? I understand completely. My Nonna always said cooking is about adaptation, about making a recipe work for your family’s needs.
You can use light or Neufchâtel cream cheese and a light whipped topping. Choose a sugar-free, fat-free instant pudding mix paired with skim milk. For the crust, look for a reduced-fat chocolate cookie crust. These small changes add up. They create a dessert that feels indulgent but aligns with a more mindful approach. For another dessert that uses similar lightening techniques, explore my recipe for strawberry icebox cake.
Presentation is the final act of love. I remember my grandmother carefully wiping the pie plate’s edge before bringing it to the table. It was a sign of respect for the food and the people about to enjoy it.
Serve each slice on a chilled plate to keep it firm. A small drizzle of chocolate sauce or a dusting of extra cocoa powder makes it look professional. A few fresh raspberries or mint leaves add a beautiful color contrast. This no-bake pie pairs wonderfully with a cup of strong espresso or a glass of cold milk. For another stunning, layered dessert that always impresses guests, you should see my chocolate lasagna. And if pies are your passion, a classic coconut cream pie is a must-try.

Let’s walk through a few common hiccups so your pie is perfect on the first try. Think of this as a friendly guide from someone who has seen it all in the kitchen.
Why is my filling lumpy? This usually happens when the cream cheese is too cold. Always soften it to room temperature before mixing. Beat it thoroughly with the sugar and cocoa until completely smooth before adding anything else.
How do I prevent a soggy crust? Ensure your pudding layer is thick before pouring it over the cream cheese layer. Whisk the pudding and cold milk for the full two minutes. Also, serve the pie within a day or two of making it for the best texture.
Why won’t my pie set? The chilling time is non-negotiable. Four hours is the minimum. For a perfectly firm slice, I often chill it overnight. Rushing this step is the main reason a no-bake pie fails to hold its shape.
Remember, patience is the secret ingredient. For more troubleshooting on creamy desserts, the USDA Food Safety site has great tips on handling dairy. And if you’re exploring other cheesecake-style treats, learn from the common pitfalls of my strawberry swirl cheesecake. For bite-sized versions, check the tips in my guide for mini cheesecake bombs.
We rarely had leftovers growing up, but when we did, Nonna had a system. She taught me that preserving food properly is a sign of respect for the ingredients and the labor of love that went into them.
Cover the pie tightly with plastic wrap or store it in a cake carrier. It will keep in the refrigerator for 3 to 4 days. I do not recommend freezing this particular cream cheese pie, as the whipped topping and pudding layers can become watery and separate when thawed. For best quality, enjoy it fresh within two days. If you love desserts that freeze beautifully, my raspberry cheesecake bars are an excellent option for make-ahead treats.
This recipe is more than a list of instructions. It’s an invitation to create a moment of pure, shared happiness. I can still see my children’s faces, smudged with chocolate, as they licked the spatula from this very pie.
It represents the beautiful simplicity of no-fuss cooking. It brings people together. Whether it’s for a birthday, a holiday, or just a Tuesday that needs brightening, this dessert delivers joy. So gather your ingredients, call your loved ones into the kitchen, and start making memories. The process is as rewarding as the first bite of this perfect Oreo Chocolate Mousse Pie. If you enjoy this style of dessert, you might also love my Valentine’s Day Oreo pops for a cute treat. For another no-bake marvel, try the layers of my Boston cream pie. And for a fun, fusion dessert, the churro cheesecake is always a crowd-pleaser.
If the success of this pie has you hooked on easy, chilled desserts, you’re in the right place. Here are a few more family favorites that require minimal effort for maximum reward.
Mini Cheesecake Bombs 2 – An updated take on bite-sized bliss, perfect for parties and little hands.
Absolutely, and I highly recommend it. This Oreo Chocolate Mousse Pie needs at least 4 hours to set, so making it the day before is perfect. Simply add the final whipped topping and cookie garnish just before serving to keep everything fresh and beautiful.
For a from-scratch touch, you can use an equal amount of freshly whipped heavy cream. Whip 1 1/2 cups of cold heavy cream with 2 tablespoons of powdered sugar until stiff peaks form. Fold half into the cream cheese mixture and use the rest to top your chocolate mousse pie.
Your creamy no-bake pie will stay fresh and delicious for 3 to 4 days when stored properly in the refrigerator. Keep it covered tightly with plastic wrap or in a sealed container. The crust is best within the first two days for optimal texture.
Yes, you can experiment. Vanilla or cookies-and-cream pudding would work wonderfully. Using a different flavor changes the character of this easy chocolate dessert, creating a new family favorite. Just keep the milk measurement the same for the proper set.

Welcome to Mac Recipes! I'm here to prove that amazing home-cooked meals don't need to be complicated. From weeknight dinners to weekend treats, I create recipes that fit into your busy life—delicious, doable, and always worth making.
More About Me