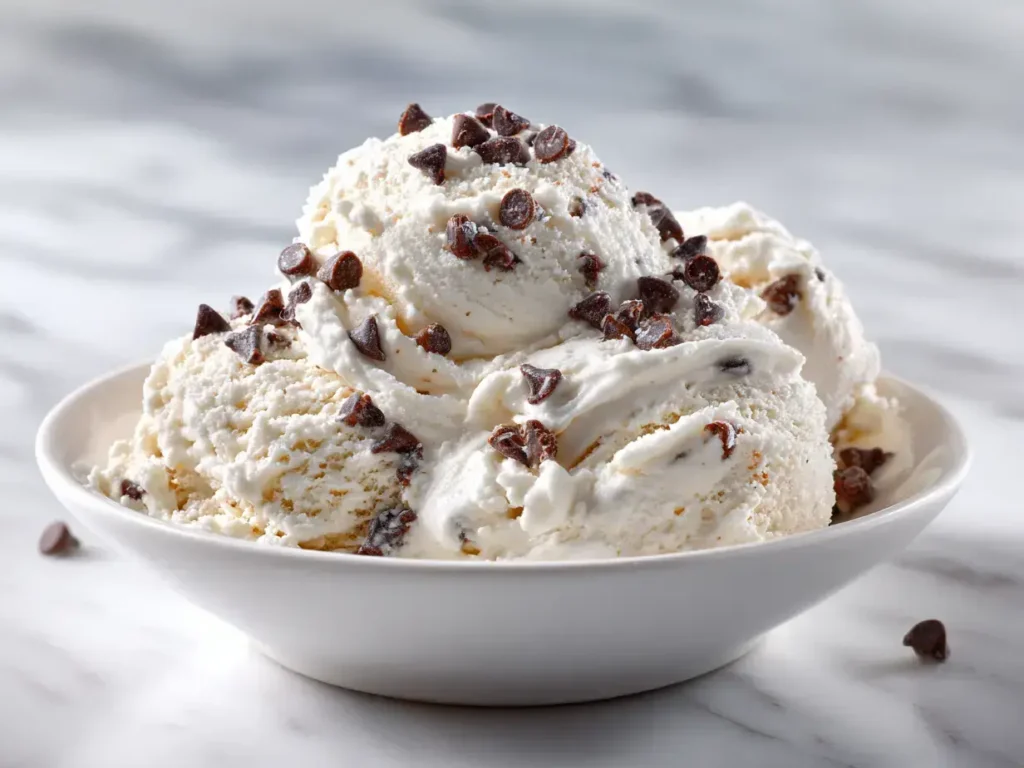
This Ninja Creami ice cream is a creamy homemade delight that showcases how simple ingredients can be transformed into something magical. It’s an easy no-churn ice cream that requires just a few pantry staples and the innovative Ninja Creami machine. Ready after a 24-hour freeze, this vanilla ice cream recipe is perfect for satisfying sweet cravings or impressing guests with a dairy-based frozen dessert.
Making this quick dessert preparation always brings me back to the joy of crafting something special from scratch. I remember the first time I experimented with my Ninja Creami, the anticipation of that creamy homemade ice cream was palpable.
This vanilla ice cream recipe has become my go-to when I need a reliable, crowd-pleasing treat. I often serve it alongside a slice of my chocolate spider cake for a decadent pairing, or after a light meal featuring my classic flan. The beauty of this easy no-churn method is how it elevates simple ingredients into a memorable dessert experience.
Why This Ninja Creami Ice Cream Wins Hearts
- Incredibly Creamy Texture: The Ninja Creami machine transforms basic ingredients into a luxurious dairy-based frozen dessert that rivals premium brands.
- Simple No-Churn Method: Unlike traditional ice cream makers, this easy no-churn process requires no complicated techniques or constant monitoring.
- Endless Customization Options: This vanilla ice cream recipe serves as the perfect base for adding your favorite mix-ins and flavors.
- Quick Dessert Preparation: After the initial freeze, you’re just minutes away from enjoying homemade ice cream whenever the craving strikes.
Essential Ingredients for Perfect Ninja Creami Ice Cream
Be sure to see the recipe card below for the full listing of ingredients, instructions, notes, and estimated nutritional information.
- Whole milk: Provides the liquid base for your creamy homemade ice cream while allowing the machine to process smoothly.
- Heavy cream: The key to achieving that rich, luxurious texture in this dairy-based frozen dessert.
- Granulated sugar: Sweetens the mixture and helps create a smoother consistency in your easy no-churn ice cream.
- Vanilla extract: Enhances the flavor profile of this classic vanilla ice cream recipe with warm, aromatic notes.
- Fine sea salt: Balances the sweetness and intensifies all the flavors in your quick dessert preparation.
- Chocolate chips: Optional mix-in that adds delightful texture and chocolatey bursts to your creation.
Ninja Creami Ice Cream
Make perfect Ninja Creami ice cream in minutes! Our easy vanilla recipe requires just 5 ingredients and delivers creamy, dreamy frozen dessert every time.
Prep Time 5 minutes mins
1 day d
Total Time 1 day d 5 minutes mins
Course Dessert
Cuisine American
Servings 1 pint
Calories 350 kcal
Ninja Creami pint
Ninja Creami machine
mixing bowl
whisk
measuring cups
measuring spoons
spoon
Ice Cream Base
- 1 1/4 cup whole milk
- 1/4 cup heavy cream
- 1/4 cup granulated sugar
- 1 tsp vanilla extract
- 1/8 tsp fine sea salt
Optional Mix-in
- 1/4 cup chocolate chips optional
In a Ninja Creami pint, combine the whole milk, heavy cream, granulated sugar, vanilla extract, and fine sea salt. Whisk vigorously for about 1 minute, or until the sugar is fully dissolved and the mixture is well combined.
Secure the lid on the Creami pint and place it flat in your freezer. Freeze for at least 24 hours, or until the mixture is completely solid and frozen through. This firm freeze is crucial for proper processing.
Once frozen solid, remove the pint from the freezer and remove the lid. Insert the Creami pint into the outer bowl and secure the outer bowl lid, making sure the blade is properly installed.
Place the outer bowl assembly into your Ninja Creami machine and twist the handle to lock it into place. Select the “Lite Ice Cream” or “Ice Cream” function, depending on your machine model and desired consistency.
Allow the machine to process the mixture completely. Once finished, open the outer bowl and check the texture of your ice cream. It should be creamy and scoopable.
If the ice cream appears crumbly, powdery, or too soft, firmly re-attach the outer bowl lid and re-insert it into the machine. Perform a “Re-Spin” cycle to achieve a smoother, creamier consistency.
If adding optional mix-ins like chocolate chips, create a 1-inch wide well down the center of the processed ice cream using a spoon. Pour the mix-ins into the well, then re-attach the lid and select the “Mix-In” function to evenly distribute them.
Serve your freshly made Ninja Creami ice cream immediately for the best texture, or transfer it to an airtight container and refreeze for later enjoyment.
Add mozzarella or feta for a cheesy twist. Let dough rise in a warm oven (off) for faster proofing.
Keyword frozen dessert, ice cream, Ninja Creami, vanilla
Creative Ways to Customize Your Ice Cream
- Chocolate Lover’s Version: Add cocoa powder to the base mixture and swirl in chocolate chunks for an intensely chocolatey experience.
- Fruit Swirl Delight: Fold in homemade fruit puree or jam after processing for vibrant flavor and beautiful marbling.
- Cookie Crunch Addition: Crush your favorite cookies and use the mix-in function to create textured, crave-worthy ice cream.
My Pro Tips for Ninja Creami Perfection
- Proper Freezing Technique: Ensure your mixture is completely solid by freezing it flat for the full 24 hours before processing.
- Sugar Dissolution Check: Whisk vigorously until no sugar granules remain to guarantee smooth, creamy homemade ice cream.
- Texture Assessment: If your ice cream appears crumbly after the first cycle, don’t hesitate to use the re-spin function.
- Mix-In Strategy: Create a proper well in the center of your processed ice cream before adding chunks or swirls.
How to Store Your Homemade Ice Cream
- Immediate Serving: Enjoy your Ninja Creami ice cream right after processing for the creamiest, soft-serve texture experience.
- Short-Term Storage: Transfer to an airtight container and freeze for up to 2 weeks, though texture is best within 3 days.
- Texture Restoration: If ice cream becomes too hard in freezer, let it sit at room temperature for 5-10 minutes before scooping.
- Make-Ahead Advantage: Prepare multiple frozen pints to have various flavors ready for quick dessert preparation anytime.
Frequently Asked Questions
How long does Ninja Creami ice cream last in the freezer?
Your homemade Ninja Creami ice cream maintains best quality for about 2 weeks when stored in an airtight container. The texture remains creamiest if enjoyed within the first 3 days after processing. I recommend making smaller batches more frequently for optimal freshness.
Can I use alternative milks in Ninja Creami recipes?
Yes, you can experiment with almond milk, oat milk, or coconut milk, but the texture will differ from traditional dairy-based frozen dessert. These alternatives may require adjustments to sugar content and might benefit from added stabilizers. For best results, I suggest starting with my classic dairy version first.
Why is my Ninja Creami ice cream crumbly after processing?
Crumbly texture usually indicates the mixture wasn’t fully frozen or needs a re-spin cycle. Ensure your pint is completely solid after 24 hours of freezing. The re-spin function works wonders for transforming crumbly results into smooth, creamy homemade ice cream with perfect consistency.
What’s the difference between Lite Ice Cream and Ice Cream settings?
The Lite Ice Cream setting typically processes for a shorter time, creating a slightly softer texture ideal for lower-fat mixtures. The standard Ice Cream setting provides more intensive processing for creamier results. I prefer the Ice Cream setting for this rich vanilla ice cream recipe to achieve maximum creaminess.
More Frozen Desserts You’ll Adore
Why This Homemade Ice Cream Becomes a Favorite
With its incredibly creamy texture and simple preparation, this Ninja Creami ice cream consistently wins over everyone who tries it. The ability to create custom flavors makes this easy no-churn method endlessly versatile for any occasion. Whether you’re enjoying it solo or serving it to guests, this quick dessert preparation delivers professional-quality results that will have you skipping the ice cream aisle forever.