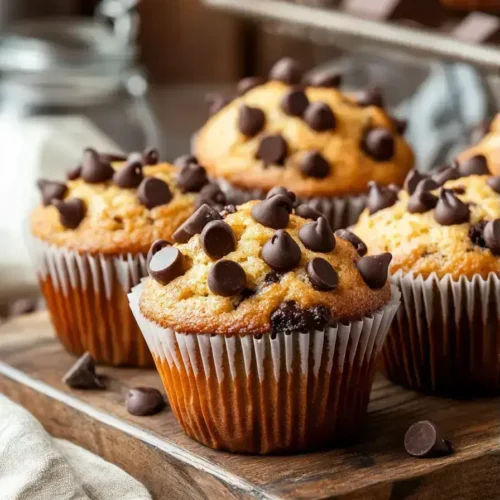
Spooky Chocolate Muffins
This post may contain affiliate links.
Read our Disclaimer.
Leave a Comment ★★★★★
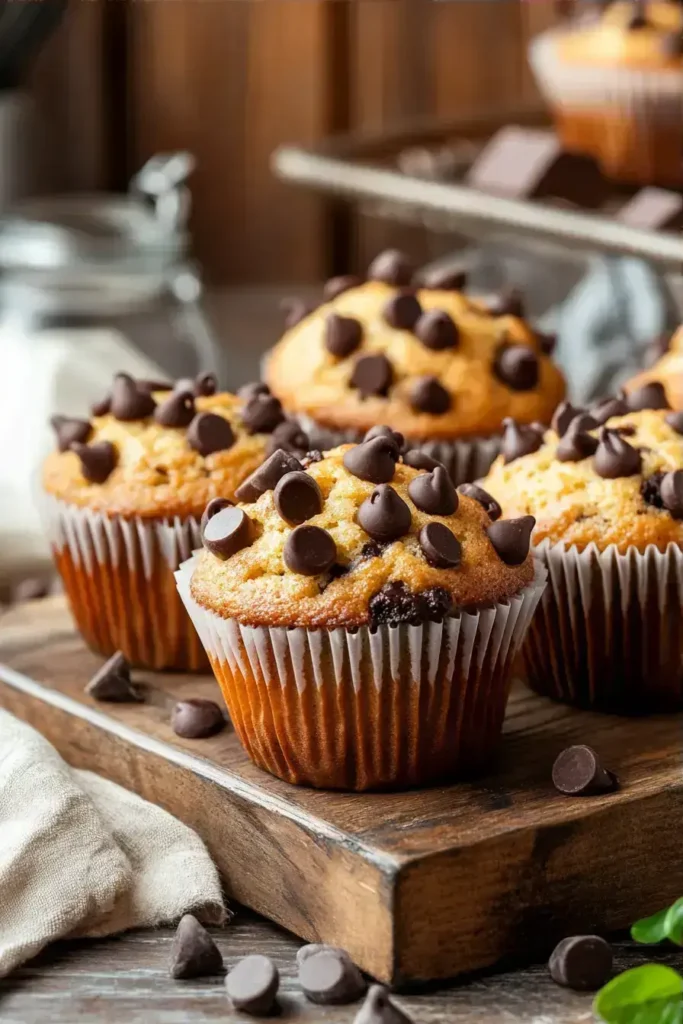
Making Mummy Muffins is one of my favorite Halloween traditions. These festive muffins are not just adorable—they’re a total win for busy parents. You can whip them up in about 30 minutes start to finish, using simple pantry ingredients you probably already have. I promise, your kids will gobble these up faster than you can say “boo!” They’re the perfect treat for classroom parties, after-school snacks, or just a fun baking project together.


I know how chaotic afternoons can get, especially around Halloween. That’s why I love this quick recipe so much. You’ll spend about 15 minutes prepping these easy Halloween muffins, and they bake in just 18-20 minutes. That means you can have a batch of warm, festive muffins ready in about 35 minutes total.
It’s the perfect activity for those days when you need a fun distraction that doesn’t take all afternoon. If you’re looking for more last-minute Halloween fun, you have to try these Mummy Oreo Balls. They’re another huge hit with kids!
I always want everyone to be able to enjoy our baking projects. If you’re looking for a lower sugar option or need to be mindful of sugar content, these muffins are actually quite adaptable. The natural sweetness from the chocolate chips often means you can reduce the added sugar a bit.
For a sugar-conscious version, you could try using a natural sweetener alternative like stevia. Another great tip is to use mini dark chocolate chips, which can be lower in sugar than semi-sweet. And remember, portion control is a simple and effective way to enjoy treats while being mindful of sugar intake.
After making countless batches of these (my kids are obsessed!), I’ve picked up a few tricks that make all the difference. First, make sure your butter is truly softened. This helps create a light, tender crumb. If you’re in a rush, you can cube the butter and let it sit at room temperature for about 15 minutes.
While these are definitely a treat, I always feel better knowing what we’re eating. These Mummy Muffins provide a good source of energy from the carbohydrates in the flour and sugar. The eggs add a bit of protein, which helps keep everyone satisfied a little longer.
Using real butter means you’re getting some natural fats, which are important for growing kids. If you’re looking for other baked goods with a nutritional boost, you might enjoy these egg muffins for a savory option. For more indulgent treats, these mini cheesecake bombs are always a hit. For reliable information on baking and nutrition, I often refer to trusted sources like King Arthur Baking.
If you want to lighten things up a bit, it’s surprisingly easy. You can replace half the butter with unsweetened applesauce for less fat and added moisture. Reducing the sugar by a quarter cup still yields a sweet, kid-approved muffin.
For an even bigger change, try using half whole wheat pastry flour. It adds fiber without making the muffins dense. These tweaks are similar to what I do with my apple muffins to make them a bit healthier.
I love watching my kids’ faces light up when I bring out a plate of these spooky muffins. They’re perfect for a Halloween-themed breakfast or an after-school snack. We often make a big batch to share with neighbors or bring to a fall party.
They pair wonderfully with a cold glass of milk or a warm cup of apple cider. For a real Halloween treat spread, set them out alongside other fun ideas like these pumpkin patch deviled eggs or these adorable reindeer brownie bites for a festive touch.

I’ve made my share of baking blunders over the years! One common issue is why muffins turn out dense. This usually happens if you overmix the batter. Remember, just stir until combined. Another frequent question is how to prevent muffins from sticking to the liners. Using a light spritz of non-stick spray on the liners can help.
If your muffins aren’t rising properly, check that your baking powder is fresh. Old leavening agents are often the culprit. For more troubleshooting tips, especially for other types of muffins like these maple walnut muffins, it’s always helpful to read up. For general baking science, I find Serious Eats to be a fantastic resource.
I’ll never forget the year I tried to rush and used cold butter. The muffins were so flat! Now I always take the extra minute to soften it properly. It makes all the difference in creating those light, fluffy holiday muffins we all love.
These festive muffins store beautifully. Once completely cool, place them in an airtight container. They’ll stay fresh and soft at room temperature for about 3 days. If you want to keep them longer, they freeze incredibly well.
I like to freeze them on a baking sheet first, then transfer to a freezer bag. That way, they don’t stick together. They thaw quickly at room temperature, or you can warm them up in the microwave for a few seconds. It’s like having a fresh-baked treat anytime! This method also works great for other baked goods like these pecan pie muffins.
This has become such a beloved Halloween tradition in our house. There’s something so special about baking together, and the joy on my kids’ faces when they see these adorable muffins is priceless. It’s a simple, fun activity that creates lasting memories.
I promise, these Mummy Muffins are easier than you think and will be a huge hit. If you love baking for the holidays, you should definitely try these other family favorites: chocolate spider cake for a creepy-crawly centerpiece, these monster cookie brownies for a fudgy treat, or these adorable cinnamon roll sugar cookies for Christmas. For even more inspiration, check out my full collection of Halloween treat ideas. I hope you have as much fun making these muffins as we do!
If you’re planning a Halloween party or just want to keep the festive baking going, I’ve rounded up some of our other favorite treats. These are all guaranteed to bring smiles and satisfy those sweet Halloween cravings!
Mummy Oreo Balls – No-bake treats that are almost too cute to eat.Absolutely! These Mummy Muffins are perfect for making ahead. Once completely cooled, store them in an airtight container at room temperature for up to 2 days. For longer storage, freeze them for up to 2 months. Thaw at room temperature before serving.
It’s super easy! After the muffins have cooled, simply place a stencil (like a simple paper cutout of a bandaged shape) over the top of a muffin. Then, use a fine-mesh sieve to generously dust powdered sugar over the stencil. Carefully lift the stencil to reveal the fun mummy wrap design.
For the best texture, I recommend sticking with all-purpose flour. However, you can experiment by substituting up to half of the all-purpose flour with whole wheat pastry flour. Avoid using 100% whole wheat flour, as it can make your Mummy Muffins too dense.
This is usually due to old baking powder. Check the expiration date on your container. Also, make sure your oven is fully preheated before baking, and avoid opening the oven door during the first half of baking. Overmixing the batter can also prevent proper rising.
Definitely! Feel free to get creative. Dried cranberries, chopped nuts, or even orange zest would be delicious additions to these Halloween muffins. Just keep the total volume of add-ins around 1/2 to 3/4 cup so the muffin structure isn’t affected.

Welcome to Mac Recipes! I'm here to prove that amazing home-cooked meals don't need to be complicated. From weeknight dinners to weekend treats, I create recipes that fit into your busy life—delicious, doable, and always worth making.
More About Me