Make Perfect Caramel Cake
This post may contain affiliate links.
Read our Disclaimer.
Leave a Comment ★★★★★
Hello, my dear baking friends! Olivia here, welcoming you back to my cozy corner of the kitchen. Today, we’re embarking on a wonderfully sweet journey, because I’m sharing my absolute favorite recipe for how to make caramel cake. This isn’t just any dessert; it’s a slice of Southern comfort, a taste of nostalgia that reminds me of family gatherings and the rich, buttery aroma that would fill my grandmother’s house. If you’ve ever wanted to create a truly spectacular, homemade caramel cake from scratch, you’ve come to the perfect place. I promise to guide you through every step, making this classic feel entirely achievable.

Many folks are intimidated by the idea of making caramel from scratch, but honestly, my method simplifies the process. We’ll create a luscious, cooked caramel icing that transforms a simple, moist caramel cake into a show-stopping masterpiece. Whether you’re a seasoned baker or just starting out, this guide will give you the confidence to bake a cake that will have everyone asking for the recipe. So, tie on your favorite apron, and let’s preheat that oven!
Table of Contents
Before we begin, let’s talk about the stars of the show. Using high-quality ingredients is the first secret to a successful how to make caramel cake journey. For instance, each component plays a specific role, and understanding this helps you see why my recipe works so well. Consequently, gathering everything before you start—a practice called mise en place—makes the baking process smooth and enjoyable.
You’ll notice I emphasize room temperature for the butter, eggs, and milk. This is a non-negotiable tip for a supremely moist caramel cake. Room-temperature ingredients emulsify and blend together much more easily, creating a uniform batter that traps air. This results in a lighter, more even crumb. Cold ingredients, on the other hand, can cause the batter to curdle and lead to a denser cake. So, plan ahead and take your ingredients out about an hour before you start baking.
The type of sugar you use dramatically impacts the final flavor. For the cake, granulated sugar provides clean sweetness. However, for the icing, we use light brown sugar, which contains molasses. This molasses is what gives our caramel glaze for cake its signature deep, warm, and complex flavor. Make sure to pack the brown sugar firmly into your measuring cup for an accurate measurement, which is crucial for the icing’s consistency.
Having the right equipment makes how to make caramel cake a true pleasure. You don’t need anything overly fancy, but a few key items will ensure success. First and foremost, a stand mixer or a sturdy hand mixer is invaluable for creaming the butter and sugar to the perfect fluffy consistency. Alternatively, a set of good-quality mixing bowls, measuring cups, and spoons are your best friends for accuracy.
For this recipe, a classic 9×13-inch baking pan is ideal. I prefer light-colored metal pans as they distribute heat evenly, preventing the edges from over-browning. You’ll also need a good spatula for scraping the bowl and spreading the batter, a wire cooling rack, and a toothpick or cake tester. For the icing, a medium-sized, heavy-bottomed saucepan is essential for even heat distribution when making the best caramel frosting for cake.
When you’re making the caramel icing, a heavy-bottomed saucepan is not just a suggestion—it’s a necessity. Thin pans can create hot spots that cause the sugar to burn easily, resulting in a bitter taste. A sturdy pan heats evenly, giving you gentle, consistent control as you cook the brown sugar and butter mixture to caramel perfection. This simple tool is the key to avoiding a common pitfall in how to make caramel icing.
Proper preparation is the unsung hero of baking. Before you even think about mixing, get your oven and pan ready. Start by preheating your oven to 350°F (175°C). A properly preheated oven is critical for the cake to rise correctly. While it heats up, prepare your 9×13-inch pan. I always use the classic butter-and-flour method: grease the entire interior with softened butter or baking spray, then add a spoonful of flour, tilting and tapping the pan until it’s evenly coated.
Why is preheating so important? Essentially, it provides an immediate burst of heat that activates the baking powder, causing the batter to rise quickly and set the structure. Similarly, greasing and flouring the pan creates a non-stick barrier. This simple step ensures your beautiful traditional caramel cake will release cleanly after baking, without any torn edges. It’s a small effort that guarantees a gorgeous final product.
Take a moment to organize your space. Measure out all your ingredients beforehand. This “mise en place” approach transforms baking from a frantic race into a calm, methodical process. You won’t be scrambling to find the vanilla extract while your butter and sugar are already creaming. This is especially helpful when you move on to the icing, which requires your full attention. For more easy dessert ideas that follow this organized approach, check out our simple peanut butter bars recipe.
Now for the fun part—making the cake batter! This is where we build the structure and flavor of our homemade caramel cake from scratch. We’ll use the creaming method, which is fundamental for a light and tender texture. First, in a medium bowl, whisk together your dry ingredients: the flour, baking powder, and salt. Whisking aerates the flour and ensures the leavening is evenly distributed, which prevents uneven rising.
In your large mixing bowl, beat the softened butter and granulated sugar together on medium speed. Cream them for a full 3 to 4 minutes until the mixture is pale, fluffy, and light. This step is not just about mixing; it’s about incorporating tiny air bubbles that will expand in the oven, giving the cake its lift. This technique is the secret to a cake that’s anything but dense, and it’s a method I also use in my decadent brown butter brookie.
Add the eggs one at a time, beating well after each addition. Then, mix in the vanilla. Now, with the mixer on low speed, add the flour mixture in three parts, alternating with the milk in two parts, beginning and ending with the flour. Mix just until the batter is smooth and no streaks of flour remain. Overmixing at this stage can develop the gluten in the flour, resulting in a tough cake. The batter will be thick and luxurious.
Pour the beautiful batter into your prepared pan and use a spatula to spread it into an even layer. Now, place it in the center of your preheated oven. The baking time will typically be 30 to 35 minutes. However, ovens can vary, so the toothpick test is your best friend. Around the 30-minute mark, insert a toothpick into the center of the cake. If it comes out clean or with a few moist crumbs, the cake is done.
Avoid opening the oven door too early, as this can cause the cake to fall. When the cake is golden brown and springs back lightly when touched, it’s ready. Once out of the oven, place the pan on a wire rack and let the cake cool completely in the pan. This is vital because applying warm caramel icing to a warm cake will cause it to melt and soak in, rather than creating a beautiful frosting layer. Patience is key here!
The most common mistake is overbaking, which leads to a dry cake. Conversely, underbaking results in a gummy texture. Trust the toothpick test more than the clock. Another tip is to ensure your baking powder is fresh; old leavening agents lose their potency. For another recipe where precise baking is crucial, have a look at these fudgy chewy brownies.
While the cake cools, we’ll create the pièce de résistance: the best caramel frosting for cake. This cooked icing is what makes a southern caramel cake recipe so special. In your heavy-bottomed saucepan, melt the butter over medium heat. Then, stir in the packed brown sugar and bring the mixture to a gentle boil. Cook it for 2 minutes, stirring constantly. This cooking step is what develops the deep caramel flavor.
After 2 minutes, carefully add the whole milk and heavy cream. The mixture will bubble up vigorously, so be careful. Return it to a boil, then immediately remove it from the heat. Let it cool for about 10 minutes; this allows the temperature to drop so the powdered sugar won’t melt when added. Gradually whisk in the sifted powdered sugar and vanilla extract until the icing is perfectly smooth and pourable. You want it to be warm but not hot when you pour it over the cake.
The consistency of your icing is crucial. If it’s too thin, it will run off the cake. If it’s too thick, it will be difficult to spread. The 10-minute cooling period is the control knob. If after adding the sugar it seems too thick, you can add a teaspoon of warm milk. If it’s too thin, let it cool a bit more or add a little more sifted powdered sugar. This caramel glaze for cake should coat a spoon thickly.
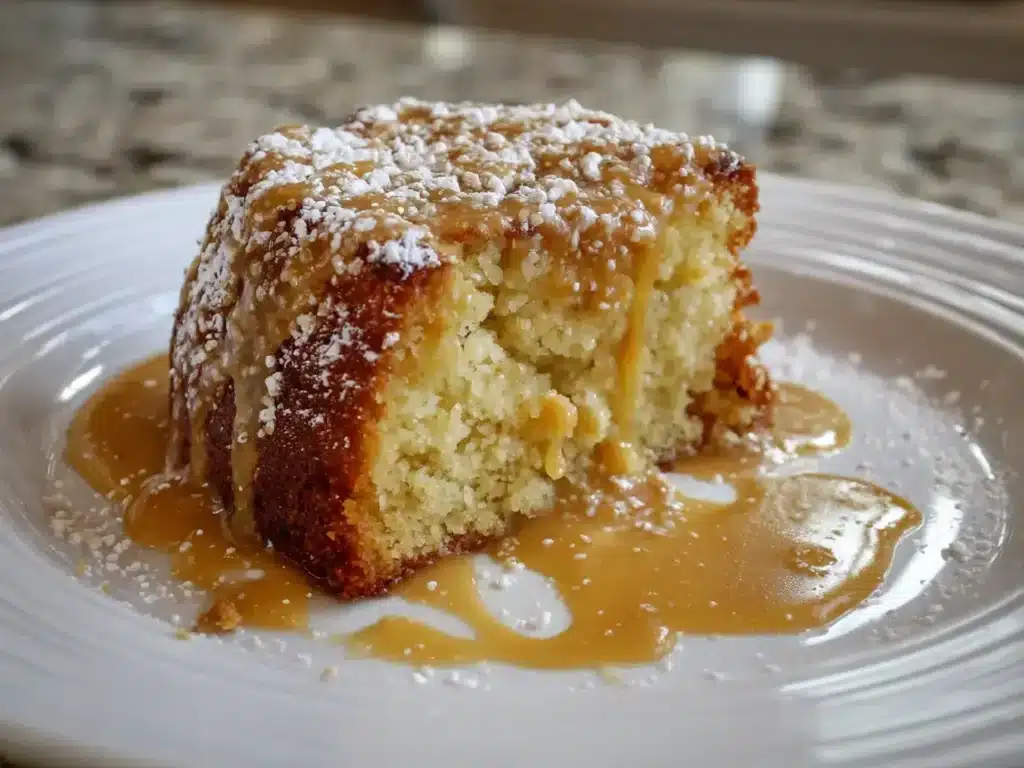
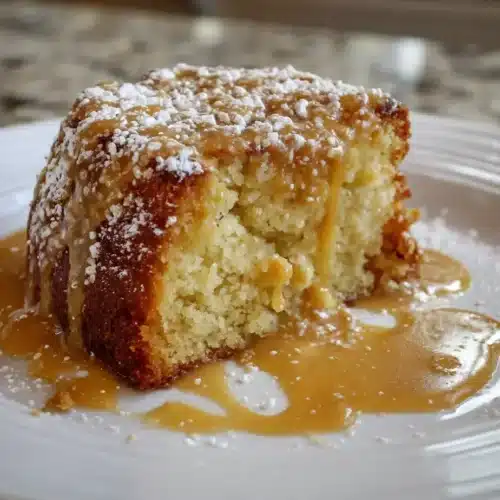
This is the moment we’ve been working towards! Ensure your cake is completely cool to the touch. If there’s any doubt, wait a little longer. I can’t stress this enough. Then, pour the warm, glorious caramel icing directly over the center of the cake. Using an offset spatula or the back of a spoon, gently guide the icing to the edges, allowing it to drip down the sides beautifully. The goal is an even, luscious coating.
Work relatively quickly but gently, as the icing will begin to set as it cools on the cake. Don’t worry if it’s not perfectly smooth; a rustic, homemade look is part of its charm. The icing will form a slightly crisp shell on the outside while remaining soft underneath. This contrast in textures is pure heaven. For a different kind of frosting adventure, our chocolate Easter egg nest cake offers a fun twist.
Allow the iced cake to set for at least an hour before slicing. This gives the icing time to firm up, making it easier to cut clean slices. The wait is absolutely worth it. As it sets, the flavors meld together, and the cake’s moisture redistributes, making every single bite unbelievably delicious. This is the final step in your how to make caramel cake journey.
Once set, slice your masterpiece into squares and serve. A glass of cold milk or a hot cup of coffee is the perfect companion for this rich, sweet treat. This cake is a star at potlucks, birthdays, or any day that needs a little extra sweetness. It’s a classic for a reason, and I guarantee it will become a requested favorite in your home, just like it is in mine.

If you have any leftovers (a rare occurrence in my house!), store the cake in an airtight container at room temperature for up to 3 days. You can also refrigerate it for up to 5 days. However, bring it to room temperature before serving for the best texture and flavor. The icing may soften slightly at room temperature, which is perfectly normal and delicious. For another dessert that stores beautifully, my NYT original plum torte is a fantastic option.
This cake freezes wonderfully! You can freeze the un-iced cake, tightly wrapped in plastic wrap and foil, for up to 3 months. Alternatively, you can freeze individual iced slices on a parchment-lined baking sheet before transferring them to a freezer bag. This way, you can thaw a single slice whenever a caramel cake craving strikes. It’s the ultimate caramel cake baking tip for busy bakers.
While this specific recipe relies on eggs for structure, you can try a substitute like flax eggs or a commercial egg replacer. However, the texture may be slightly denser. For a guaranteed egg-free dessert, browse our dessert category for ideas.
Graininess usually means the powdered sugar wasn’t fully dissolved. Always sift the powdered sugar and make sure the butter-sugar mixture has cooled slightly before whisking it in vigorously.
Yes! You can divide the batter between two greased and floured 9-inch round pans. The baking time will be less, so start checking at 20-25 minutes.
Absolutely. The combination of a simple, buttery cake with a cooked caramel icing is a hallmark of traditional, old-fashioned baking, much like the classic feel of our peach upside-down cakes.
This happens if the cake is even slightly warm when you apply the icing. Patience is key—ensure the cake is completely cool to room temperature.
Certainly! Fold about a cup of chopped pecans or walnuts into the cake batter for a wonderful crunch, or sprinkle them on top of the wet icing.
And there you have it, my friends—a complete, heartfelt guide on how to make caramel cake. This traditional caramel cake is more than just a recipe; it’s a creation filled with love and a touch of nostalgia. Remember, the secrets are in the room-temperature ingredients, the patience required for cooling, and the careful cooking of that divine caramel icing. I hope this recipe brings as much joy to your kitchen as it has to mine over the years. So, go ahead, bake a memory, and don’t forget to share a slice with someone you love. Happy baking!

Welcome to Mac Recipes! I'm here to prove that amazing home-cooked meals don't need to be complicated. From weeknight dinners to weekend treats, I create recipes that fit into your busy life—delicious, doable, and always worth making.
More About Me