Quick Honeycomb Recipe
This post may contain affiliate links.
Read our Disclaimer.
Leave a Comment ★★★★★
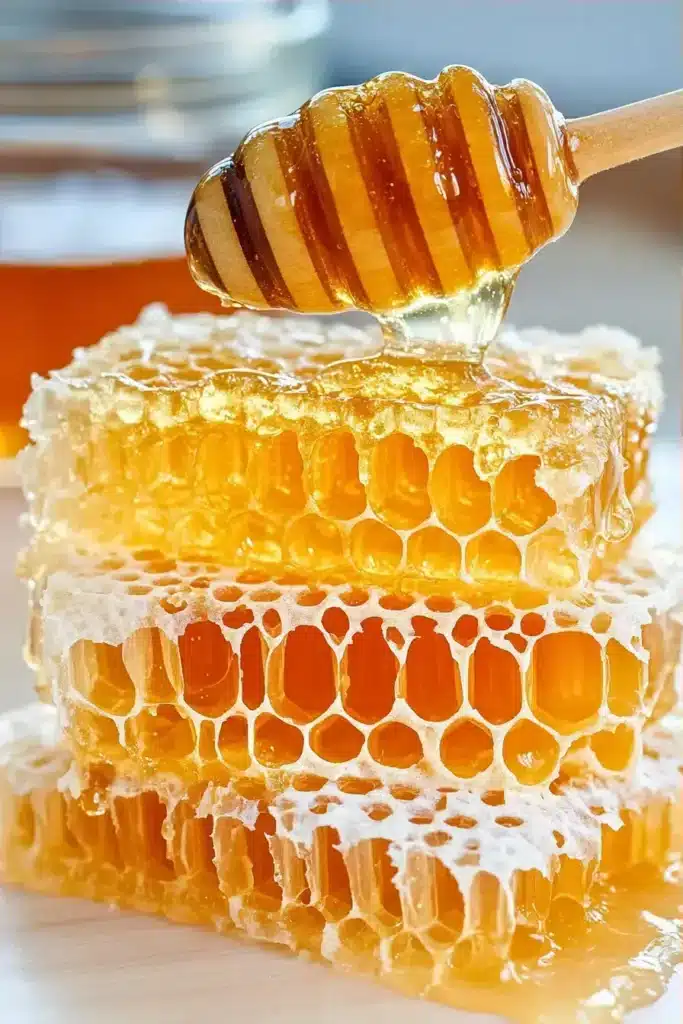
Making perfect Honeycomb candy at home is a delightful kitchen project that yields a light, airy, and wonderfully crunchy treat. This guide will walk you through the professional techniques needed to achieve that signature sponge-like texture, also known as cinder toffee or sponge candy, every single time.


One of the best parts about this honeycomb candy recipe is how quickly it comes together. With a total time of just about 50 minutes, including cooling, you can go from idea to indulgence in less than an hour. The active cook time is a mere 10 minutes, making it a fantastic last-minute treat.
The prep work is minimal, requiring only about 10 minutes to get your ingredients measured and your pan lined. This efficient timing makes candy making feel accessible, not intimidating. For another recipe that comes together with similar speed, try my honey garlic chicken thighs for a savory contrast.
While traditional honeycomb candy is sugar-based, there are thoughtful ways to approach it if you are sugar-conscious. I always encourage my students to understand that portion control is the first step to enjoying treats mindfully.
For a lower glycemic impact, you could experiment with natural sugar alternatives, though the texture may vary. Remember, the chemical reaction with the baking soda is crucial, so swaps require careful testing. Breaking the finished candy into smaller pieces can also help manage portion sizes naturally.
After teaching countless candy-making classes, I’ve found that a few key tips make all the difference between good honeycomb and great honeycomb. Let’s get everything in place for success.
As a chef, I believe in understanding what we’re eating. Homemade honeycomb candy is a simple confectionery treat primarily composed of sugar. It provides a quick source of energy, but it’s best enjoyed in moderation as part of a balanced diet.
The process of making it at home means you control the ingredients, avoiding any unnecessary additives found in some commercial candies. The satisfaction of creating something from scratch can be a sweet reward in itself. For a different kind of homemade treat that incorporates whole grains, explore this salted caramel granola. If you’re looking for a baked good with fruit, these maple walnut muffins are a wonderful option. For reliable nutritional information, I often refer to the USDA FoodData Central database.
While it’s challenging to create a true low-sugar version of honeycomb due to the chemistry involved, you can approach it with a lighter mindset. Focus on quality over quantity—using pure vanilla extract enhances the flavor so you may be satisfied with a smaller piece.
Consider incorporating broken pieces of honeycomb as a garnish rather than the main event. A small chunk crumbled over a bowl of plain yogurt or a simple peanut butter granola can provide a sweet crunch without overindulging. It’s all about a thoughtful balance.
I love the moment when I bring a platter of golden, broken honeycomb pieces to the table. The irregular shapes and glossy surface always draw admiring glances. Serving this candy is part of the fun.
For a beautiful presentation, pile the pieces on a rustic wooden board or a elegant ceramic plate. It makes a stunning finish to a dinner party alongside coffee. You can also use it as a decadent topping for ice cream sundaes, where its crisp texture contrasts beautifully with the creamy dessert. For another show-stopping dessert idea, consider these red velvet cinnamon rolls. It also pairs wonderfully with the rich flavors in this chocolate croissant bread pudding.

Even experienced cooks can run into issues with candy making. Let’s troubleshoot some common problems so your homemade honeycomb turns out perfectly.
Why is my honeycomb sticky or chewy? This almost always means the sugar syrup did not reach the correct temperature. Invest in a good candy thermometer and ensure it reads 300°F before proceeding.
Why didn’t my candy foam up enough? Your baking soda might be old or you didn’t whisk it in vigorously enough. Use fresh baking soda and whisk quickly and confidently to incorporate it.
Why does my honeycomb taste bitter? If the sugar syrup is allowed to cook beyond 300°F, it can begin to burn and develop a bitter flavor. Remove it from the heat the moment it reaches the target temperature. For more troubleshooting on sweet recipes, the tips in my maple donut bars post can be helpful. For a deeper understanding of caramelization, I recommend reading this guide from Serious Eats. I remember my first batch that didn’t foam properly; it taught me that in candy making, precision truly matters.
To keep your honeycomb candy delightfully crisp, storage is key. I always store mine in an airtight container at room temperature. Placing a paper towel at the bottom of the container can help absorb any ambient moisture.
Properly stored, your homemade honeycomb should stay fresh and crunchy for up to two weeks. Avoid refrigerating it, as the refrigerator can introduce moisture that will make the candy soft. For another sweet treat that stores well, you might enjoy these honey roasted carrots as a side dish.
I encourage you to embrace the simple magic of candy making. There’s a special satisfaction in creating this beautiful, textured treat from a few basic ingredients. The process is a fantastic introduction to the science of cooking.
Remember, your first batch is a learning experience. Don’t worry if it’s not perfect. Each time you make Honeycomb, you’ll gain more confidence. For more kitchen projects that bring joy, try my honey roasted carrots and parsnips or this savory crispy honey garlic tofu. If you enjoyed the caramel notes in this candy, you might also like the deeper flavors in this version of honey roasted carrots or the combination in honey roasted carrots and parsnips. For a different baked good, these maple walnut muffins are a reader favorite.
If you loved the process of making homemade candy, you might be ready to try your hand at other delightful desserts. Here are a few more recipes that offer that same satisfaction of creating something special from scratch.
Honey Roasted Carrots and Parsnips – A savory-sweet side dish with caramelized edges and tender centers.
Honey Roasted Carrots and Parsnips – Another take on the classic roasted vegetable combination.
Honey Roasted Carrots – A simple, elegant side that lets the natural sweetness shine.
Honey Roasted Carrots – The perfect way to elevate an everyday vegetable.
Honey Garlic Chicken Thighs – A family-friendly main course with a sticky, flavorful glaze.
Crispy Honey Garlic Tofu – A vegetarian option that’s packed with protein and flavor.
Traditional Honeycomb candy is made from a simple combination of sugar, corn syrup, water, and baking soda. The baking soda reacts with the hot sugar syrup to create carbon dioxide bubbles, which gives the candy its signature light and airy, sponge-like texture. A touch of vanilla extract is often added for flavor.
If your honeycomb candy didn’t puff up, the most common reason is that the baking soda was not fresh or it wasn’t mixed in vigorously enough. The syrup must also be at the correct high temperature (300°F) to trigger the proper foaming reaction when the baking soda is added. Always use fresh leavening agents for the best results.
While possible, it is challenging. Corn syrup plays a crucial role in preventing the sugar from crystallizing, which ensures a smooth texture in the finished Honeycomb. Substitutes like golden syrup or a glucose syrup can work, but the texture and flavor may be slightly different. I recommend following the recipe with light corn syrup for guaranteed success.
When stored correctly in an airtight container at room temperature, homemade honeycomb candy will maintain its crisp texture for about 1 to 2 weeks. Because it absorbs moisture from the air, keeping it sealed is essential to prevent it from becoming sticky and soft. For best quality, enjoy it within the first week.

Welcome to Mac Recipes! I'm here to prove that amazing home-cooked meals don't need to be complicated. From weeknight dinners to weekend treats, I create recipes that fit into your busy life—delicious, doable, and always worth making.
More About Me