Bakery Style Homemade Dinner Rolls
This post may contain affiliate links.
Read our Disclaimer.
Leave a Comment ★★★★★
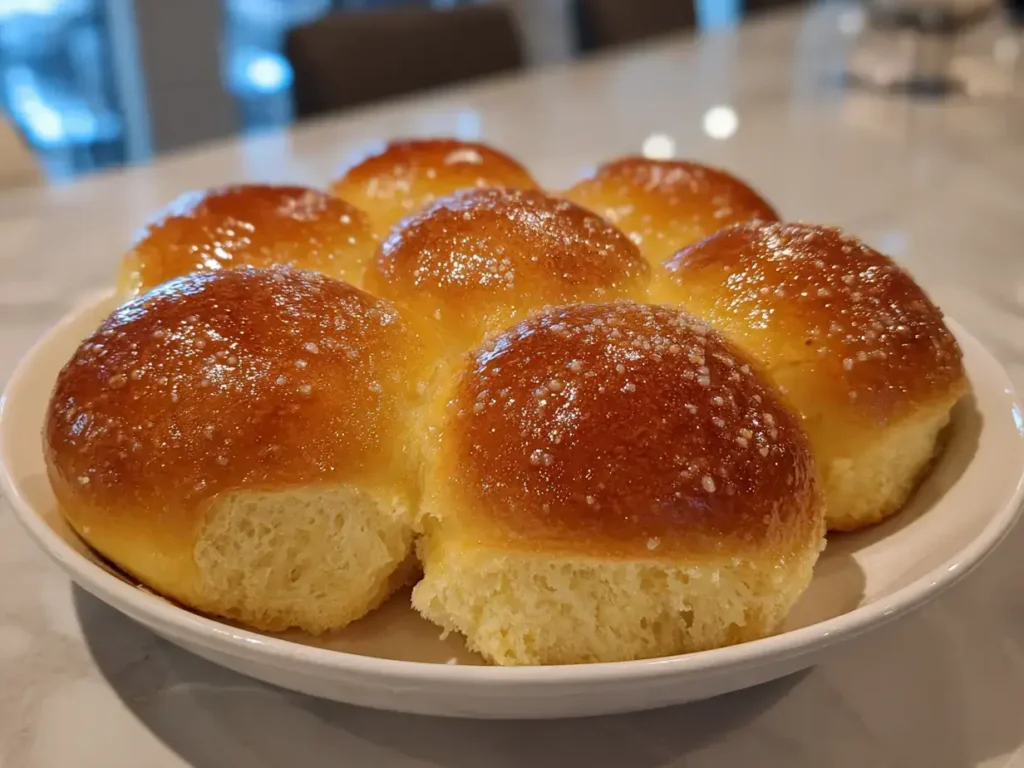
There’s something incredibly comforting about preparing homemade dinner rolls. This hearty dish combines soft, warm bread with a golden crust and tender interior, perfect for soaking up gravy or simply slathering with butter. I still recall my grandmother pulling trays of these beauties from the oven during holiday gatherings—their aroma filling the entire house with pure comfort and anticipation.
Making homemade dinner rolls from scratch might seem intimidating, but they’re surprisingly straightforward and extremely rewarding. Whether you’re preparing for Thanksgiving dinner or want to elevate your weeknight meals, mastering these fluffy creations will make you the star of any table.

These homemade dinner rolls require just seven basic ingredients and a few simple steps. Unlike finicky pastries or complicated breads, these rolls forgive minor mistakes and still turn out beautifully. The dough comes together quickly, and most of the time involves hands-off rising periods. For another straightforward bread recipe, try our classic banana bread—perfect for beginners.
These homemade dinner rolls keep wonderfully for days and freeze exceptionally well. You can prepare the dough in advance, refrigerate it overnight, and bake fresh rolls whenever needed. They’re ideal for busy families who want fresh-baked goodness without daily effort.
Quality ingredients transform good homemade dinner rolls into exceptional ones. Each component plays a specific role in creating that perfect texture and flavor we all crave.
While simple, the combination of sugar and salt creates beautifully balanced homemade dinner rolls. The sugar feeds the yeast and adds subtle sweetness, while salt enhances all the flavors and controls yeast activity. For rolls with extra flavor, consider our cheesy garlic variation.

Begin by warming your milk gently—it should feel warm to the touch but not hot (about 110°F). Combine it with yeast and a teaspoon of sugar, then watch for foaming to ensure your yeast is active. Meanwhile, measure your flour carefully using the spoon-and-level method for accuracy. For more baking tips, check our angel food cake guide which shares valuable measuring techniques.
After the first rise, punch down the dough gently to release large air bubbles. When shaping your rolls, create tight balls by pulling dough edges underneath—this creates that beautiful pull-apart texture. Bake until golden brown and listen for that hollow sound when tapped. My grandma always said the best homemade dinner rolls “sing” when they’re done!
These homemade dinner rolls shine alongside classic comfort foods. Serve them warm with roasted turkey, mashed potatoes, and gravy for the ultimate holiday feast. They’re also perfect with hearty cottage pie or Sunday pot roast.
Arrange your homemade dinner rolls in a decorative basket lined with a cloth napkin to keep them warm. For special occasions, brush with garlic herb butter or sprinkle with everything bagel seasoning before baking. Serve with compound butters or flavored oils for dipping.

Store cooled homemade dinner rolls in an airtight container at room temperature for up to three days. For longer storage, freeze them in freezer bags for up to three months. I always double the recipe to have extra rolls ready for unexpected guests.
Revive day-old homemade dinner rolls by sprinkling with water and heating at 350°F for 5-8 minutes. Frozen rolls can go straight from freezer to oven—just add a few extra minutes. For more kitchen tips, our dinner recipes collection includes various reheating methods.
For vegan homemade dinner rolls, substitute plant-based milk and butter, and replace the egg with a flax egg. Gluten-free flour blends work well too—just add xanthan gum if your blend doesn’t include it. Our cranberry orange bread offers another delicious gluten-free option.
If you’re out of milk, warm water with a tablespoon of butter works in a pinch. Honey or maple syrup can replace sugar for different flavor notes. For extra-rich rolls, try using half-and-half instead of milk.
These homemade dinner rolls provide carbohydrates for energy, protein from the flour and milk, and B vitamins from the yeast. The butter contributes fat-soluble vitamins while the egg adds additional protein and nutrients.
Unlike store-bought versions, you control the ingredients in homemade dinner rolls, avoiding preservatives and excessive sodium. The fermentation process makes nutrients more bioavailable. For more nutrient-dense options, our stuffed bell peppers pack plenty of vitamins.
Never use hot liquid when activating yeast—it will kill it. Measure flour accurately since too much creates dense rolls. Don’t skip the kneading step; it develops gluten for proper texture. Our Detroit-style pizza recipe emphasizes similar dough techniques.
Avoid overproofing your dough, which causes rolls to collapse. Don’t overcrowd the baking dish—they need space to expand. I learned the hard way that opening the oven too early causes uneven baking. Now I use my oven light to check progress!
Absolutely! These homemade dinner rolls freeze beautifully. Cool completely, then place in freezer bags with air removed. They’ll keep for three months. Thaw at room temperature or reheat directly from frozen.
Freshly baked homemade dinner rolls stay fresh in the refrigerator for about five days when stored in an airtight container. They may dry out slightly, but reheating restores their softness.
For homemade dinner rolls, you can use water with added butter, plant-based milks, or even potato water. Each substitution adds slightly different flavor and texture characteristics.
Yes! Use the dough cycle for your homemade dinner rolls, then shape and bake as directed. The machine handles kneading and first rise, saving time and effort.
Mastering these homemade dinner rolls will transform your meals and create lasting memories around your table. Their warmth and comfort make every occasion special, from weeknight dinners to holiday feasts. For another family favorite, try our classic chicken Parmesan—it pairs perfectly with these rolls. From my kitchen to yours, happy baking!

Welcome to Mac Recipes! I'm here to prove that amazing home-cooked meals don't need to be complicated. From weeknight dinners to weekend treats, I create recipes that fit into your busy life—delicious, doable, and always worth making.
More About Me