Easy Breadcrumbs Making
This post may contain affiliate links.
Read our Disclaimer.
Leave a Comment ★★★★★

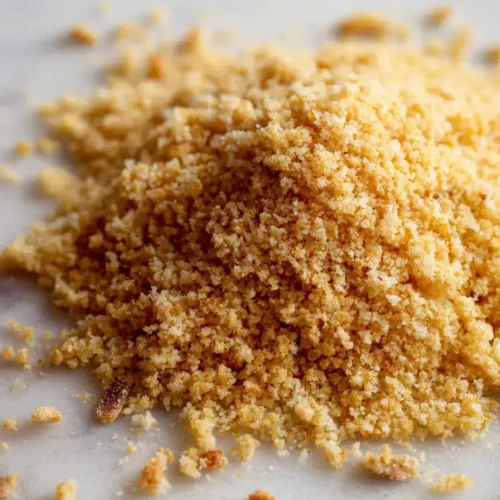
Making Homemade Breadcrumbs is one of my favorite kitchen shortcuts, turning leftover bread into a golden, flavorful topping in just 30 minutes. I promise, this DIY Breadcrumbs method is so simple and far better than the store-bought kind. It’s the perfect solution for using up stale bread and adding a delicious crunch to so many meals.


As a busy parent, I love recipes that have a clear finish line. This method for How to Make Breadcrumbs is incredibly efficient. Your active prep time is only about 10 minutes. Then, the oven does most of the work for another 20 minutes.
That means you’ll have a batch of fresh, flavorful Homemade Croutons or fine breadcrumbs ready in a total of 30 minutes. It’s the perfect quick recipe to tackle while you’re prepping other parts of dinner. Compared to other from-scratch projects, this one is wonderfully hands-off. You can check out my homemade dinner rolls if you want to start from scratch with the bread itself!
I know many families are juggling different dietary needs, so here are some easy tweaks. For a lower sodium version, you can easily reduce the salt in this Homemade Breadcrumbs recipe. Since you’re controlling the ingredients, it’s simple to make it suit your needs.
Using whole grain or seeded bread will increase the fiber content, which is great for glycemic control. For a sugar-conscious option, just be sure to avoid breads with added sugars or honey. The recipe itself is naturally a low sugar option, making it a versatile base for many meals.
After making this Stale Bread Recipe countless times, I’ve picked up a few tricks that make all the difference. Here are my best shortcuts for flawless results.
When you make your own Homemade Breadcrumbs, you’re in control of what goes into them. This DIY Breadcrumbs approach avoids the preservatives and additives often found in commercial varieties. You can choose a whole-grain bread as your base to boost the fiber content.
This recipe is a good source of complex carbohydrates for sustained energy. By baking them instead of frying, you keep the fat content in check. Using olive oil adds heart-healthy monounsaturated fats. It’s a simple way to make a wholesome ingredient for your family’s meals. For another healthy side dish idea, try these garlic parmesan potato wedges. You can learn more about the benefits of whole grains from reputable sources like the Whole Grains Council. And if you’re baking your own bread, this classic banana bread is another great way to use simple ingredients.
If you’re looking for a lighter option, this recipe is easily adaptable. You can reduce the oil by half; the bread will still crisp up, though the crumbs may be a bit less rich. For a different flavor profile, try using an avocado oil spray for a light, even coating.
Another great tip is to use a rack on your baking sheet. This allows air to circulate all around the bread cubes, helping them dry out and crisp with even less oil. It’s a small change that makes a big difference!
I’ll never forget the first time I used my own Homemade Breadcrumbs to make a topping for mac and cheese. The flavor and crunch were so much better than anything from a canister. My kids went crazy for it, and it’s been a staple in our house ever since.
These breadcrumbs are incredibly versatile. Use them as a crunchy topping for casseroles, a coating for baked chicken or fish, or mixed into meatballs for better texture. They add the perfect finish to a simple pasta dish. For a real treat, use them to make homemade pizza rolls. They also pair wonderfully with other comfort food sides, like a batch of crispy oven chips.

Even an easy recipe like this for Homemade Breadcrumbs has a few pitfalls. Here’s how to avoid them for perfect results every time.
Using fresh, soft bread: This is the biggest mistake. Stale, slightly dry bread is essential. Fresh bread contains too much moisture and will steam instead of toast, resulting in a chewy, not crispy, texture.
Baking at too high a temperature: Low and slow is the key. A moderate 300°F (150°C) oven dries the bread out perfectly without burning the outside before the inside is crisp. Rushing this process with high heat will give you burnt, bitter crumbs.
Not stirring halfway through: For even Baking Breadcrumbs, you must give them a stir about halfway through the cook time. This ensures every cube dries and browns uniformly, preventing some from being overdone while others are still soft.
I learned these lessons the hard way so you don’t have to. Following these simple steps guarantees a perfect batch. For more flavor inspiration, check out this homemade dill pickle spice blend. You can also find great information on proper baking techniques from sources like King Arthur Baking. And if you love pickles, these homemade sweet pickles are another great preserve to try.
I always make a double batch of these Homemade Breadcrumbs because they keep so well. After a big holiday meal with rolls leftover, I turn them all into crumbs and stash them in the freezer. It’s such a satisfying feeling to have them ready for a busy weeknight.
Once completely cooled, store your breadcrumbs in an airtight container at room temperature for up to a week. For longer storage, they freeze beautifully for up to 3 months. There’s no need to thaw them before using; just sprinkle frozen crumbs right onto your casserole or into your recipe. It’s one less thing to worry about during the dinner chaos!
This simple method truly changed my weeknight cooking game. Having a jar of flavorful, crunchy Homemade Breadcrumbs ready to go makes so many meals feel more special. It’s a small act that brings a huge payoff in flavor and satisfaction.
I hope this recipe becomes a trusted favorite in your kitchen, just like it is in mine. Once you see how easy it is, you’ll never go back to the store-bought kind. For your next baking project, why not try this moist chocolate banana bread, this delicious vegan zucchini bread, or this classic cornbread? They are all fantastic ways to enjoy homemade goodness. Making your own Homemade Breadcrumbs is the first step toward a more flavorful kitchen.
If you enjoyed making your own breadcrumbs, you’ll get a kick out of these other easy recipes that transform simple ingredients into kitchen gold.
Cheddar Bay Biscuits – These warm, cheesy biscuits come together in minutes and taste just like the famous restaurant version.
Gluten-Free Banana Bread – A wonderfully moist and tender loaf that everyone will love, perfect for using up ripe bananas.
Cranberry Orange Bread – A sweet and tangy quick bread that’s absolutely bursting with festive flavor.
Stale, day-old bread is absolutely best for Homemade Breadcrumbs. Slightly drier bread toasts more evenly and creates a crisper crumb. You can use almost any type: French bread, sandwich bread, sourdough, or even leftover dinner rolls. Avoid very soft, fresh bread as it has too much moisture.
When stored correctly in an airtight container at room temperature, your Homemade Breadcrumbs will stay fresh for about one week. For longer storage, you can freeze them for up to 3 months. Their longevity is a great reason to make a big batch!
Absolutely! If you don’t have a food processor, you can place the cooled, toasted bread cubes in a sturdy zip-top bag and crush them with a rolling pin. You’ll get a more rustic, uneven crumb, which is perfect for many dishes like stuffing.
Traditional Homemade Breadcrumbs are made from baked or toasted bread, resulting in a finer, denser crumb. Panko is made from bread crusts that are processed into larger, flakier, airier crumbs. You can make a panko-style crumb by pulsing your bread cubes less, aiming for a coarser texture.

Welcome to Mac Recipes! I'm here to prove that amazing home-cooked meals don't need to be complicated. From weeknight dinners to weekend treats, I create recipes that fit into your busy life—delicious, doable, and always worth making.
More About Me