Simple Homemade Apple Pie
This post may contain affiliate links.
Read our Disclaimer.
Leave a Comment ★★★★★
There’s something incredibly comforting about preparing homemade apple pie from scratch. This classic dessert combines tender, spiced apples with a flaky, buttery crust that simply melts in your mouth. I still remember helping my grandmother roll out pie dough on her weathered kitchen counter – the aroma of cinnamon and baking apples filling her farmhouse kitchen is a memory I treasure. If you love apple desserts, you might also enjoy our salted caramel apple bars for another delicious treat.
The beauty of this homemade apple pie lies in its simplicity and the incredible flavor that comes from using fresh, quality ingredients. I’ve perfected this recipe over years of baking, and I’m excited to share all my tips and tricks with you. Whether you’re baking for a holiday gathering or just craving a warm slice of comfort, this pie will quickly become a family favorite. My secret? Chilling the dough properly and using a mix of apple varieties for the perfect balance of sweet and tart flavors.

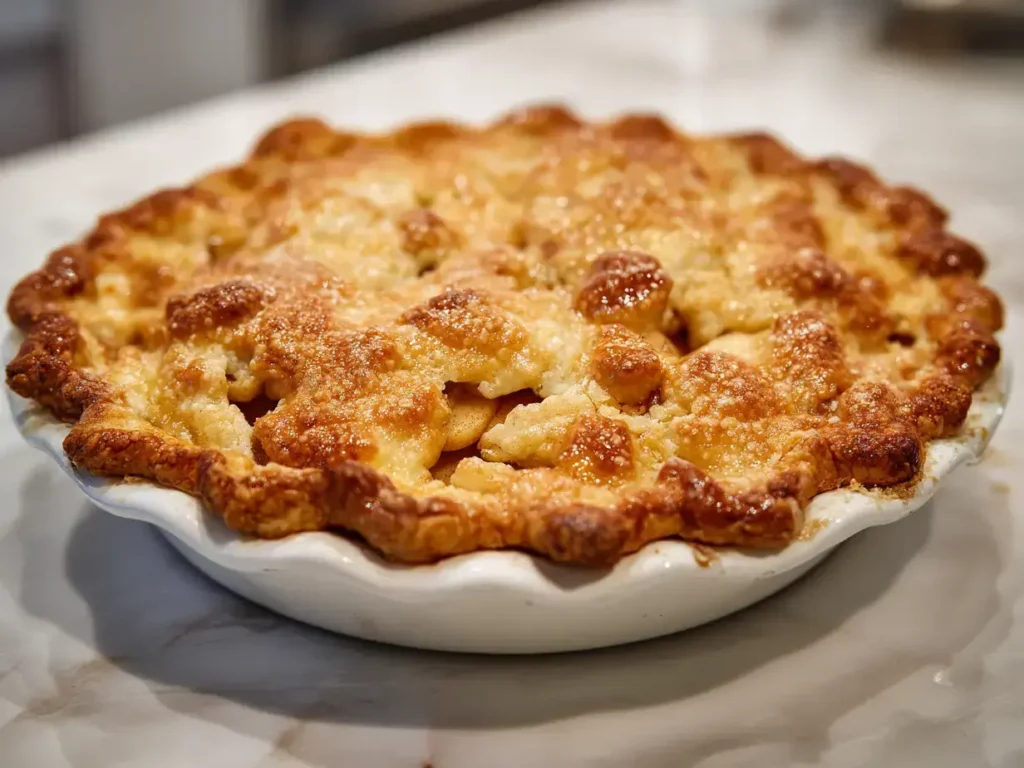
Nothing compares to the taste of a truly homemade apple pie made from scratch. Store-bought versions simply can’t match the depth of flavor you achieve when you control every ingredient. The combination of fresh apples, warm spices, and buttery crust creates a symphony of flavors that feels both nostalgic and special. I love how the house smells while it bakes – it’s the ultimate comfort food aroma that brings everyone running to the kitchen.
Many home bakers feel intimidated by homemade apple pie, but this recipe breaks it down into manageable steps that anyone can follow. With clear instructions and helpful tips, you’ll discover that pie-making is actually quite straightforward. The satisfaction of pulling a golden, bubbling pie from your own oven is absolutely worth the effort. Plus, once you master this basic recipe, you can experiment with different fillings and crust designs.
The foundation of any great homemade apple pie starts with quality ingredients. Each component plays a crucial role in creating the perfect texture and flavor balance. Here are the key elements you’ll need for both the crust and filling:
The spices and additional ingredients transform simple apples into an extraordinary filling. Cinnamon and nutmeg provide that classic warm spice aroma we all associate with homemade apple pie. A touch of flour helps thicken the natural juices released during baking, ensuring your slice holds together perfectly. If you enjoy spiced desserts, you might also like our German chocolate cake with its rich flavor profile.

Begin by preparing your pie dough – this allows it adequate chilling time. Whisk together the flour, salt, and sugar before cutting in very cold butter until the mixture resembles coarse meal. Gradually add ice water until the dough just comes together, then divide into two discs and refrigerate. Meanwhile, prepare your apple filling by combining sliced apples with sugars, spices, flour, and lemon juice. My grandma taught me to taste an apple slice after mixing – you should adjust spices if needed at this stage.
Roll one chilled dough disc into a 12-inch circle and transfer to your pie plate. Add the apple filling, mounding it slightly in the center, and dot with butter. Top with your second crust (either solid or lattice design), seal the edges, and brush with egg wash. Bake initially at 425°F to set the crust, then reduce to 375°F until golden brown and bubbling. The aroma will tell you when it’s getting close to done – that warm cinnamon scent means perfection is near!
Nothing complements homemade apple pie better than a scoop of vanilla ice cream slowly melting over the warm slice. The contrast of temperatures and textures is absolutely divine. For a simpler option, a dollop of freshly whipped cream adds luxurious richness. If you’re serving this for a special occasion, consider pairing it with a sharp cheddar cheese – the tangy flavor beautifully offsets the pie’s sweetness. For another delightful dessert pairing, try our chewy lemon cookies for a citrusy contrast.
For a beautiful presentation, serve individual slices on warmed plates drizzled with caramel sauce. Garnish with a dusting of powdered sugar and a fresh mint sprig for color contrast. During holidays, I sometimes add a small scoop of cinnamon ice cream and a baked apple chip on top. For parties, consider making miniature pies in muffin tins – they’re adorable and perfect for individual servings.

Once completely cooled, cover your homemade apple pie loosely with plastic wrap or aluminum foil and store at room temperature for up to two days. For longer storage, refrigerate for up to five days – the crust may soften slightly, but the flavor remains excellent. You can also freeze the baked pie for up to three months; wrap it tightly in plastic followed by foil to prevent freezer burn. I always label my frozen pies with the date so I know when I made them.
To restore that fresh-from-the-oven quality, reheat individual slices in a 350°F oven for 10-15 minutes until warmed through. This method helps crisp up the crust again. For quicker reheating, microwave slices for 20-30 seconds, but note this will soften the pastry. If reheating a whole pie, cover the edges with foil to prevent over-browning and heat at 325°F for 20-25 minutes. Always let the pie cool slightly before serving to allow the filling to set properly.
For a gluten-free homemade apple pie, substitute the all-purpose flour with a gluten-free blend in both the crust and filling. Vegan bakers can replace the butter with solid coconut oil and use a flax egg (1 tablespoon ground flax mixed with 3 tablespoons water) for the egg wash. If you’re watching sugar intake, reduce the granulated sugar and increase the brown sugar slightly for more flavor with less sweetness. For another delicious gluten-free option, try our pecan pie muffins.
Experiment with different apple combinations – I love using 2/3 tart apples and 1/3 sweeter varieties for complexity. Add a handful of cranberries or raisins to the filling for extra flavor bursts. For a streusel topping instead of a top crust, mix flour, brown sugar, oats, and butter until crumbly and sprinkle over the filling before baking. You could also incorporate chopped pecans or walnuts into the filling for added texture and richness.
Apples, the star of our homemade apple pie, provide valuable dietary fiber, particularly pectin, which supports digestive health. They also contain vitamin C and various antioxidants that contribute to overall wellness. When you use whole ingredients and control the sugar content, this dessert can be part of a balanced diet. The complex carbohydrates from the flour and apples provide sustained energy, while the butter contributes some fat-soluble vitamins.
By making your homemade apple pie from scratch, you avoid the preservatives and excessive sugars often found in commercial versions. You can adjust the sweetener to your preference and use whole food ingredients. Remember that dessert should be enjoyed in moderation as part of an overall balanced eating pattern. For another fruit-based dessert option, consider our apple muffins which offer portion-controlled servings.
The most common error in homemade apple pie making is using the wrong apples – avoid mealy varieties that turn mushy when baked. Don’t skip the chilling time for the dough; cold butter is essential for flaky layers. Another mistake is overworking the pastry, which develops gluten and makes it tough. I learned this the hard way when my first pie crust resembled cardboard rather than the flaky layers I wanted. Always measure flour correctly – scoop and level rather than dipping your measuring cup into the flour.
Underbaking leads to a soggy bottom crust while overbaking results dry filling. Watch for thick, bubbling juices and golden brown crust as doneness indicators. Not allowing the pie to cool completely before slicing is another common mistake – the filling needs time to set properly. If you slice too soon, you’ll have apple soup instead of neat slices. Finally, remember to place a baking sheet underneath to catch any drips and prevent oven messes.
Absolutely! You can freeze homemade apple pie either before or after baking. For unbaked freezing, assemble the pie completely but don’t add the egg wash. Wrap tightly in plastic and foil, then freeze for up to 3 months. Bake directly from frozen, adding 15-20 minutes to the baking time. Already baked pie freezes well too – just ensure it’s completely cooled before wrapping and freezing.
Properly stored homemade apple pie will keep well in the refrigerator for 4-5 days. Cover it loosely with plastic wrap or aluminum foil, or place it in an airtight container. The crust may soften slightly during refrigeration, but reheating in the oven will help restore its texture. Always check for signs of spoilage like off odors or mold before consuming refrigerated pie.
If you prefer not to use cornstarch in your homemade apple pie, several alternatives work well. All-purpose flour is the most common substitute – use twice the amount of cornstarch called for. Tapioca starch provides a clear, glossy filling and use it measure for measure. Arrowroot powder also works well and gives a clear result. Instant ClearJel is another excellent option, especially for pies that will be frozen.
Yes, homemade apple pie is an excellent make-ahead dessert. You can prepare the dough up to 3 days in advance and keep it refrigerated, or freeze it for up to 3 months. The filling can be prepared 1 day ahead and stored covered in the refrigerator. For best results, assemble and bake the pie on the day you plan to serve it, as the crust is crispiest when fresh.
Creating this homemade apple pie from scratch is one of life’s simple pleasures that yields extraordinary rewards. The process of transforming basic ingredients into a beautiful, fragrant dessert never fails to bring me joy and satisfaction. I hope this recipe becomes a cherished part of your baking repertoire, creating warm memories around your own kitchen table. For another classic dessert that’s always crowd-pleaser, try our Boston cream pie with its delightful combination of cake and pastry cream. Happy baking!

Welcome to Mac Recipes! I'm here to prove that amazing home-cooked meals don't need to be complicated. From weeknight dinners to weekend treats, I create recipes that fit into your busy life—delicious, doable, and always worth making.
More About Me