Creamy Flan Recipe With Sweetened Condensed Milk
This post may contain affiliate links.
Read our Disclaimer.
Leave a Comment ★★★★★
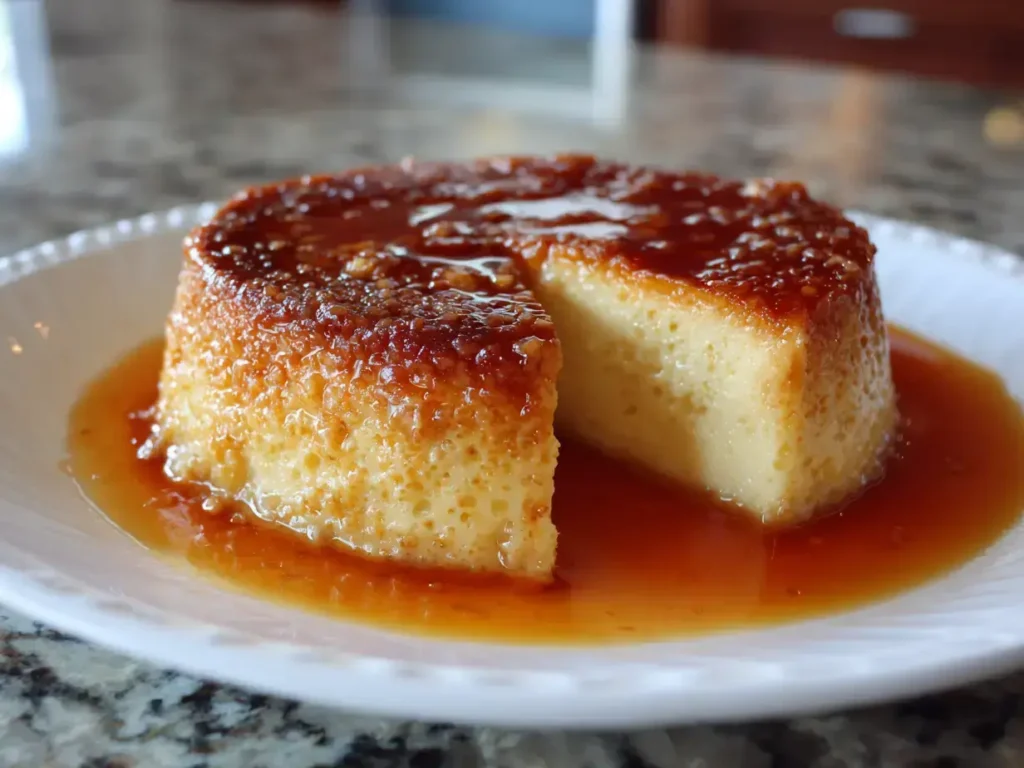
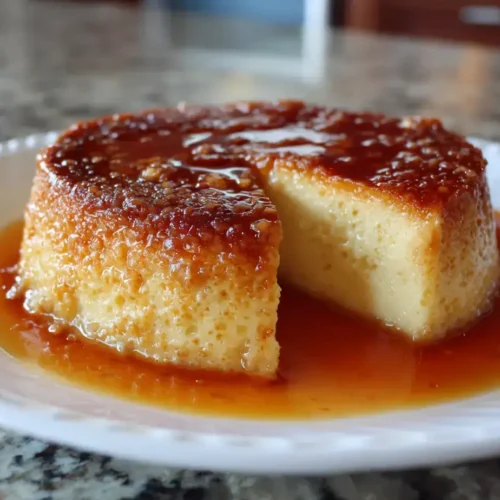
There’s something truly magical about a classic flan recipe. This creamy, caramel-topped custard dessert feels like a warm hug from the past, a sweet memory that transcends generations. I remember watching my abuela carefully swirl the sugar for the caramel, her kitchen filled with that unmistakable, rich aroma. She taught me that the best flan recipe is about patience and love, resulting in a dessert that’s both elegantly simple and incredibly satisfying. If you’ve ever been intimidated by making flan at home, I’m here to guide you through every step. This traditional flan, or flan de leche, is a foolproof journey to a silky-smooth treat that will impress your family and become a requested favorite for every holiday and potluck.

Table of Contents
Creating the perfect flan recipe starts with simple, high-quality ingredients. Each component plays a specific role in achieving that dreamy, creamy texture and deep flavor. For instance, using large, room-temperature eggs helps them blend seamlessly into the custard without overmixing. Meanwhile, the combination of sweetened condensed milk and evaporated milk is the heart of a traditional flan, providing unmatched richness. Let’s break down what you’ll need to create this homemade flan masterpiece.
Every ingredient in this easy flan recipe has a purpose. Granulated sugar transforms into a beautiful amber caramel, forming the signature glossy topping. Water helps the sugar dissolve evenly, preventing crystallization. The eggs are the main thickening agent, giving the custard its structure. Sweetened condensed milk contributes a velvety sweetness, while evaporated milk adds a light, creamy consistency without the density of heavy cream. A splash of pure vanilla extract and a pinch of salt round out the flavors, balancing the sweetness and adding depth. This thoughtful combination is what makes this the best flan recipe for both beginners and experts.
While this traditional flan recipe is perfect as written, you can make a few simple swaps if needed. For a lighter version, you can use low-fat evaporated milk, though the texture will be slightly less rich. If you don’t have vanilla extract, a vanilla bean scraped into the custard adds a wonderful, aromatic flavor. For a dairy-free alternative, full-fat coconut milk can replace the evaporated milk, creating a tropical twist. Remember, the key to a successful flan pudding is maintaining the balance between the eggs and the liquid, so stick to the measurements for the creamiest results.
You don’t need a kitchen full of fancy gadgets to make an incredible flan dessert. However, a few key tools will make the process smoother and more successful. First, a heavy-bottomed saucepan is non-negotiable for making the caramel; it distributes heat evenly, preventing hot spots that can burn the sugar. An 8-inch round cake pan or a deep pie dish is ideal for baking. Furthermore, a large roasting pan for the water bath and a fine-mesh strainer for the custard are incredibly helpful. Gathering these tools before you start ensures your flan recipe execution is seamless.
The pan you choose for your baked flan matters. I prefer a light-colored metal pan or a glass pie dish because they conduct heat gently. Avoid dark metal pans, as they can cause the edges to overcook. The pan should be deep enough to hold all the custard with about an inch of space at the top. Meanwhile, your larger roasting pan for the water bath should be at least 2-3 inches deep to hold enough water. If you love baking, you might already have the perfect pan from making a delicious peach upside-down cake.
The water bath, or baño María, is the secret to a creamy flan without bubbles or cracks. This technique involves placing your flan pan inside a larger pan filled with hot water. Consequently, the water gently and evenly cooks the custard with steam, preventing it from curdling or becoming rubbery. It’s the same gentle cooking principle used for cheesecakes. Don’t skip this step! It’s what transforms a good egg custard flan into an extraordinary one. Always use hot tap water to fill the bath so the oven temperature doesn’t drop.
The caramel layer is the foundation of any great flan recipe. It might seem daunting, but with a watchful eye, it’s surprisingly simple. The process involves melting sugar until it liquefies and turns a deep amber color. This caramel then hardens at the bottom of the pan, magically turning into a luscious sauce when the flan is inverted. The key is patience; resist the urge to stir the sugar once it starts boiling. Instead, swirl the pan gently to ensure even cooking. A perfect caramel sets the stage for a stunning Mexican flan or Spanish flan.
The most common issue when making caramel is crystallization, which happens if sugar crystals form on the side of the pan. To prevent this, start by brushing the sides of the pan with a wet pastry brush to dissolve any stray crystals. Another mistake is walking away from the stove. Sugar goes from perfectly golden to burnt in seconds. Stay nearby and watch the color change closely. If you see smoke, it’s gone too far. Luckily, even if you burn your first batch, you can easily clean the pan and start over. It’s a skill worth mastering, much like getting the perfect crust on a batch of salted caramel apple bars.
You want your caramel to reach a rich, deep amber hue—similar to iced tea. A pale caramel will taste too sweet and lack depth, while a dark one will be bitter. As soon as the sugar melts and begins to color, pay close attention. The moment it reaches that perfect shade, immediately remove it from the heat and pour it into your cake pan. Act quickly because the caramel will continue to cook in the hot pan. Tilt the pan to coat the bottom evenly before the caramel hardens. This beautiful layer will become the gorgeous, glossy topping of your finished flan dessert.
Once your caramel is ready, it’s time to create the heart of the flan: the custard. The goal is a silky-smooth mixture without any air bubbles. Start by gently whisking the eggs until they are just combined. You don’t want to incorporate too much air. Then, slowly add the milks and flavorings. For the creamiest flan, some bakers prefer to blend the mixture for a few seconds. This step ensures everything is perfectly emulsified. The consistency should be homogenous and smooth, like heavy cream. This attention to detail guarantees a flawless texture in your final homemade flan.
Overmixing is the enemy of a smooth flan recipe. When you whisk the eggs too vigorously, you trap air, which can lead to a bubbly, spongy texture instead of a dense, creamy one. Whisk the eggs gently, just until the yolks and whites are unified. Then, when adding the condensed milk, evaporated milk, vanilla, and salt, mix only until everything is incorporated. If you see foam on the surface, you can let the mixture sit for a few minutes to allow the bubbles to settle, or skim them off with a spoon. This gentle approach is similar to making a custard for rich maple donut bars.
For an ultra-smooth, restaurant-quality flan, always strain your custard mixture. Pour it through a fine-mesh strainer into the caramel-coated pan. This crucial step catches any small bits of egg that didn’t fully incorporate or any potential cooked egg strands. It also helps remove any remaining air bubbles. Straining is the secret to that melt-in-your-mouth texture that defines the best flan recipe. It’s a simple 30-second task that makes a world of difference in the final presentation and mouthfeel of your flan pudding.
Baking is where the magic happens, transforming the liquid custard into a firm, yet jiggly, delight. The water bath is your best friend here. Carefully place your filled flan pan into the larger roasting pan and pour hot water into the larger pan until it reaches halfway up the sides of the flan pan. Then, gently slide this setup into the preheated oven. The water bath ensures gentle, even heat, preventing the eggs from scrambling. Bake until the edges are set but the center still has a slight wobble. This slow, steady baking is the key to a creamy flan.
Knowing when your flan is perfectly baked is easy. After about 50 minutes, open the oven and gently jiggle the pan. The edges should look firm, while the center, about the size of a quarter, should jiggle like Jell-O when shaken. If the center moves like a wave, it needs more time. Another test is to insert a thin knife near the edge; it should come out clean. The flan will continue to set as it cools. Overbaking is the main cause of a rubbery texture, so err on the side of underdone. It’s better to have a slightly soft center than a tough custard, much like when you bake fudgy, chewy brownies.
If you notice cracks on the surface of your flan, the oven temperature was likely too high, or the water bath wasn’t used correctly. Next time, try reducing the oven temperature by 25 degrees Fahrenheit. If the top looks bubbly or porous, the custard was probably overmixed, incorporating too much air. If your flan takes much longer than an hour to set, check your oven temperature with a thermometer. Ovens can run cool, and an accurate temperature is crucial for this egg custard flan. Remember, practice makes perfect, and even an imperfect flan still tastes wonderful!
Patience is truly a virtue after your flan comes out of the oven. First, carefully remove the flan pan from the water bath and let it cool on a wire rack to room temperature. This cooling process can take about an hour. Then, the most critical step: chilling. You must cover the flan with plastic wrap and refrigerate it for at least four hours, but overnight is ideal. This chilling time allows the custard to fully set and the flavors to meld beautifully. The caramel will also liquefy, creating that signature pool of sauce. Rushing this step is the biggest mistake you can make with a quick flan recipe.
I cannot stress enough how much better your flan dessert will be after an overnight rest in the refrigerator. The texture becomes firmer and creamier, and the caramel sauce fully develops. It also makes unmolding much easier and cleaner. Planning ahead is the key to a stress-free dessert. You can make this flan two days before you need to serve it, which is perfect for dinner parties and holidays. This make-ahead quality makes it as convenient as preparing a stunning churro cheesecake in advance.
Unmolding your flan is the dramatic finale! Start by running a thin, flexible knife or a small offset spatula around the edges of the pan to loosen the custard. Place your serving plate upside-down on top of the pan. Then, with confidence, hold the plate and pan together firmly and flip them over in one quick motion. Give the pan a gentle shake. You should hear and feel the flan release onto the plate. Slowly lift the pan away to reveal your beautifulcreation, now gloriously topped with a river of golden caramel. If a little caramel sticks to the pan, just scrape it out and drizzle it over the top.
Once you’ve mastered the classic flan de leche, a world of delicious variations opens up. You can infuse the custard with different flavors, add toppings, or create stunning layered desserts. For a coffee-flavored flan, add a tablespoon of instant espresso powder to the custard mixture. For a citrus twist, add the zest of an orange or a lime. You can even create a stunning marbled effect by swirling in some melted chocolate. These variations allow you to customize this easy flan recipe for any season or occasion, making it a versatile star in your dessert repertoire.
Why not combine two beloved desserts into one? Create a “Flancocho” by pouring flan custard over a layer of chocolate cake batter before baking—the batter rises to the top as the flan sinks to the bottom. For a festive twist, try a coconut flan by substituting coconut milk for the evaporated milk and topping with toasted coconut. If you love the combination of chocolate and caramel, sprinkle some sea salt over the top of your finished flan for a salted caramel flan. These creative ideas are as fun as experimenting with the flavors in monster cookie brownies.
You can easily adapt this flan recipe for different dietary needs. For a gluten-free dessert, flan is naturally perfect, as it contains no flour. To reduce sugar, you can experiment with a sugar substitute for the caramel, though the texture may vary. For a richer flavor, use half-and-half instead of evaporated milk. Remember, the basic ratio of eggs to dairy is what sets the custard, so stick to the number of eggs for the best structure. These small adjustments ensure everyone can enjoy a slice of this delightful flan pudding.
Presentation is key when serving your beautiful homemade flan. Use a sharp, thin-bladed knife dipped in hot water to slice clean portions. Wipe the knife between each cut for neat slices. Serve the flan on its own to highlight its pure, creamy flavor, or garnish with fresh berries, a sprig of mint, or a dollop of whipped cream. Flan is best served chilled, straight from the refrigerator. It’s the perfect ending to a spicy meal, a light dessert for a summer evening, or a show-stopping centerpiece for a holiday table.

If you have any leftover flan (a rare occurrence in my house!), it stores beautifully. Cover the flan tightly with plastic wrap or transfer individual slices to an airtight container. It will keep in the refrigerator for up to five days. The texture remains creamy, and the flavor may even improve. I do not recommend freezing flan, as the custard can become watery and grainy upon thawing. Leftover flan makes a delightful treat with your morning coffee—a little secret indulgence that feels as special as enjoying a leftover cinnamon roll sugar cookie.
While flan is delicious on its own, certain beverages and desserts complement it perfectly. A cup of strong coffee or espresso contrasts beautifully with the sweet creaminess. For a dessert wine pairing, a late-harvest Riesling or a Moscato d’Asti works wonderfully. If you’re serving a larger crowd, consider pairing your flan with a lighter dessert, like these chewy lemon cookies, to offer a variety of flavors. Ultimately, the simplicity of a well-made flan is its greatest strength, allowing its rich, comforting flavor to shine.
A watery flan is usually caused by underbaking or not chilling it long enough. Make sure the center still has a slight jiggle when you take it out of the oven, and always chill for at least 4 hours, preferably overnight, to allow the custard to set fully.
I don’t recommend skipping the water bath. It’s essential for gentle, even heating, which prevents the eggs from curdling and ensures a smooth, creamy texture. Baking without it will likely result in a rubbery or cracked flan.
Avoid overmixing the custard, as this incorporates air. Mix gently and strain the custard through a fine-mesh sieve into the pan. Letting the mixture sit for a few minutes before baking allows bubbles to rise to the surface, where you can skim them off.
The caramel is supposed to harden in the pan. During baking and chilling, it softens and turns back into a liquid sauce. If it’s still too hard after unmolding, the flan may not have chilled long enough, or the caramel might have been cooked a bit too long.
The main difference is the dairy. Spanish flan often uses whole milk, while Mexican flan typically uses a combination of sweetened condensed milk and evaporated milk, resulting in a richer, denser, and sweeter custard. This recipe is a classic Mexican-style flan.
Yes, but the baking time will change. A larger, shallower pan will require less time, while a smaller, deeper pan will need more. The key is to watch for the jiggly center as your indicator of doneness, regardless of the pan size.
Creating the perfect homemade flan is a rewarding journey that blends simple techniques with a little bit of kitchen magic. From watching sugar transform into golden caramel to the satisfying flip that reveals your beautiful dessert, every step is a labor of love. This easy flan recipe is a testament to the fact that the most cherished desserts are often the simplest. I hope this guide gives you the confidence to create this classic treat for your own family, creating new sweet memories around the table. So go ahead, preheat that oven, and get ready to enjoy one of the most delicious and comforting desserts the world has to offer.

Welcome to Mac Recipes! I'm here to prove that amazing home-cooked meals don't need to be complicated. From weeknight dinners to weekend treats, I create recipes that fit into your busy life—delicious, doable, and always worth making.
More About Me