Cookie Monster Frozen Treat
This post may contain affiliate links.
Read our Disclaimer.
Leave a Comment ★★★★★
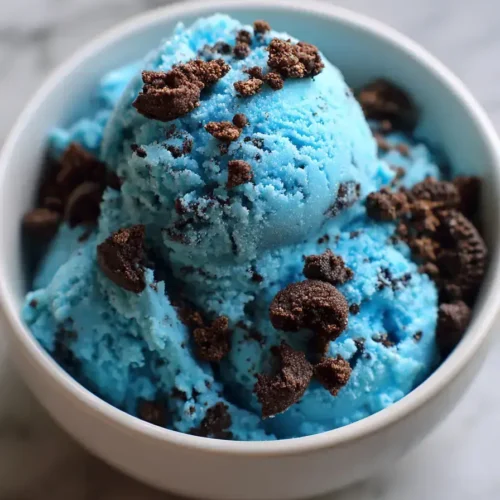
Making Cookie Monster Ice Cream is the fastest way to bring a burst of playful, nostalgic flavor to your table. This vibrant blue ice cream, loaded with chocolate chip cookies, is homemade ice cream at its most fun and satisfying.


I love recipes that do most of the work for you, and this Cookie Monster Ice Cream is exactly that. With just 15 minutes of hands-on prep, you’re on your way to a frozen treat that’s far superior to anything from a carton.
The total time is about 4 hours and 15 minutes, but most of that is hands-off freezing. It’s the perfect weekend project—simple enough for a lazy afternoon but impressive enough for a celebration. For another fantastic frozen dessert that’s equally easy, check out my Ninja Creami ice cream guide.
Being mindful of dietary needs means everyone can enjoy a scoop. This Cookie Monster Ice Cream can easily be adapted for a lower sugar or diabetic-friendly version without sacrificing that classic cookie flavor.
For a low glycemic option, try substituting the granulated sugar with a natural sweetener like monk fruit or stevia blend. You could also use your favorite sugar-free chocolate chip cookies for the mix-in. Remember, portion control is a simple and effective way to manage sugar intake while still enjoying this homemade treat.
After testing this recipe countless times, I’ve found a few secrets that make all the difference. Here are my top tips for ice cream that’s bursting with flavor and perfect texture.
While this is certainly a treat, understanding its components helps you enjoy it mindfully. This Cookie Monster Ice Cream provides energy from carbohydrates and a source of calcium from the dairy.
The heavy cream and whole milk contribute to your daily calcium intake, which is essential for bone health. Compared to many store-bought varieties, you have complete control over the sugar content. For another dessert where you control the ingredients, explore my chocolate lasagna recipe. Remember, balance is key. You can learn more about mindful eating from resources like the American Heart Association. For a different kind of chocolate indulgence, these classic chocolate brownies are another great option.
Craving the flavor but watching your intake? You can easily create a lighter version of this blue ice cream. Swap the heavy cream for half-and-half or even full-fat coconut milk for a dairy-free alternative.
Reduce the sugar by a quarter cup—the cookies will still provide plenty of sweetness. For the mix-ins, opt for a smaller amount of cookies or choose a brand with less sugar. These small tweaks make a big difference, much like the simple adjustments in my lighter pumpkin brownies.
I love serving this ice cream at summer gatherings—it always brings smiles. The vibrant blue against a white bowl makes a stunning presentation that feels both playful and special.
For a truly over-the-top sundae, add an extra sprinkle of mini chocolate chips and a whole cookie on top. It pairs wonderfully with a simple warm chocolate brownie or alongside a slice of Oreo brownie. Serve it immediately after scooping for the best, creamiest texture.

Even the simplest recipes can have pitfalls. Let’s make sure your Cookie Monster Ice Cream turns out perfectly every single time.
One common mistake is not letting the base chill enough before churning. If your mixture is warm, it won’t freeze properly in the machine. Always ensure it’s cold to the touch. Another issue is over-churning. Once it reaches a soft-serve consistency, stop! Over-churning can make the ice cream grainy.
Finally, avoid adding the cookies too early. If you mix them into the liquid base, they’ll become soggy. Always fold them in after churning. For more tips on perfecting baked goods, see my guide on avoiding common cookie mistakes. You can also find great general freezing tips from sources like FoodSafety.gov. I learned the hard way that patience is key, just like when perfecting my peppermint chocolate chip cookies.
Proper storage is the secret to keeping your ice cream creamy. I always use an airtight, freezer-safe container to prevent freezer burn and those dreaded ice crystals.
Press that parchment paper directly onto the surface before sealing the lid—it’s a game-changer. Your Cookie Monster Ice Cream will stay delicious for up to two weeks. For longer storage, consider a vacuum sealer for the container. This method also works brilliantly for storing other frozen desserts, like the ones in my deep dish brownie recipe.
This recipe is more than just dessert; it’s a fun, creative project that results in pure joy. I love making it with my family, watching the simple ingredients transform into something magical.
The process is straightforward, and the reward is a uniquely delicious treat that will become a requested favorite. I encourage you to give it a try this weekend. You’ll love the process and the result. For more festive frozen ideas, check out my candy cane brownies, reindeer brownie bites, and holiday candy guide. Making this Cookie Monster Ice Cream is an experience you’ll want to repeat again and again.
If you loved this playful ice cream, you’ll adore these other recipes that celebrate the glorious combination of cookies and creamy textures.
Peanut Butter Blossom Cookies – A classic cookie that’s soft, chewy, and topped with a chocolate kiss.
Chocolate Peppermint Blossom Cookies – A festive twist on the classic, perfect for the holiday season.
You can, but gel food coloring is highly recommended. Liquid coloring is less concentrated, so you’ll need much more to achieve the vibrant blue color, which can slightly thin your Cookie Monster Ice Cream base. Gel provides intense color without affecting the texture.
Classic chocolate chip cookies are perfect. Choose a brand that stays relatively crisp, like Chips Ahoy or a homemade batch. The key is to coarsely crush them so you get satisfying chunks in every bite of this cookie ice cream.
When stored properly in an airtight container, this Cookie Monster Ice Cream will maintain its best quality for about 2 weeks. After that, it might develop ice crystals, but it will still be safe to eat.
Yes, but the texture will be denser. Pour the base into a shallow pan, freeze until slushy, then whisk vigorously. Repeat every 30 minutes until frozen, then fold in the cookies. An ice cream maker yields a far superior, creamier result for your homemade ice cream.

Welcome to Mac Recipes! I'm here to prove that amazing home-cooked meals don't need to be complicated. From weeknight dinners to weekend treats, I create recipes that fit into your busy life—delicious, doable, and always worth making.
More About Me