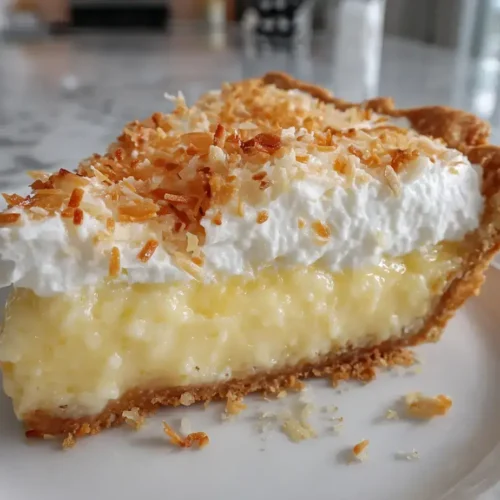
Quick Coconut Cream Pie
This post may contain affiliate links.
Read our Disclaimer.
Leave a Comment ★★★★★
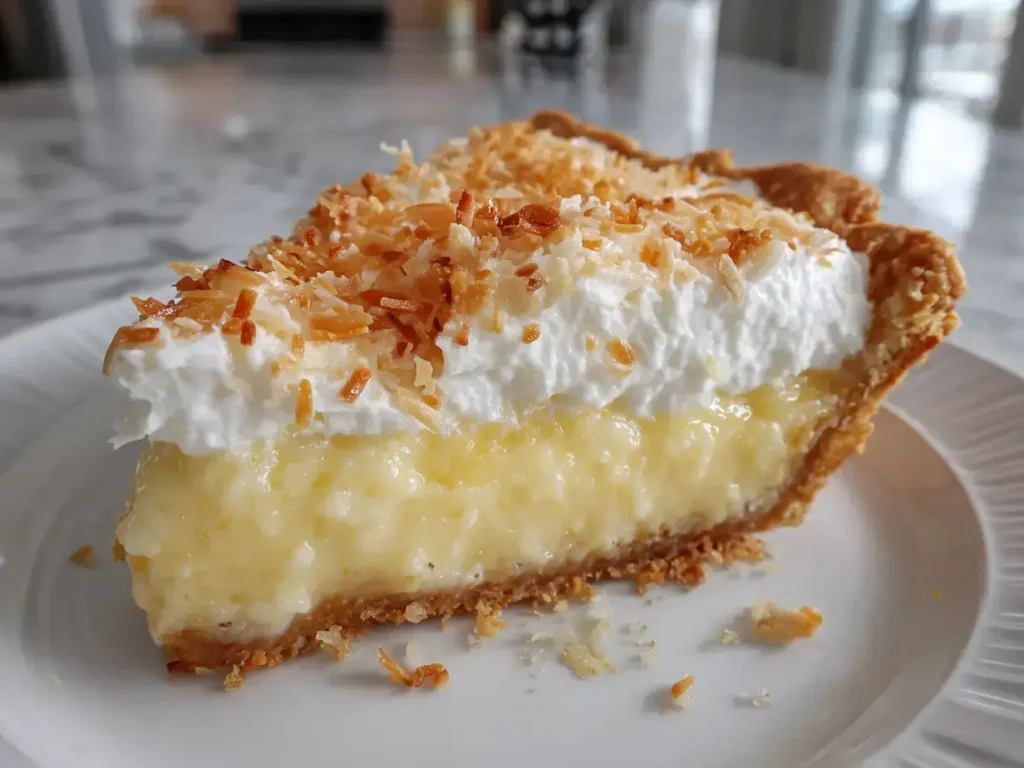

Table of Contents
Creating an unforgettable dessert starts with selecting the right components. For a truly spectacular pie, every ingredient plays a crucial role in building that signature flavor and texture. Consequently, I always recommend using the highest quality items you can find, especially when it comes to the coconut elements. Let’s break down what you’ll need to bring this dreamy coconut cream pie filling to life.
First and foremost, the star of the show is the coconut. For the richest flavor, you absolutely need a full-fat canned coconut milk. Don’t reach for the “lite” version; the fat content is essential for that luxurious mouthfeel. Similarly, sweetened shredded coconut gives the filling its wonderful texture. Meanwhile, for garnish, toasting a little extra coconut adds a nutty depth and beautiful color. If you’re looking for other decadent treats, our irresistible pecan pie muffins also rely on high-quality ingredients for their amazing taste.
Furthermore, the combination of whole milk and heavy whipping cream ensures the filling and topping are supremely creamy. Cornstarch is our thickening hero here, working with the egg yolks to create a stable, pudding-like consistency that slices perfectly. Remember, a pinch of salt is not optional; it magnificently balances the sweetness and makes the coconut flavor pop. For another dessert that uses a similar custard technique, check out our delicious banana upside-down cake.
You don’t need a kitchen full of fancy gadgets to make this pie, but a few key tools will make the process smoother and more enjoyable. Having everything within arm’s reach before you start is one of my best tips for stress-free baking. Ultimately, the right equipment helps you achieve that perfect, silky texture for your easy coconut cream pie recipe.
First, a good quality medium saucepan is non-negotiable for cooking the filling evenly without scorching. A whisk is your best friend for creating a lump-free custard. Additionally, an electric mixer makes quick work of the whipped cream topping, though a sturdy whisk and some elbow grease can work too. For the crust, a standard 9-inch pie plate is perfect. If you enjoy bar cookies, our chewy s’mores bars are another simple treat that uses basic baking pans.
Moreover, a wire cooling rack is essential for letting your crust cool completely before adding the filling. You’ll also need plastic wrap to press directly onto the custard surface, which prevents a skin from forming. A rubber spatula helps you scrape every last bit of filling into the crust. For recipes with similar prep steps, our guide to wonderful dessert recipes has plenty of ideas.
Let’s start from the bottom up with the foundation of our pie: the crust. A flaky, buttery crust provides the perfect textural contrast to the creamy filling. While I’m using a store-bought crust for convenience here, the baking method is crucial. Therefore, following these steps will guarantee a golden, crisp base that won’t get soggy.
Begin by preheating your oven according to the package directions for a pre-filled crust. Once hot, bake the crust until it’s evenly golden brown, which usually takes about 10 to 12 minutes. Keep a close eye on it to avoid over-browning. Then, transfer the hot crust directly to a wire rack. This step is vital; you must let it cool completely before adding the filling. A warm crust will cause the custard to become weepy.
Furthermore, pre-baking, or blind baking, creates a barrier that seals the crust, preventing the moist filling from making it soft. This technique ensures every bite has a satisfying crunch. For another dessert where the crust is key, our salted caramel apple bars feature a similar shortbread base.
This is the heart of the pie, where the magic truly happens. The process is straightforward, but patience and constant attention are your guides. The goal is a thick, smooth, and intensely coconutty custard. So, grab your whisk and let’s create that dreamy coconut cream pie with coconut milk.
First, in your saucepan, whisk together the sugar, cornstarch, and salt. This dry mix prevents the cornstarch from clumping when you add the liquids. Gradually whisk in the whole milk and the full can of coconut milk until the mixture is completely smooth. Then, place the pan over medium heat. Cook, stirring constantly with a whisk, until the mixture thickens and begins to bubble. This constant motion is the secret to a lump-free filling.
Once the filling bubbles, continue cooking and whisking for one full minute. This step is critical because it cooks the starchy flavor out of the cornstarch. The filling should coat the back of a spoon thickly. At this stage, you have a rich pastry cream base ready for the next step. For another recipe involving a cooked filling, our red velvet cinnamon rolls have a luxurious cream cheese frosting.
Tempering might sound fancy, but it’s a simple technique that prevents the eggs from scrambling when you add them to the hot filling. It’s the key to a velvety smooth texture. By slowly raising the temperature of the eggs, you create a stable emulsion. So, don’t be intimidated—it’s easier than you think!
First, lightly beat your egg yolks in a separate bowl. Then, slowly whisk about one cup of the hot milk mixture into the yolks. Pour it in a thin, steady stream while whisking the yolks continuously. This gradual addition gently warms the eggs. Once combined, you can pour the entire yolk mixture back into the saucepan with the remaining hot filling.
Return the saucepan to medium heat and cook, whisking constantly, for one more minute until the filling thickens significantly into a pudding. Remove it from the heat and immediately whisk in the butter, vanilla extract, and the cup of shredded coconut. The butter and vanilla add richness and depth, while the coconut provides delightful texture. Pour this glorious filling into your waiting, cooled crust.
The hard work is done, and now we need to let the pie set up properly. Chilling is not a step to rush; it’s what transforms the liquid custard into a sliceable pie. This waiting period allows the flavors to meld beautifully. Consequently, plan ahead to give your pie the time it deserves.
After smoothing the top of the filling, take a piece of plastic wrap and press it directly onto the surface. This simple act is the best way to prevent a rubbery skin from forming on your custard. Then, refrigerate the pie for at least 4 hours, though overnight is even better. The filling needs this time to become firm and cold all the way through.
A properly chilled pie will yield clean slices when cut. If you try to add the topping too soon, the whipped cream will sink, and the slices will be messy. For a dessert that also requires patience for setting, our fudgy chewy brownies need to cool completely for the perfect texture.
No Coconut Cream Pie is complete without a billowy cloud of freshly whipped cream on top. It adds a light, airy contrast to the dense, rich filling. While store-bought whipped topping is an option, homemade is infinitely superior in flavor and texture. So, let’s make a topping that’s worthy of your beautiful pie.
Start with a chilled bowl and chilled beaters or a whisk attachment—this helps the cream whip faster and increases volume. Pour the cold heavy cream into the bowl and beat on medium-high speed until soft peaks form. Soft peaks will hold their shape but droop slightly when the beaters are lifted. Then, add the confectioners’ sugar and continue beating until stiff peaks form. These peaks will stand straight up when the beaters are lifted.
While the cream is whipping, you can toast the extra shredded coconut for garnish. Spread it on a baking sheet and bake at 350°F for 5-7 minutes, stirring once, until it’s golden brown. Watch it closely, as it can burn quickly. The toasted coconut adds a wonderful nutty flavor and a beautiful visual appeal. For a recipe with a similar decorative touch, our maple donut bars feature a lovely glaze.
The moment of truth has arrived! It’s time to assemble the final product and serve your masterpiece. Presentation is part of the joy, so take a moment to make it look as good as it tastes. However, remember that a coconut cream pie is best enjoyed fresh, so plan your serving timing wisely.
Carefully remove the plastic wrap from the chilled pie. Either spread the whipped cream evenly over the filling with a spatula or pipe it on for a more elegant look. Generously sprinkle the toasted coconut over the whipped cream. For the cleanest slices, dip your sharp knife in hot water and wipe it dry between each cut. This method gives you picture-perfect slices every time.
This pie is best eaten the day it’s made. If you have leftovers, cover them loosely with plastic wrap or store them in an airtight container in the refrigerator for up to 2 days. Be aware that the crust may soften over time. Unfortunately, the pie does not freeze well, as the whipped cream topping and custard can become watery upon thawing. For a make-aight dessert that freezes beautifully, try our cinnamon roll sugar cookies.

Absolutely! You can easily make a gluten free coconut cream pie by using a certified gluten-free pre-made pie crust or by making your own with a gluten-free flour blend. The filling is naturally gluten-free, so simply swap the crust for a safe alternative.
Yes, a delicious vegan coconut cream pie is possible! Use a vegan pie crust, replace the dairy milk with more coconut or oat milk, use cornstarch or a vegan custard powder as a thickener instead of eggs, and top with whipped coconut cream.
For a coconut cream pie no bake version, use a graham cracker or cookie crust that doesn’t require baking. Then, prepare a simple filling with instant pudding mix, coconut milk, and whipped topping, chill until set. It’s quicker but has a different texture than the cooked custard.
Spread sweetened shredded coconut in a thin layer on a baking sheet. Bake at 350°F for 5-7 minutes, stirring once or twice, until it’s fragrant and golden brown. Watch it closely after the 5-minute mark, as it can burn very quickly.
Certainly! A graham cracker crust or a shortbread cookie crust both pair wonderfully with the coconut filling. Just press the crumb mixture into the pie plate and bake briefly to set it before adding the filling.
A runny filling is usually due to insufficient cooking time or not enough thickener. Make sure you cook the filling for the full minute after it bubbles, and measure your cornstarch accurately. Also, allow the pie to chill for the full 4 hours, or even overnight, to firm up completely.
Baking this Coconut Cream Pie is more than just following a recipe; it’s about creating a moment of pure joy and nostalgia. The combination of flaky crust, rich custard, and fluffy cream is a timeless celebration of flavor. I hope this guide gives you the confidence to create this stunning dessert for your family and friends. So, gather your ingredients, embrace the process, and get ready to receive plenty of compliments. Happy baking!

Welcome to Mac Recipes! I'm here to prove that amazing home-cooked meals don't need to be complicated. From weeknight dinners to weekend treats, I create recipes that fit into your busy life—delicious, doable, and always worth making.
More About Me