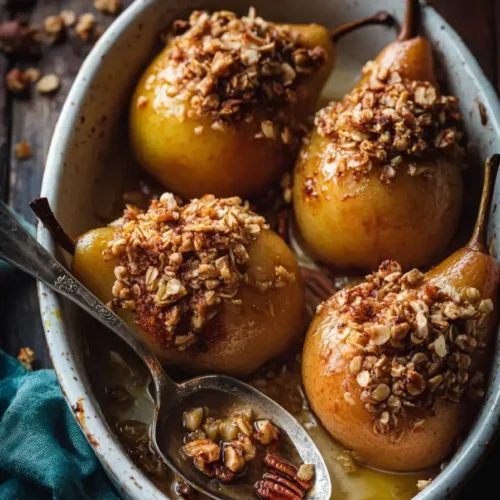
Honey Glazed Pears
This post may contain affiliate links.
Read our Disclaimer.
Leave a Comment ★★★★★
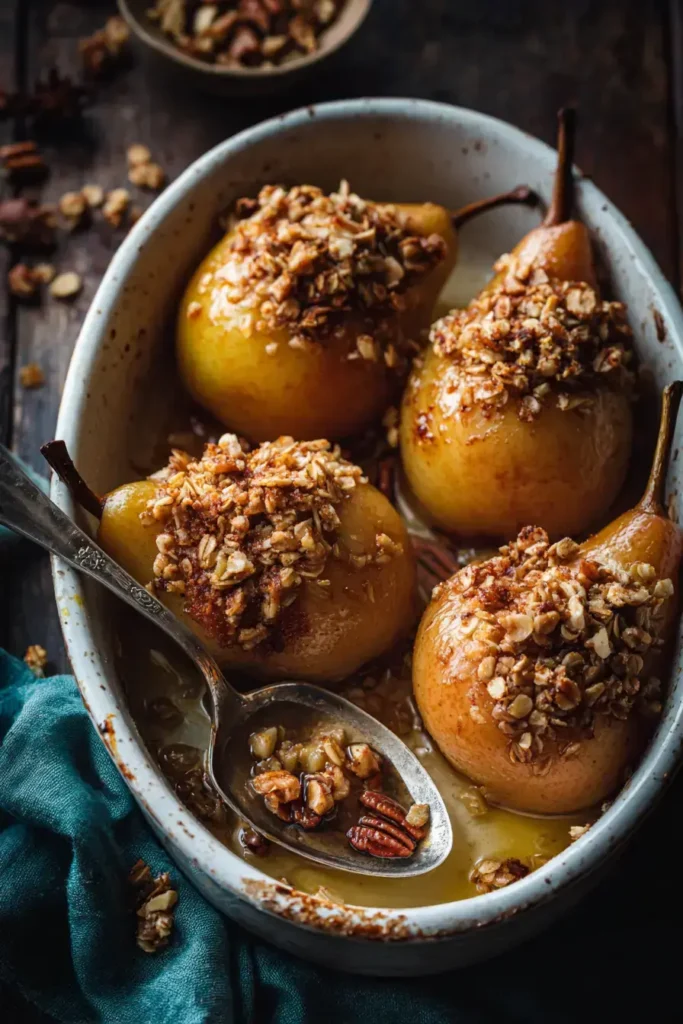
Craving a simple, elegant dessert that feels fancy but is incredibly easy? Baked Pears are your perfect solution, transforming humble fruit into a warm, spiced treat in under an hour. This recipe delivers bold flavors with zero fuss, using a handful of pantry staples for a globally inspired dessert that feels both cozy and sophisticated. You’ll love how the honey glaze caramelizes and the oat-pecan topping adds a delightful crunch. It’s a healthy, naturally sweetened option that’s perfect for a quick weeknight treat or for impressing dinner guests without any stress.


Let’s be real, sometimes you want a dessert that feels special but doesn’t keep you in the kitchen all night. I love this recipe because it respects your time. Honestly, you can go from prep to plate in about 45 minutes, with most of that being hands-off oven time. Your active effort is just 15 quick minutes of slicing and mixing.
Then, the Baked Pears roast for 25-30 minutes, filling your home with an incredible aroma. This is the perfect timeline for an easy weeknight treat or a last-minute dinner party dessert. Compared to more complex pastries, this is a total win for efficiency. For another fantastic hands-off recipe, check out my method for perfect oven-baked brown rice that pairs wonderfully with savory meals.
As a health-conscious cook, I always think about how to make recipes adaptable. This Baked Pears dessert is wonderfully flexible for various dietary preferences, especially if you’re sugar-conscious. The natural sweetness of the pears does a lot of the work, but you have smart options for the added sweeteners.
For a truly low-sugar version, you can replace the honey and brown sugar with a granulated sugar alternative like monk fruit or erythritol that measures 1:1 like sugar. Another great tip is to simply reduce the amount of honey by half and rely more on the warm spices for flavor. Portion control is also key for glycemic management; serving a single pear half with a dollop of Greek yogurt makes a satisfying, balanced treat.
After making these roasted pears countless times, I’ve picked up a few shortcuts that make them even better. First, don’t be afraid to play with spices. For an Italian twist, add a pinch of cardamom with the cinnamon. If you’re out of pecans, walnuts or almonds work beautifully too.
For the best texture, make sure your pears are firm, not mushy. A slightly under-ripe pear holds its structure perfectly. If you want to prep ahead, mix the dry streusel topping and keep it in a jar for a quick dessert later in the week. Leftovers reheat wonderfully in a toaster oven to recrisp the topping. This method is similar to how I keep crispy baked potatoes perfect for meal prep. For a different kind of cozy, stuffed vegetable, my roasted spaghetti squash is another great vessel for flavorful toppings.
This isn’t just a tasty dessert; it’s a nourishing one. Baked Pears are a fantastic source of dietary fiber, which is great for digestive health and helps you feel satisfied. Pears also provide a good amount of vitamin C and potassium. Using oats and nuts in the topping adds healthy fats, plant-based protein, and more fiber, making this a more balanced treat.
Compared to many desserts, this one is significantly lower in added sugars, especially if you tweak the sweeteners as mentioned earlier. The combination of fiber, healthy fats, and natural fruit sugars can help provide a more steady energy release. It’s a perfect example of how global ingredients can be both delicious and nutritious. For another fiber-rich side, explore my recipe for hearty roasted root vegetables. The cooking technique for caramelizing natural sugars is similar in my honey roasted carrots. You can learn more about the benefits of dietary fiber from authoritative sources like the Harvard T.H. Chan School of Public Health.
Want to lighten up this baked pear dessert even further? You absolutely can. Instead of butter, try brushing the pears with melted coconut oil or even a light olive oil for a dairy-free version. The flavor will be slightly different but still delicious.
You can also skip the streusel topping altogether for a super simple version. Just bake the pears with the spice glaze and finish with a sprinkle of toasted nuts after baking. For a nut-free option, use sunflower seeds or just double the oats in the topping. It’s all about making the recipe work for your kitchen and your preferences, a principle I also use in my versatile roasted sweet potatoes.
I love how this dish transitions from a simple preparation to a stunning presentation. The moment you pull the golden, fragrant Baked Pears from the oven is pure magic. For serving, I always think about contrast in temperature and texture. A scoop of vanilla bean ice cream melting over the warm fruit is classic and heavenly.
For a breakfast or brunch twist, serve a pear half alongside Greek yogurt and a drizzle of the pan juices. A dollop of lightly sweetened whipped cream or a sprinkle of extra cinnamon right before serving adds that final touch. These pears also pair beautifully with a cup of spiced chai tea or a glass of dessert wine for a truly elegant end to a meal. They remind me of the comforting simplicity of easy apple dumplings, but with a lighter feel. For another dessert that uses fruit and pastry in a gorgeous way, try my apple pie cinnamon rolls.

Even simple recipes can have pitfalls. Let’s tackle a few common ones so your oven-baked pears turn out perfect every time. First, using pears that are too ripe. This is the number one reason for mushy results. You want firm pears that will soften beautifully but still hold their shape.
Another mistake is not creating a deep enough well for the topping. Use a melon baller or a sturdy teaspoon to really scoop out the core and seeds, creating a generous cavity. This ensures every bite has the perfect ratio of tender pear to crunchy streusel. Also, don’t skip the step of brushing the entire pear with the glaze. This adds flavor and promotes beautiful caramelization. For other vegetable-focused recipes where technique is key, see how to avoid sogginess in my perfect baked salmon guide or get crispy skin on flaky baked cod. Understanding oven temperatures is crucial, which is explained well in resources from King Arthur Baking.
I remember the first time I made these, I was so impatient I used over-ripe pears. The result was more like pear sauce—still tasty, but not the elegant dessert I envisioned. Learning from that mistake made all the difference!
These Baked Pears are best enjoyed warm from the oven, but leftovers are still a treat. Once completely cooled, store them in an airtight container in the refrigerator for up to 3 days. The topping will soften, but the flavor deepens nicely.
To reheat, place them on a baking sheet in a 350°F oven for about 10 minutes, or until warmed through. This helps crisp up the topping again. I don’t recommend freezing the assembled pears, as the pear texture can become watery upon thawing. However, you can freeze the unbaked streusel topping mixture in a bag for future use, making your next batch even quicker. This make-ahead strategy is similar to what I do with components for honey roasted carrots and parsnips.
I truly hope you give this recipe a try. There’s something so satisfying about transforming a simple piece of fruit into a warm, spiced, and elegant dessert. It’s a recipe that proves you don’t need complicated techniques or rare ingredients to create something special. It’s become my go-to for unexpected guests, a cozy night in, or when I just want a wholesome sweet treat.
This method of baking fruit with a crunchy topping is a fantastic foundation. Once you master these Baked Pears, you can experiment with apples, peaches, or even plums. The process is wonderfully forgiving and the results are always rewarding. If you love this hands-off baking approach, you might also enjoy my classic apple dumpling recipe, my sweet honey roasted carrots and parsnips, or the simpler version of honey glazed carrots.
If you’re hooked on the idea of easy, elegant fruit desserts, you’re in the right place. Here are a few more reader-favorite recipes that bring big flavor with minimal fuss.
Simple Apple Dumplings – Flaky pastry wrapped around spiced apples, baked in a sweet syrup for the ultimate comfort food.
Cinnamon Roasted Sweet Potatoes – A savory-sweet side that caramelizes beautifully, using similar warm spice notes.
Firm varieties like Bosc, Anjou, or Concorde pears are best for Baked Pears. They hold their shape well during cooking and have a dense, sweet flesh that softens beautifully without turning to mush. Avoid very ripe or overly soft pears, as they will not provide the right texture for this dessert.
Absolutely. For a nut-free version of this baked pear dessert, simply omit the pecans. You can replace them with an equal amount of old-fashioned rolled oats, or add sunflower seeds for crunch. The streusel will still be deliciously crispy and flavorful with the butter, oats, and brown sugar.
Your Baked Pears are done when they are easily pierced with a fork or the tip of a knife, but not collapsing. The topping should be golden brown and crisp. This usually takes 25-30 minutes in a 375°F oven. The pears will continue to soften slightly as they cool in the baking dish.
Yes, for easy prep, you can assemble the oven-baked pears up to a few hours ahead. Halve and core the pears, mix the glaze and streusel topping separately, and store them covered in the fridge. Assemble in the baking dish just before you’re ready to bake them for the best texture.

Welcome to Mac Recipes! I'm here to prove that amazing home-cooked meals don't need to be complicated. From weeknight dinners to weekend treats, I create recipes that fit into your busy life—delicious, doable, and always worth making.
More About Me