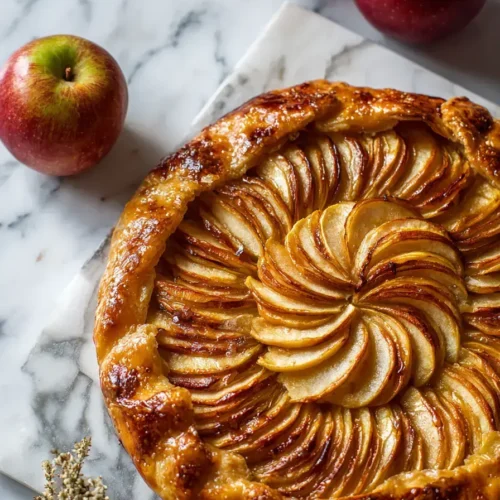
Homemade Apple Galette
This post may contain affiliate links.
Read our Disclaimer.
Leave a Comment ★★★★★
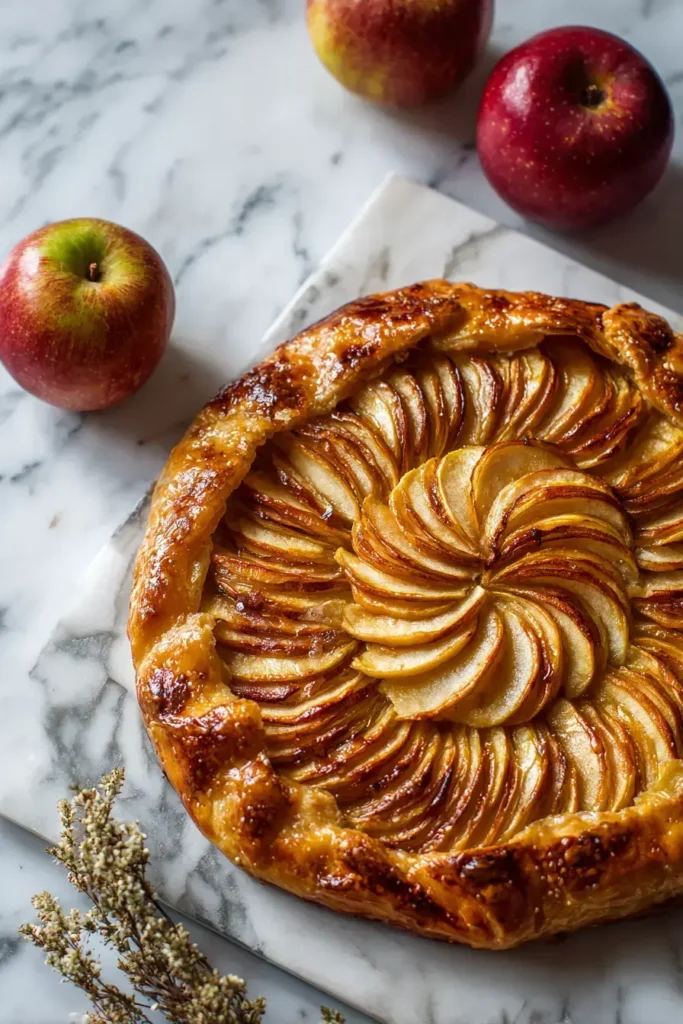
Making a beautiful Apple Galette is one of the simplest ways to bring a taste of French dessert elegance to your table. This rustic tart, with its free-form pastry and sweet, spiced apple filling, is a family secret I learned from my Nonna, who believed the best food is made with love and a little organized chaos.


Now, let’s talk about time. Some recipes feel rushed, but making this Apple Galette is a peaceful ritual.
With a prep time of about 45 minutes and a bake time of 40 minutes, you can have this gorgeous French dessert ready in just over an hour. It’s the perfect weekend project, don’t you think?
This is slower than my quick apple muffin recipe, but the result is so worth the extra love. The hands-on time is mostly relaxing—rolling the dough, arranging the apples—followed by the wonderful wait as the aroma fills your home.
In our family, we believe everyone should have a seat at the table. If you’re sugar-conscious or looking for a lower glycemic treat, this recipe is wonderfully adaptable.
You can easily reduce the sugar or use a natural sugar alternative like monk fruit sweetener. For a diabetic-friendly version, simply toss the apples with a touch of cinnamon and a sugar substitute that works for you. The beauty of this rustic tart is its flexibility.
After generations of making this easy pastry, I’ve learned a few secrets I’m delighted to share with you. These small touches make all the difference between good and extraordinary.
This fruit galette isn’t just a delight for the senses. It also offers some simple nutritional benefits, especially when you choose your ingredients wisely.
Apples are a good source of dietary fiber, which is great for digestion. Using whole ingredients like real butter and flour means you’re enjoying a treat without unnecessary additives.
Compared to many store-bought desserts, this Apple Galette is a more wholesome choice. For another dessert that balances indulgence and wholesomeness, my NYT original plum torte is a fantastic option. If you love the simplicity of fruit desserts, you might also enjoy a classic pineapple upside-down cake. For more on the health benefits of whole foods, you can always consult reputable sources like the Harvard T.H. Chan School of Public Health.
If you’re watching your sugar or fat intake, you can easily create a lighter version of this classic. It’s all about smart swaps that still deliver on flavor.
Try using whole wheat pastry flour for half of the all-purpose flour to add fiber. You can also reduce the butter in the crust slightly by substituting a few tablespoons with cold Greek yogurt. For the filling, the natural sweetness of the apples often means you can use less sugar. For another deliciously light bake, my classic banana bread can be made with similar healthy tweaks.
I remember my Nonna serving her galette still warm from the oven, the kitchen filled with the smell of cinnamon and baked apples. She would cut generous slices and serve them on her favorite floral plates.
For a truly decadent experience, serve a slice of this Apple Galette with a scoop of vanilla bean ice cream. The contrast of warm tart and cold cream is pure magic. A drizzle of warm caramel sauce takes it to another level. It’s the perfect finale to a family dinner. For another stunning dessert presentation, see how I serve my peach upside-down cakes.

Even the most passionate bakers can run into a hiccup. Let’s walk through a few common questions, so your rustic tart turns out perfectly.
Why is my crust soggy? This usually happens if the apples release too much liquid. The tablespoon of flour in the filling is crucial—it absorbs the juices. Also, make sure your oven is fully preheated for a strong initial burst of heat.
How can I prevent the filling from leaking? Ensure you leave a good 2-inch border when arranging the apples. When you fold the edges up, make sure there are no gaps or tears in the dough. A good seal keeps all that beautiful syrup inside. For more tips on perfecting fruit desserts, my guide to homemade apple pie covers similar techniques. Another common issue is a tough crust, which you can also encounter with cranberry orange bread if you over-mix the batter. For a deeper dive into the science of baking, King Arthur Baking has excellent resources.
I’ll never forget the first time I made this alone; I was so nervous I almost forgot the sugar! But that’s the beauty of cooking—we learn, we laugh, and we try again.
This Apple Galette is best enjoyed the day it’s made, but if you’re lucky enough to have leftovers, here’s how to keep them lovely.
Once completely cool, cover it loosely with foil or place it in an airtight container. It will keep at room temperature for up to two days. For longer storage, you can freeze the baked galette. Wrap it tightly in plastic wrap and then foil, and it will keep for up to three months. Thaw overnight in the refrigerator and reheat in a warm oven to bring back its glory. This method is similar to how I store my chocolate banana bread for later enjoyment.
I hope this recipe brings as much joy to your kitchen as it has to mine over the years. There’s something so satisfying about creating a beautiful, rustic tart from simple ingredients.
This Apple Galette is more than a dessert; it’s a tradition. It’s a way to slow down, to create something with your hands, and to share a piece of your heart with those you love. So, gather your ingredients, take a deep breath, and let’s bake. I promise, the result will be worth it. If you enjoy the process of rolling out dough, you might also love making my apple pie cinnamon rolls. For another fantastic apple treat, try these simple apple dumplings or the more classic apple dumpling recipe. And if you’re looking for another easy project, these easy apple dumplings are always a hit.
If this Apple Galette has inspired you, why stop there? Here are a few more beloved recipes from my kitchen that celebrate the simple beauty of fruit.
A galette is a free-form, rustic tart that is baked flat on a sheet pan without a pie dish. Unlike a double-crust pie, an Apple Galette has a single layer of dough that is folded up over the filling. This makes it much easier to assemble and gives it a beautifully casual appearance.
You want apples that hold their shape well during baking to avoid a mushy filling. Tart varieties like Granny Smith or Honeycrisp are perfect for this Apple Galette because they provide a nice flavor contrast to the sweet filling and won’t turn to applesauce in the oven.
Absolutely. You can prepare the dough disc, wrap it tightly in plastic, and refrigerate it for up to 2 days. You can also freeze it for up to 3 months. Just thaw it overnight in the refrigerator before rolling it out for your rustic tart.
A soggy bottom on your Apple Galette is usually caused by juicy apples or an undercooked crust. Tossing the apples with flour helps absorb excess juice. Also, make sure your oven is fully preheated and you bake it on a parchment-lined sheet to ensure even heat distribution for a crisp crust.

Welcome to Mac Recipes! I'm here to prove that amazing home-cooked meals don't need to be complicated. From weeknight dinners to weekend treats, I create recipes that fit into your busy life—delicious, doable, and always worth making.
More About Me