Easy Raspberry Cheesecake Bars
This post may contain affiliate links.
Read our Disclaimer.
Leave a Comment ★★★★★
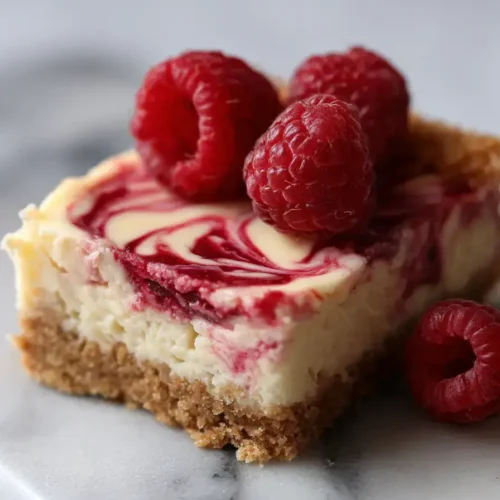
Making Raspberry Cheesecake Bars is like wrapping your family in a sweet, creamy hug, a tradition passed down from my Nonna that turns any day into a celebration. This easy dessert combines a buttery graham cracker crust with a luscious cream cheese filling swirled with vibrant raspberry jam and fresh fruit, creating the perfect bite every single time.


My dear, good things take time, but this recipe is wonderfully straightforward. With just 20 minutes of prep work and 40 minutes in the oven, you’ll have a stunning dessert in about an hour of active time. The secret is in the chilling—allowing the Raspberry Cheesecake Bars to rest in the refrigerator for at least four hours, or even overnight, is what gives them that firm, sliceable texture we love.
This hands-off time is perfect for preparing the rest of your meal, perhaps a comforting red velvet cake for a full dessert spread. The total time is well worth it for a cream cheese dessert that holds its shape and delivers incredible flavor in every bite.
In our family, we believe everyone should enjoy a sweet ending. If you’re mindful of sugar, you can still create a delicious, low-sugar version of these bars. For a diabetic-friendly option, consider using a natural sugar alternative like stevia or xylitol in both the crust and filling.
You could also reduce the amount of jam or opt for a no-sugar-added variety. Portion control is another wonderful way to enjoy this fruit cheesecake recipe while being sugar-conscious. A smaller square can be just as satisfying!
After years of making this traditional recipe, I’ve learned a few tricks that make all the difference. Here is my generational wisdom, from our table to yours.
While this is certainly a treat, these bars offer more than just empty calories. Raspberries are a wonderful source of dietary fiber and antioxidants. The cream cheese and eggs provide a good amount of protein, making this dessert a bit more satisfying.
Compared to many store-bought options, this homemade cheesecake bars recipe allows you to control the ingredients, which is a health benefit in itself. For another dessert that uses fruit beautifully, explore my cranberry crumble bars. If you’re looking for a festive variation, my Christmas cheesecake is always a hit. For more on the benefits of baking at home, you can read about it on reputable health sites.
If you want to indulge with a lighter conscience, a few simple swaps can make a difference. Using a pistachio cream kunafa cheesecake approach, you can incorporate nuts for added nutrients. For the crust, you could use almond flour instead of graham crackers for a gluten-free option.
Reducing the sugar by a quarter cup is often unnoticeable, especially with the natural sweetness from the raspberries. These small changes let you enjoy your dessert bars with peace of mind.
I love serving these bars on my grandmother’s porcelain platter. They are perfect just as they are, but a dollop of freshly whipped cream or a light dusting of powdered sugar makes them extra special. For a summer gathering, serve them alongside a glass of iced tea or a crisp prosecco.
These easy raspberry dessert bars are also fantastic for a holiday spread. They pair wonderfully with other festive treats like Christmas cheesecake bars or raspberry linzer cookies. The possibilities are endless!

Even with a simple recipe, a few missteps can happen. But don’t worry, I’m here to guide you. The most common question I get is, “Why are my cheesecake bars cracked?” This usually happens from overmixing the batter or a sudden temperature change.
Another issue is a soggy crust. To prevent this, make sure you press the crust mixture firmly into the pan and pre-bake it as directed. If you love the combination of cinnamon and cheesecake, my churro cheesecake has tips for a perfect crust. Also, using cold ingredients is a surefire way to get a lumpy filling instead of the smooth cream cheese dessert we want. For a no-bake option that avoids the oven entirely, consider a egg nog cheesecake style. Remember, patience is the secret ingredient your grandmother always talked about.
Nonna taught me that good food is meant to be savored, not wasted. To store your Raspberry Cheesecake Bars, place them in an airtight container in the refrigerator where they will keep for up to 5 days. For longer storage, these bars freeze exceptionally well.
Wrap them individually in plastic wrap and then place them in a freezer bag. They’ll keep for up to 2 months. Thaw overnight in the refrigerator for the best texture. For another bar that stores beautifully, you might enjoy my pecan pie bars.
I hope this recipe brings as much joy to your home as it has to mine. There is nothing quite like the feeling of sharing a dessert made with love. This is more than just a cheesecake bars recipe; it’s a connection to tradition, a moment of sweetness in a busy world.
If you enjoy this, you might also love exploring other bar recipes like s’mores bars or a festive Christmas cheesecakes collection. For a different take on a cream cheese dessert, my cranberry cream cheese bread is a wonderful breakfast treat. And for the ultimate indulgence, don’t forget the purple velvet cake. So, preheat your oven, gather your ingredients, and create something beautiful. I promise these Raspberry Cheesecake Bars will become a new family favorite.
If you loved this recipe, your sweet tooth adventure is just beginning. Here are a few more irresistible bar recipes that are perfect for any occasion.
Yes, you can use frozen raspberries, but it’s best to thaw and drain them completely first to avoid adding extra moisture to your Raspberry Cheesecake Bars. Pat them dry with a paper towel before adding them to the filling.
The edges should look set, but the center will still have a slight jiggle when you gently shake the pan. The top will appear dry, not wet. Remember, the bars will continue to firm up as they chill.
Absolutely! Simply use gluten-free graham crackers or a gluten-free cookie of your choice for the crust. The filling for these gluten-free cheesecake bars is naturally gluten-free, making it an easy swap.
Cracking usually happens from overmixing the batter (which incorporates too much air) or from the cheesecake cooling too quickly. Avoid opening the oven door during baking and allow the bars to cool gradually in the oven with the door slightly ajar.

Welcome to Mac Recipes! I'm here to prove that amazing home-cooked meals don't need to be complicated. From weeknight dinners to weekend treats, I create recipes that fit into your busy life—delicious, doable, and always worth making.
More About Me