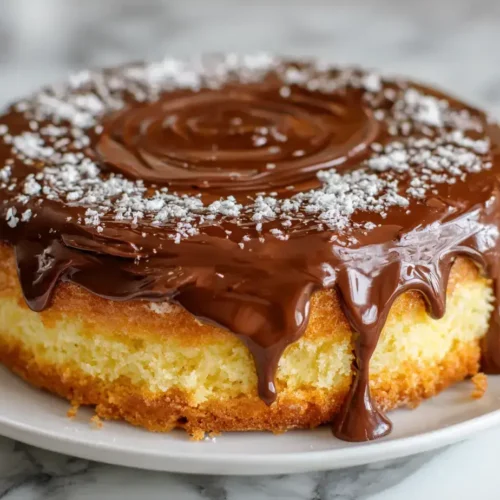
Pastry Cream Boston Cream Pie
This post may contain affiliate links.
Read our Disclaimer.
Leave a Comment ★★★★★
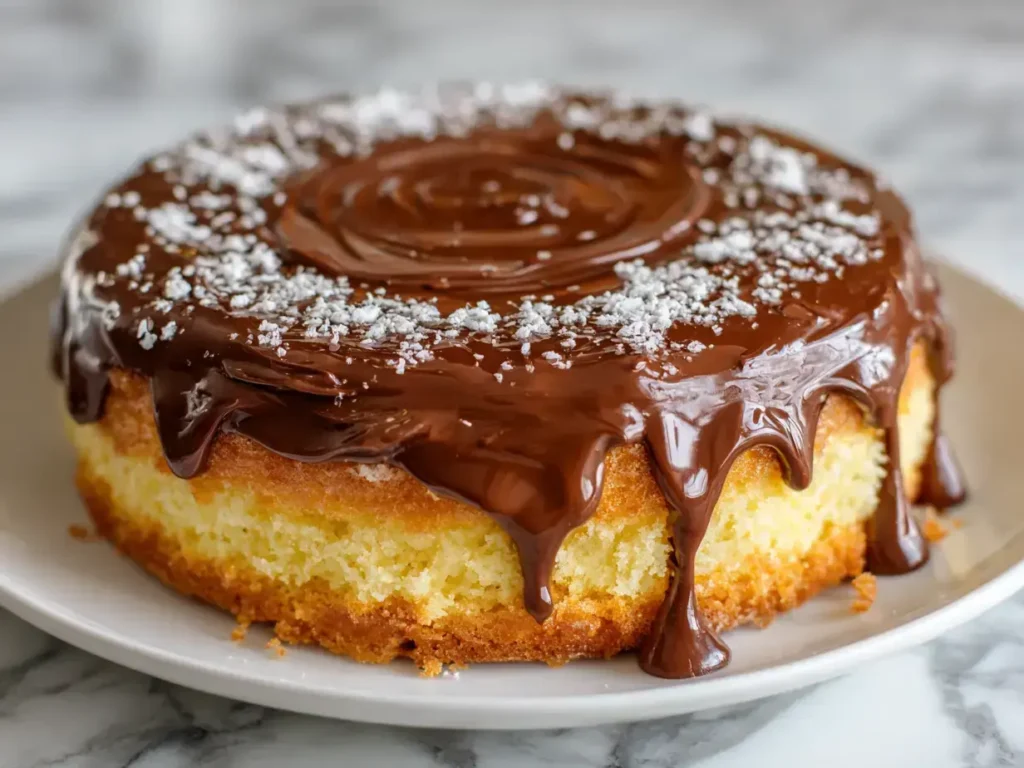
Is there anything more comforting than a classic American dessert? As a food blogger who grew up in the heart of New England, I have a particular soft spot for the legendary Boston Cream Pie. This iconic treat, with its tender cake layers, rich custard filling, and glossy chocolate glaze, feels like a warm hug from the past. Despite its name, it’s truly a cake, and making it from scratch is a rewarding baking project that fills your kitchen with the most wonderful aromas.

My goal today is to guide you through creating the absolute best Boston Cream Pie right in your own kitchen. We will cover everything from its fascinating history to the simple, step-by-step process. So, preheat your oven and grab your favorite mixing bowl—it’s time to bake a piece of history!
Table of Contents
Every great dessert has a story, and the Boston Cream Pie is no exception. Its origins are deeply rooted in 19th-century New England, a time when baking powder revolutionized home baking. Interestingly, the name “pie” likely stuck because cakes were often baked in pie tins back then. This dessert became so beloved that it was officially declared the state dessert of Massachusetts in 1996!
The story goes that the Boston Cream Pie we know and love was first created at Boston’s famous Parker House Hotel in the 1850s. A French chef named Augustine Francois Anezin is credited with combining a sponge cake, vanilla custard, and a chocolate glaze. This creation was a sensation, quickly moving from the hotel’s menu into the hearts of home bakers across the country. It’s a testament to how simple, quality ingredients can create something timeless.
This is the most common question I get! The confusion stems from the pans used. In the mid-1800s, home kitchens didn’t always have specialized cake pans. Instead, cooks used what they had: simple, shallow pie plates. So, a cake baked in a pie tin was often called a “pie.” The name persisted even after dedicated cake pans became standard. Other traditional New England desserts have similar charming quirks, making baking history so much fun to explore through recipes.
Creating an authentic homemade Boston Cream Pie starts with quality ingredients. Using fresh, simple components makes all the difference in achieving that classic flavor and texture. I always recommend gathering everything before you start—a practice called “mise en place”—to make the baking process smooth and enjoyable.
For the cake layers, all-purpose flour provides the perfect structure—it’s not too heavy, not too light. I always use unbleached flour for the best results. The baking powder is crucial for giving the cake its lovely rise. Make sure your baking powder is fresh; an old canister can lead to a dense cake. If you’re looking for another recipe that uses these pantry staples beautifully, check out my cinnamon roll sugar cookies.
This is my number one tip for a perfect Boston Cream Pie cake! Room temperature butter, eggs, and milk incorporate more easily, creating a smooth, emulsified batter that bakes up evenly. Cold ingredients can cause the batter to curdle, resulting in a tougher texture. Simply take your dairy and eggs out of the fridge about an hour before you begin baking. This small step is a giant leap towards a flawless Boston cream cake.
You don’t need a professional bakery’s worth of equipment to make a stunning Boston Cream Pie. A few key tools will set you up for success. Having the right equipment makes the process more efficient and helps ensure your dessert turns out perfectly every single time.
Two 9-inch round cake pans are essential. I prefer light-colored aluminum pans because they conduct heat evenly, preventing the edges from over-browning. An electric hand mixer or a stand mixer will save you time and arm-ache when creaming the butter and sugar. For the custard, a sturdy medium saucepan and a good whisk are your best friends. A wire cooling rack is also non-negotiable for allowing the cakes to cool completely before assembly.
A few other items can make your life easier. A kitchen scale guarantees precise measurements for the most consistent results. A flexible spatula helps you scrape every bit of batter out of the bowl and spread the custard filling recipe evenly. An instant-read thermometer takes the guesswork out of tempering the eggs for the pastry cream. And of course, a sharp knife for leveling the cake tops and a offset spatula for frosting are wonderful to have. For more bar-style desserts that use similar tools, my s’mores bars are a family favorite.
Now for the fun part—bringing our easy Boston cream pie to life! This process is broken down into three main parts: baking the cake, preparing the pastry cream, and making the glaze. Follow these steps carefully, and you’ll have a show-stopping dessert that’s worth every minute.
Start by preheating your oven to 350°F (175°C). Properly prepare your cake pans by greasing them with butter and lightly dusting with flour. This prevents sticking and helps the cakes release cleanly. In a medium bowl, whisk together your dry ingredients—flour, baking powder, and salt. In a larger bowl, cream the softened butter and sugar until the mixture is pale and fluffy. This step incorporates air, which is key for a light crumb. Add the eggs one at a time, followed by the vanilla. Then, alternate adding the dry ingredients and the milk, beginning and ending with the flour. Mix just until combined to avoid overworking the gluten. Divide the batter evenly between the pans and bake for 25-30 minutes.
Once the cakes are completely cool, it’s time for assembly. Place one cake layer on your serving plate. Give the chilled pastry cream a good stir to make it smooth and spreadable. Spread it evenly over the first layer, leaving a small border around the edge to prevent it from squishing out when you add the top layer. Gently place the second cake layer on top. Now, pour the warm chocolate ganache frosting over the center of the cake. Use an offset spatula or the back of a spoon to gently guide the glaze to the edges, allowing it to drip down the sides decoratively. For another decadent chocolate experience, my monster cookie brownies are a guaranteed hit.
The heart of any great Boston Cream Pie is its luxurious custard filling. This pastry cream recipe might seem intimidating, but it’s quite simple once you understand the technique. The key is patience and constant attention.
Tempering is the most critical step for a smooth, lump-free custard. You slowly raise the temperature of the egg yolks by gradually whisking in a small amount of the hot milk mixture. This prevents the eggs from scrambling when you add them back to the hot saucepan. Whisk continuously while you do this! Once tempered, you can pour the egg mixture back into the pan with the rest of the hot milk. Continue cooking over medium heat, stirring constantly, until the custard thickens noticeably.
The biggest mistake is rushing the process or cooking over too high a heat, which can cause curdling. If you see small lumps starting to form, you can often save the custard by immediately removing it from the heat and blending it briefly with an immersion blender. Once the custard is thick, immediately transfer it to a bowl and press plastic wrap directly onto the surface. This prevents a skin from forming. Chilling it for at least two hours allows it to set completely. This creamy filling is just as versatile as the one in my popular red velvet cinnamon rolls.
That shiny, rich chocolate topping is the crowning glory of the Boston Cream Pie. This chocolate ganache frosting is incredibly simple, requiring only two ingredients and a few minutes of your time.
For the best flavor and texture, use a good-quality semisweet chocolate. You can use chocolate bars chopped finely or high-quality chocolate chips. The quality of the chocolate directly impacts the taste of your glaze. Semisweet chocolate provides the ideal balance between sweetness and deep chocolate flavor, complementing the cake and custard without overwhelming them.
The method is straightforward: heat the cream until it simmers, then pour it over the chopped chocolate. Let it sit for a few minutes to melt the chocolate, then whisk until smooth. The glaze should be pourable but not too thin. If it seems thick, you can add a teaspoon more of warm cream. Pour it over the assembled cake while it’s still warm for those beautiful, elegant drips down the sides. For a different take on a chocolate-topped dessert, my fudgy chewy brownies feature a similar glossy finish.
Your beautiful Boston Cream Pie is ready! Now, let’s talk about how to serve and store it to maintain its incredible texture and flavor. A little care here ensures every slice is as perfect as the first.
For the neatest slices, use a long, sharp knife dipped in hot water. Wipe the knife clean between each cut. This technique glides through the layers and the set chocolate glaze without tearing the delicate cake. The pie is best served slightly chilled, as the cool custard contrasts wonderfully with the soft cake and firm chocolate. It’s a stunning dessert for any occasion, from a weeknight treat to a holiday celebration.

Because of the dairy-based custard, Boston Cream Pie must be stored in the refrigerator. Cover it loosely with plastic wrap or place it in a cake carrier. It will keep well for up to 3 days. The cake may soften a bit more over time, but it will still be delicious. I do not recommend freezing the assembled pie, as the custard can become watery upon thawing. You can, however, freeze the unfilled cake layers separately for up to a month. For a dessert that stores beautifully, my chewy lemon cookies are a great option.
Once you’ve mastered the classic Boston Cream Pie, it’s fun to get creative! These variations add a personal twist while honoring the dessert’s beloved structure.
Infuse the milk for the pastry cream with a citrus zest or a cinnamon stick for a warm, spiced flavor. You can also add a tablespoon of rum or bourbon to the cooled custard for an adult twist. For the cake, try swapping the vanilla extract for almond extract. It gives the cake a wonderful, nostalgic flavor that pairs beautifully with the chocolate and custard. If you enjoy playing with flavors, you’ll love my maple donut bars, which capture the essence of a Boston cream doughnut in bar form.
While the chocolate glaze is traditional, you can top your cake with a dark chocolate ganache for a deeper flavor or a milk chocolate one for a sweeter finish. For a special occasion, garnish with chocolate shavings, fresh berries, or a dusting of powdered sugar. You can even make individual-sized Boston cream pies by baking the cake in a sheet pan and using a round cutter to create small cakes. This is a fantastic option for parties. For another impressive individual dessert, try my peach upside-down cakes.
Absolutely! You can bake the cake layers a day in advance, wrap them tightly in plastic wrap, and store them at room temperature. The pastry cream can be made up to 2 days ahead. Assemble the pie the day you plan to serve it for the best texture.
Don’t worry! You can often fix a slightly lumpy custard by straining it through a fine-mesh sieve into a clean bowl immediately after cooking. Press it through with a spatula. For more stubborn lumps, a quick blitz with an immersion blender will make it smooth again.
A Boston Cream Pie is a cake with custard filling and a chocolate glaze. A chocolate cream pie typically has a pastry or cookie crust filled with chocolate pudding or mousse, and is topped with whipped cream.
While homemade is always best for flavor, you can use a yellow cake mix to save time. Be sure to follow the package directions for two 9-inch round layers. The real magic, however, comes from the homemade pastry cream and glaze.
This usually means the glaze was too thick or too cool. The glaze should be warm and fluid when you pour it. If it’s too thick, gently reheat it with a splash of warm cream. Practice makes perfect!
Yes! You can use a 1:1 gluten-free all-purpose flour blend for both the cake and the pastry cream. Just ensure the blend contains xanthan gum, which helps with structure.
Baking this classic Boston Cream Pie is more than just following a recipe; it’s about creating a piece of American culinary history in your kitchen. The combination of soft cake, velvety custard, and rich chocolate is truly timeless. Remember the key steps: room temperature ingredients for the cake, patience when tempering the custard, and a warm, pourable glaze for that perfect finish. I hope this recipe brings as much joy to your family as it has to mine over the years. Happy baking!

Welcome to Mac Recipes! I'm here to prove that amazing home-cooked meals don't need to be complicated. From weeknight dinners to weekend treats, I create recipes that fit into your busy life—delicious, doable, and always worth making.
More About Me