Stuffed Bell Peppers With Parsley
This post may contain affiliate links.
Read our Disclaimer.
Leave a Comment ★★★★★
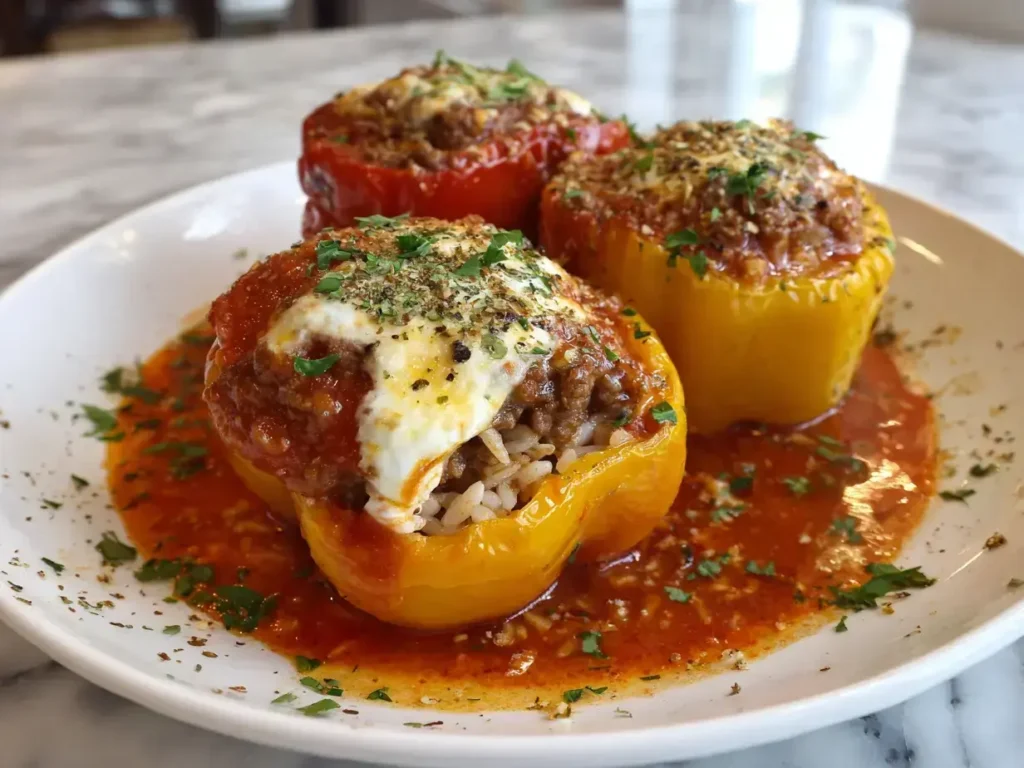
There is something profoundly comforting about a classic dish like Stuffed Bell Peppers. It’s a meal that always reminds me of Sunday dinners at my grandmother’s house in the Midwest, where the aroma of baking peppers and savory filling would fill the entire home. In fact, this recipe for Stuffed Bell Peppers is my go-to when I want to create that same warm, welcoming feeling for my own family. It combines juicy ground beef, fluffy rice, and a rich tomato sauce, all tucked into a tender bell pepper and topped with bubbling mozzarella cheese. Best of all, this recipe is incredibly straightforward, proving that you don’t need complicated techniques to make a truly memorable meal. It’s the perfect balance of hearty and healthy, and I’m so excited to share my version with you today.

Table of Contents
This recipe for Stuffed Bell Peppers is a timeless classic for so many wonderful reasons. First and foremost, it delivers incredible flavor with simple, wholesome ingredients you likely already have in your pantry. Furthermore, it’s a complete meal in one neat package, which makes cleanup an absolute breeze. The combination of savory ground beef, aromatic rice, and tangy tomato sauce creates a symphony of taste that appeals to both kids and adults alike. Ultimately, this dish is pure comfort food that feels both special and utterly familiar.
Let’s face it, life gets hectic. That’s why these easy Stuffed Bell Peppers are a weeknight lifesaver. You can prepare the filling ahead of time and simply assemble and bake when you get home. The active prep time is under 30 minutes, and then the oven does most of the work. Meanwhile, you can relax or tackle other tasks. Consequently, you get a hot, home-cooked dinner on the table without spending all evening in the kitchen. It’s a fantastic alternative to my speedy Cajun Sausage and Rice Skillet when you want something equally satisfying but with a different flavor profile.
When you’re looking for healthy Stuffed Peppers, this recipe is a wonderful choice. Bell peppers are packed with vitamins A and C, and using lean ground beef keeps the dish light. Additionally, the rice provides sustained energy. You control the sodium and can easily incorporate more vegetables into the filling if you wish. It’s a well-rounded dish that satisfies your hunger without weighing you down, making it a meal you can feel good about serving your family any night of the week.
Great dishes start with great ingredients, and these classic Stuffed Peppers are no exception. Each component plays a vital role in building the final flavor and texture. For instance, the lean ground beef provides a rich, meaty base, while the cooked rice soaks up all the delicious juices. I find that using quality ingredients makes a noticeable difference in the final result. So, let’s break down what you’ll need to create this hearty and delicious meal.
The heart of any great Stuffed Bell Peppers recipe is, of course, the filling. I prefer using 90/10 lean ground beef because it offers plenty of flavor without excess grease. The finely chopped yellow onion and fresh minced garlic create an aromatic foundation that makes your kitchen smell amazing. Don’t forget the dried oregano; it adds that classic herbal note that pairs perfectly with the tomato sauce. For the rice, I always use pre-cooked long-grain white rice, which helps keep the texture perfect and prevents it from becoming mushy during baking.
For the peppers themselves, you have flexibility. Any color of bell pepper works beautifully, so choose your favorite! Green peppers offer a slightly more bitter taste, while red, yellow, and orange are sweeter. Using a mix of colors makes for a stunning presentation. As for the cheese, shredded mozzarella is my top pick because it melts into a wonderfully gooey, golden blanket. It’s the same cheese that makes my Pepperoni Pizza Burgers so irresistibly cheesy. Finally, a sprinkle of fresh parsley at the end adds a pop of color and a fresh flavor contrast.
Selecting the right peppers is a simple step that can really elevate your final dish. You want peppers that are sturdy enough to hold their shape during parboiling and baking, yet tender enough to eat comfortably. I always look for peppers that feel heavy for their size with firm, glossy skin. Avoid any peppers with soft spots or wrinkles. Additionally, the shape is important for creating a stable base so your stuffed peppers don’t tip over in the baking dish.
The color of the bell pepper you choose will influence the overall flavor of your Stuffed Bell Peppers. Green peppers are harvested early and have a more pronounced, slightly bitter flavor that stands up well to the savory filling. Conversely, red, yellow, and orange peppers are ripened longer, making them much sweeter and milder. I love using a combination of colors not just for a beautiful presentation, but also to offer a variety of tastes in one meal. It’s a simple trick that makes dinner feel extra special.
Properly preparing your peppers is crucial. First, slice off the tops evenly and remove all the seeds and white membranes inside. This creates a clean cavity for the filling. Next, the parboiling step is non-negotiable for the best baked bell peppers with rice. It softens the peppers just enough so they become perfectly tender during baking without turning to mush. Just five minutes in boiling water does the trick. Remember to drain them upside down to remove all excess water; this prevents a soggy filling and ensures your Stuffed Bell Peppers have the ideal texture.
Now for the fun part—bringing it all together! Following these steps carefully will guarantee perfect Stuffed Bell Peppers every single time. First, preheat your oven to 350°F (175°C). Then, bring a large pot of salted water to a boil. While you wait, prepare your peppers by slicing off the tops and removing the seeds. This initial setup makes the entire process flow smoothly. I always recommend reading through all the instructions once before you begin, much like I do with my Garlic Parmesan Chicken Meatloaf recipe, to ensure a stress-free cooking experience.
While the peppers parboil, start on the filling. Heat a large skillet over medium-high heat and add the ground beef, onion, and garlic. Cook this mixture, breaking up the beef with a spoon, until the meat is nicely browned and the onions are soft. Then, drain off any excess fat to keep your filling from being greasy. Next, stir in the cooked rice, salt, pepper, oregano, and 3/4 cup of the tomato sauce. Let this cook together for a couple of minutes so the rice absorbs all those wonderful flavors. The aroma at this stage is absolutely heavenly!
Once your filling is ready and your peppers are parboiled and drained, it’s time to assemble. Arrange the peppers upright in a baking dish. Spoon the beef and rice mixture into each pepper, pressing down gently to pack it in. Then, top each one with the remaining tomato sauce and a generous handful of shredded mozzarella. Cover the dish with foil and bake for 25 minutes. Finally, remove the foil and bake for another 10 minutes, or until the cheese is beautifully golden and bubbly. Let them rest for five minutes before serving—this allows the flavors to settle and makes them easier to handle.
One of the best things about Stuffed Bell Peppers is their versatility. While the classic version is divine, you can easily adapt the filling to suit different dietary needs or simply to mix things up. For example, you can create delicious vegetarian stuffed peppers by swapping the ground beef for a plant-based alternative or a mixture of beans and corn. Alternatively, you can take the flavors in a completely different direction for a fun twist on taco night. The basic method remains the same, making it easy to get creative.
For a taste of Italy, try making Italian Stuffed Peppers. Simply add a teaspoon of Italian seasoning to the filling and use a marinara sauce instead of plain tomato sauce. You could even mix in some chopped spinach and swap the mozzarella for a blend of Parmesan and provolone. Conversely, for Mexican Stuffed Peppers, use seasoned ground beef with chili powder and cumin, mix in some black beans and corn, and top with a spicy enchilada sauce and a blend of cheddar and Monterey Jack cheese. It’s like a warm, comforting burrito in a pepper!
If you’re short on time, these can be quick Stuffed Peppers. Use pre-cooked rice from the fridge or a pouch, and consider browning the beef ahead of time. For a lower-carb option, you can replace the rice with cauliflower rice; just be sure to sauté it first to remove excess moisture. If you love the cheesy element of this dish, you’ll also adore my Cheesy Garlic Bliss Bread as a side. The possibilities are truly endless, allowing you to customize this dish to become your new family favorite.
Achieving the ideal texture for your peppers is key to the best Stuffed Peppers recipe. You want the pepper shell to be tender and easy to cut with a fork, but not so soft that it loses its structure and collapses. The secret lies in the two-step cooking process: parboiling and then baking. This method gives you absolute control over the final texture. Additionally, the resting period after baking is crucial. It allows the intense heat to distribute evenly and the filling to set slightly, making the peppers much easier to serve.
Never skip the parboiling step! Plunging the hollowed peppers into boiling water for five minutes is what ensures they cook through evenly in the oven. Without this step, the pepper might still be unpleasantly crunchy after baking, while the filling could become dry from overcooking. Think of parboiling as giving the peppers a head start. It’s a simple technique that makes all the difference, similar to how blanching vegetables helps preserve their color and texture in other dishes.
The baking process is just as important. Covering the dish with foil for the first 25 minutes creates a steamy environment that gently cooks the peppers and heats the filling through without browning the cheese too early. Then, removing the foil for the final 10 minutes allows the cheese to achieve that perfect, irresistible golden-brown crust. If you love that cheesy, baked topping, you might also enjoy the technique used in my Cheesy Garlic Rolls. Keep an eye on them during the last few minutes to prevent the cheese from burning.
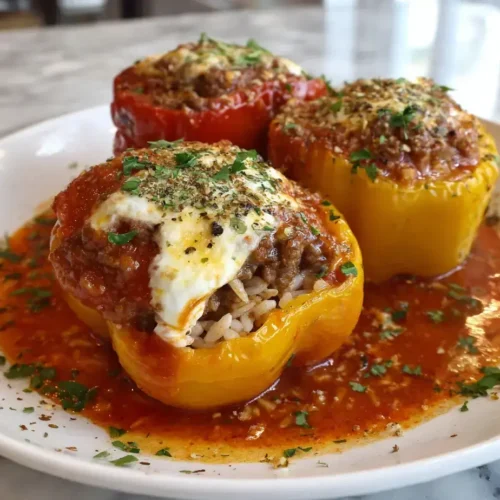
Presenting your Stuffed Bell Peppers beautifully makes the meal feel even more special. I love serving them right in the baking dish for a rustic, family-style presentation that encourages everyone to dig in. Alternatively, you can plate each pepper individually for a more elegant look. A sprinkle of fresh chopped parsley not only adds a burst of flavor but also a lovely contrast against the red tomato sauce and melted cheese. The goal is to create a meal that delights the eyes as much as the palate.
These Stuffed Bell Peppers are a complete meal on their own, but a simple side dish can round out the dinner perfectly. A crisp green salad with a light vinaigrette provides a refreshing contrast to the hearty peppers. For a carb-loving crowd, a slice of crusty bread is ideal for soaking up any extra tomato sauce in the dish. My Irresistible Olive Oil Bread Dip would be a fantastic accompaniment. If you’re serving a crowd, a simple pasta like Creamy Garlic Pasta on the side is always a hit.

For individual plating, place one pepper in the center of a shallow bowl or plate. You can slice it in half vertically to showcase the beautiful layers of the filling inside—this is always a showstopper. Spoon a little of the extra sauce from the baking dish around the base of the pepper. Finally, add your chosen side dish next to it. This thoughtful presentation turns a simple weeknight dinner into a restaurant-quality experience that your family will love.
Fortunately, these Stuffed Bell Peppers make fantastic leftovers! The flavors often meld and become even more delicious the next day. Proper storage is key to maintaining their quality. Always allow the peppers to cool completely to room temperature before storing them. Never put a hot baking dish directly into the refrigerator, as this can create condensation and make the peppers soggy. Instead, transfer them to an airtight container once they’ve cooled. This simple step ensures your leftovers taste just as good as the first time.
Stored properly in the refrigerator, your leftover Stuffed Bell Peppers will keep for 3-4 days. For longer storage, they freeze exceptionally well. To freeze, wrap each cooled pepper individually in plastic wrap and then place them all in a large freezer bag. They can be frozen for up to 3 months. This method is perfect for making a double batch and having a ready-made meal for a future busy night. Just thaw overnight in the refrigerator before reheating.
The best way to reheat Stuffed Bell Peppers is in the oven to retain their texture. Preheat your oven to 350°F (175°C), place the peppers in an oven-safe dish, cover with foil, and heat for 15-20 minutes, or until hot all the way through. If you’re in a hurry, the microwave works, but it can make the pepper a bit softer. For microwave reheating, place a pepper on a microwave-safe plate, cover it loosely with a damp paper towel to keep it from drying out, and heat on high for 1-2 minutes. Now you can enjoy your delicious creation all over again!
Absolutely! You can assemble the Stuffed Bell Peppers completely a day in advance. Simply cover the baking dish tightly with plastic wrap or foil and refrigerate. When you’re ready to bake, you may need to add a few extra minutes to the baking time since you’ll be starting with a cold dish.
Brown rice, quinoa, or even cauliflower rice are excellent substitutes. If using brown rice or quinoa, ensure it is fully cooked before adding it to the filling. For cauliflower rice, sauté it first to remove excess moisture so your filling isn’t watery.
The key is to drain the parboiled peppers very well upside down on paper towels. Also, avoid overfilling the baking dish with extra tomato sauce. Baking them uncovered for the final 10 minutes also helps to evaporate any excess liquid.
Yes, ground turkey, chicken, pork, or even a plant-based ground meat alternative work wonderfully. The cooking method remains the same. Just be sure to cook the meat thoroughly before mixing it with the other filling ingredients.
I highly recommend it for the best texture. Skipping this step often results in peppers that are too firm. If you’re short on time, you can skip it, but you will need to extend the baking time by about 15-20 minutes, covered, to soften the peppers.
Thaw them overnight in the refrigerator. Then, reheat in a 350°F oven, covered with foil, for 25-30 minutes, or until heated through. This method helps them retain their texture much better than microwaving.
I hope this recipe for Stuffed Bell Peppers brings as much joy to your table as it has to mine over the years. It’s more than just a recipe; it’s a vessel for creating warm memories with loved ones. Whether you stick with the classic version or try one of the fun variations, the result is always a satisfying, home-cooked meal that comforts and nourishes. So gather your ingredients, preheat your oven, and get ready to enjoy one of the most beloved comfort foods around. Happy cooking!

Welcome to Mac Recipes! I'm here to prove that amazing home-cooked meals don't need to be complicated. From weeknight dinners to weekend treats, I create recipes that fit into your busy life—delicious, doable, and always worth making.
More About Me