Quick Angel Food Cake
This post may contain affiliate links.
Read our Disclaimer.
Leave a Comment ★★★★★
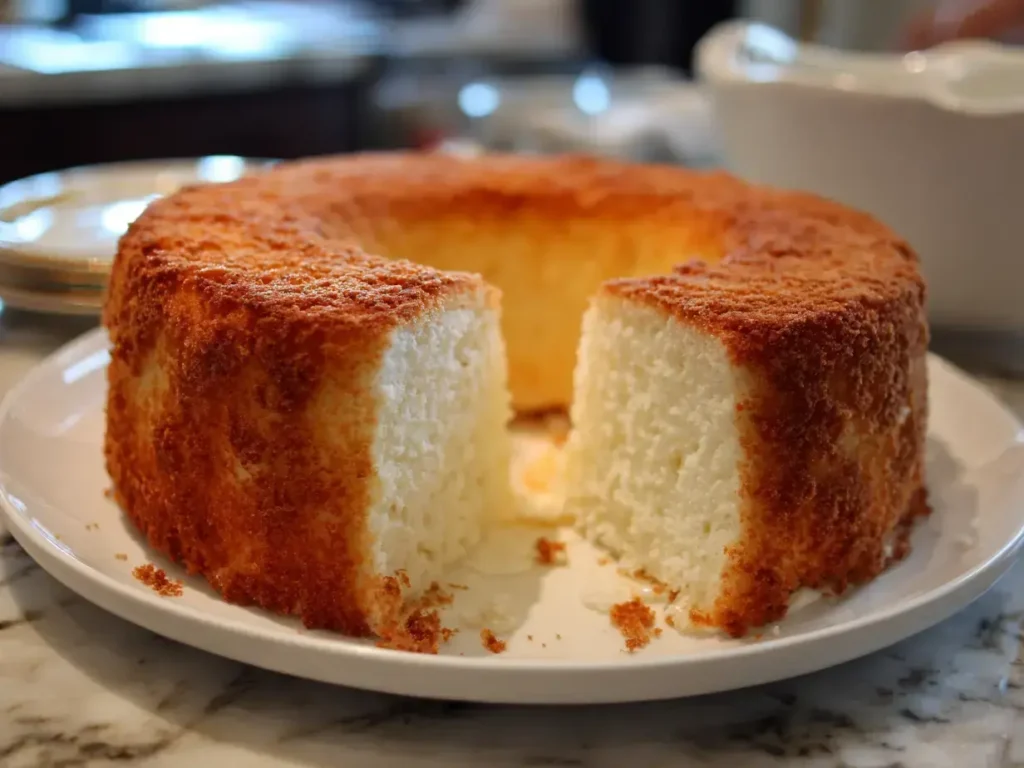
Hello, my dear friends. Is there anything quite as heavenly as a perfect slice of homemade angel food cake? It reminds me so much of long summer afternoons on my grandmother’s porch, where a light and fluffy angel food cake was always the star of the show. This classic dessert, with its cloud-like texture and delicate sweetness, feels like a warm hug. Today, I want to share my treasured recipe for the best Angel Food Cake you will ever make. We will walk through every simple step together, from selecting the right pan to topping it with fresh strawberries. So, tie on your favorite apron, and let’s create some magic in your kitchen.

Table of Contents
This particular Angel Food Cake recipe has been my go-to for decades. It consistently delivers that moist Angel Food Cake texture we all crave. The secret lies in the meticulous process. For instance, sifting the dry ingredients multiple times incorporates tons of air. Similarly, whipping the egg whites to stiff, glossy peaks builds a strong foundation. This attention to detail guarantees a light and fluffy Angel Food Cake every single time. It is the kind of reliable recipe you will proudly pass down.
A true classic Angel Food Cake is defined by its ethereal texture and simple, pure flavor. It contains no butter, oil, or egg yolks. Consequently, its rise comes entirely from the air whipped into the egg whites. This results in a dessert that is surprisingly light. The flavor is a delicate balance of sweet vanilla and a hint of almond. It is a timeless dessert that never goes out of style.
While store-bought versions are convenient, nothing compares to a homemade Angel Food Cake. You control the quality of every ingredient. Furthermore, the taste and texture of a cake made from scratch are far superior to any boxed mix. The process is a joyful, therapeutic baking experience. It fills your home with a wonderful aroma and gives you a tremendous sense of accomplishment.
Using the correct ingredients is the first crucial step to a successful cake. Each component plays a specific role in creating the structure and flavor. For this easy Angel Food Cake, you need just a handful of simple items. I always recommend using the finest quality you can find. After all, with so few ingredients, each one truly shines. Let’s break down what you will need and why it matters so much.
Cake flour is non-negotiable for this recipe. Its low protein content is essential for that tender, fine crumb. All-purpose flour will make the cake dense and tough. Granulated sugar does more than just sweeten; it helps stabilize the egg white foam. We use it in two stages: mixed with the flour and whipped into the egg whites. This dual use ensures the sugar dissolves completely, preventing graininess.
Room temperature egg whites are the heart and soul of this cake. They whip up to a much greater volume than cold egg whites. The cream of tartar is an acid that strengthens the protein in the egg whites. This stabilizes the foam and prevents overbeating. Do not substitute it! Together, they create the stable, airy base that allows the cake to rise high and hold its shape.
Having the right tools makes the process of how to make Angel Food Cake much simpler. The most important piece is, without a doubt, the pan. Using the wrong type can lead to disaster. You will also need a few other key items to ensure your success. I have learned this the hard way over the years! Let’s get your kitchen ready for baking.
You must use a true tube pan, specifically an Angel Food Cake pan. This pan has a center tube and removable bottom. The sides should be completely smooth, without any non-stick coating. This is vital because the batter needs to cling to the sides as it rises. Do not use a Bundt pan, as the intricate designs will trap the batter. The ungreased, smooth surface is key to the cake’s ascent.
A stand mixer or a powerful hand mixer is your best friend for this recipe. Whipping the egg whites by hand is nearly impossible. You will also need a fine-mesh sieve or sifter for the flour. A large rubber spatula is crucial for gentle folding. Finally, having a long, thin knife or a skewer helps release the cooled cake perfectly from the pan.
Proper preparation is the secret to stress-free baking. Before you even turn on your mixer, get everything measured and ready. This “mise en place” approach prevents mid-recipe panic. For an Angel Food Cake from scratch, this step is especially important. The egg whites must be at room temperature to whip properly. Let’s get everything set up for a smooth and enjoyable baking session.
The easiest method is to separate eggs when they are cold. Then, let the whites sit on the counter to warm up. Make sure no trace of yolk gets into the whites. Even a small amount of fat can prevent them from whipping up. I crack each egg over a small bowl, then place the white into my main mixing bowl. This way, one bad egg won’t ruin the whole batch.
Do not be tempted to skip the triple sifting! This step is critical for a light and fluffy Angel Food Cake. Sifting the cake flour and sugar together multiple times does two things. First, it combines them evenly. Second, and more importantly, it aerates the mixture. This well-aerated flour blend incorporates into the meringue much more easily, reducing the risk of deflating your beautiful air bubbles.
This stage is where the magic begins. The meringue is the foundation of your entire cake. You want to whip it to its full potential. The goal is a bowl full of glossy, stiff peaks that hold their shape firmly. The process requires a bit of patience, but it is well worth the effort. A strong meringue means a tall, stable cake. Listen to the cues and watch the transformation.
Start by beating the room temperature egg whites with the cream of tartar and salt on medium speed. First, you will reach the “foamy” stage. Then, soft peaks will form; the peaks will curl over when you lift the beaters. Now, gradually add the sugar. As you continue beating on high, the mixture will become thick, glossy, and bright white. Stiff peaks stand straight up when the beaters are lifted. This is your sign to stop.
Once you have beautiful stiff peaks, it is time for the flavor. Gently beat in the vanilla and almond extracts. Use a light hand here; you just want to swirl them through. Overmixing at this point can break down the structure you worked so hard to build. The almond extract is my little secret; it adds a depth of flavor that makes this the best Angel Food Cake.
This is the most delicate part of the process. The goal is to combine the flour and meringue without deflating all the air you incorporated. You must be patient and gentle. Imagine you are coaxing the two elements together. Use a large, wide spatula and a light touch. Proper folding is the final key to ensuring your homemade Angel Food Cake is incredibly light.
Start by sifting about a quarter of the flour mixture over the top of the meringue. Using your spatula, cut down through the center of the batter, scrape along the bottom, and fold the batter over on itself. Give the bowl a quarter turn and repeat. Continue this motion until the flour is just incorporated. Some streaks are okay at this point. You will have three more additions to fully blend it.
Work efficiently but gently. Do not stir or mix aggressively. The batter should still look light and airy when you are finished. It is better to have a few tiny streaks of flour than to overmix and deflate the batter. A deflated batter will result in a dense, low-volume cake. Trust the process and your spatula!
You are almost there! Now, we get to the transformative heat of the oven. Baking is straightforward, but cooling is just as important. The unique inverted cooling method is what prevents your masterpiece from collapsing. This step is non-negotiable for a moist Angel Food Cake. Resist the urge to peek while it bakes! Let the oven do its work.
Bake the cake until it is a beautiful golden brown on top. The crust will feel dry and firm to the touch. When you press it lightly, it should spring back. You can also use a wooden skewer; it should come out clean. If it needs a few more minutes, give it time. Every oven is different, so watch for these visual and tactile cues rather than just the timer.
As soon as the cake comes out of the oven, immediately invert the pan. If your pan has little feet, rest it on those. If not, carefully place the center tube over the neck of a glass bottle. Let it cool completely upside down for at least an hour and a half. This allows the cake to set its structure as it cools, stretching downward instead of collapsing under its own weight. Patience is a virtue here!
Now for the best part: enjoying your creation! Once the cake is completely cool, carefully run a knife around the edges and the center tube to loosen it. Gently tap it out onto a serving platter. This light and fluffy Angel Food Cake is delicious on its own. However, a beautiful topping can turn it into a spectacular showstopper. I love exploring new Angel Food Cake dessert ideas for family gatherings.
Angel Food Cake with strawberries is a match made in heaven. Simply slice fresh strawberries and sprinkle them with a little sugar to draw out their juices. Let them macerate for about 30 minutes. Then, spoon the berries and their syrup over a slice of cake. A dollop of freshly whipped cream or a drizzle of cream cheese glaze takes it over the top. It is a timeless combination that never fails to please.
An Angel Food Cake with glaze is another fantastic option. A simple vanilla or citrus glaze made with powdered sugar and milk is delightful. For a chocolate twist, try a light chocolate sauce or even a dusting of cocoa powder. If you love other fruity flavors, a raspberry coulis or a lemon curd would be divine. For more bar-style inspiration, check out our fantastic peanut butter bars recipe that uses a similar frosting technique.

I do not recommend it. An angel food cake pan is essential. The center tube helps the heat circulate, and the removable bottom allows you to get the cake out. A Bundt pan’s designs will trap the batter, preventing it from rising properly.
The most common reason is not cooling it upside down. This step is crucial! Other reasons include under-whipped egg whites, overmixing the batter, or greasing the pan.
Store it covered at room temperature for up to 3 days. For longer storage, wrap it tightly and freeze it for up to 2 months. Thaw it at room temperature while still wrapped.
You can, but fresh egg whites from whole eggs generally whip up to a greater volume and stability. If you use cartoned whites, make sure they are 100% egg whites with no additives.
Do not throw them out! You can use them to make rich fudgy chewy brownies, custard, homemade mayonnaise, or these incredible chewy lemon cookies.
Yes, absolutely! A slightly sticky crust is completely normal for angel food cake. It is a sign of the high sugar content and is part of its characteristic texture.
Baking this classic Angel Food Cake from scratch is a rewarding journey back to the heart of homemade goodness. It is a beautiful, timeless dessert that speaks of patience, care, and love. I hope this recipe becomes a cherished part of your family traditions, just as it is in mine. Remember, the best meals often end with a simple, wonderful dessert. If you are looking for another stunning finale, my chocolate Easter egg nest cake is always a hit. Now, go forth and bake something beautiful!

Welcome to Mac Recipes! I'm here to prove that amazing home-cooked meals don't need to be complicated. From weeknight dinners to weekend treats, I create recipes that fit into your busy life—delicious, doable, and always worth making.
More About Me