Perfect Reindeer Brownie Bites
This post may contain affiliate links.
Read our Disclaimer.
Leave a Comment ★★★★★
The air is getting crisp, the carols are starting to play, and my kitchen begins to smell like nostalgia and melted chocolate. I’m Olivia, and if you’re anything like me, you crave holiday baking ideas that bring joy without the stress. Today, I’m so excited to share a family favorite that never fails to delight: adorable Reindeer brownie bites. Honestly, these cute little treats are the stars of every cookie tray and Christmas party desserts table I’ve ever put them on. They combine the rich, fudgy goodness of a classic brownie with the whimsical charm of Rudolph, making them an instant hit with kids and adults alike. Furthermore, they are incredibly simple to make, turning a boxed mix into something truly magical and festive. Of course, they are the perfect easy holiday desserts to whip up when you’re short on time but big on spirit. So, let’s make some memories together in the kitchen.

Table of Contents
Honestly, these reindeer themed desserts check every box on my holiday list. First, they are incredibly easy to make, which is a lifesaver during the busy season. Moreover, they are a fantastic activity to do with little ones; my own grandchildren love placing the candy eyes and red noses. They are the ultimate quick Christmas treats that look like you spent hours in the kitchen. Also, they offer a wonderful holiday cookie alternatives for those who prefer chocolatey goodness over a traditional sugar cookie. Ultimately, they bring a smile to everyone’s face, creating that warm, fuzzy holiday feeling we all cherish.
Gathering the family for holiday baking is one of my favorite traditions. These Reindeer brownie bites are perfect for little hands to help decorate. The steps are simple and fun, and the result is always adorable. Consequently, you get priceless family time and a delicious treat all at once. It’s a wonderful way to create lasting memories and teach kids some basic kitchen skills.
Whether you’re hosting a big Christmas Eve dinner or a casual cookie exchange, these bites are always a hit. They are the ideal festive party snacks because they are perfectly portioned and easy to eat. Furthermore, their playful design instantly brightens any dessert table. They pair beautifully with other treats, like this decadent Churro Cheesecake, for a truly spectacular spread.
Using simple, easy-to-find ingredients is key to this recipe’s charm. Luckily, you probably have most of these items in your pantry right now. I always say that quality matters, even when you’re starting with a mix. For instance, using a good fudge brownie mix sets the foundation for a rich, decadent treat. Meanwhile, the decorations are pure fun and completely customizable. Let’s break down what you’ll need for these Christmas brownie desserts.
The heart of these bites is, of course, the brownie. A standard 18-ounce family-size fudge brownie mix works perfectly here. However, if you’re a from-scratch baker at heart, you can absolutely use your favorite homemade recipe. In fact, my go-to Fudgy Chewy Brownies recipe yields an incredibly rich and moist base that holds up wonderfully in mini muffin tins. The eggs, oil, and water called for on the box mix are essential for achieving that classic fudgy texture we all love.
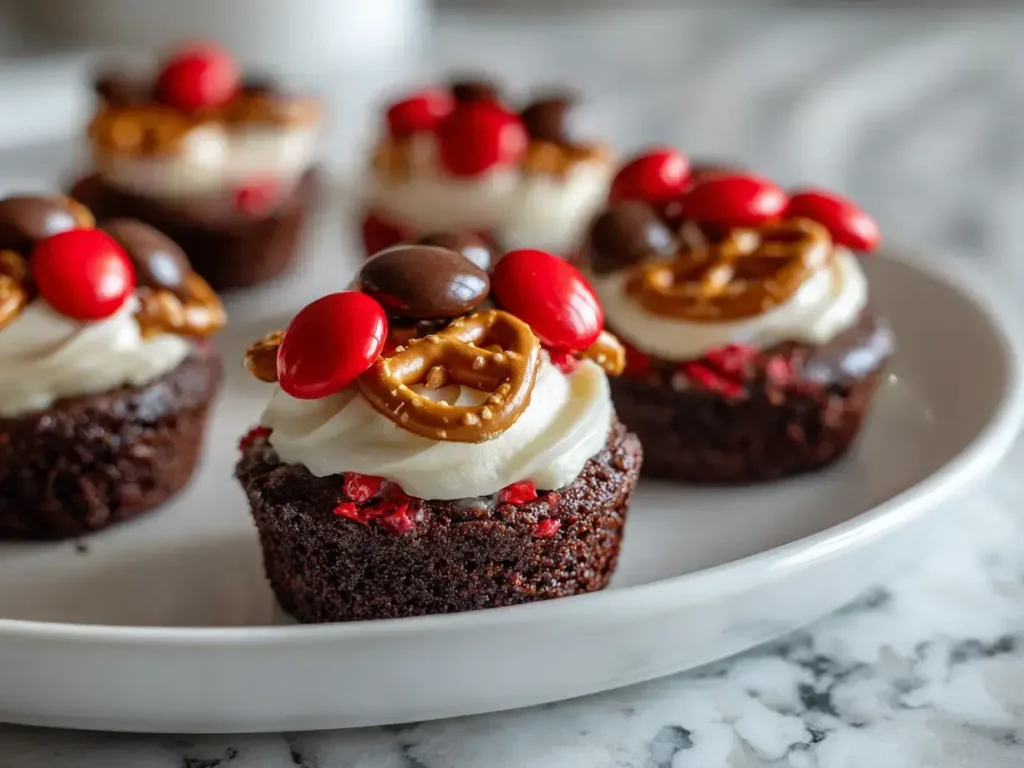
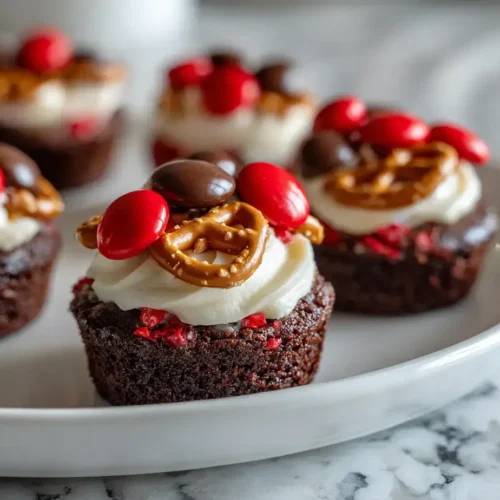
This is where the magic happens! Small pretzel twists are non-negotiable for the perfect antler shape. For the eyes, brown M&M’s or similar candy-coated chocolates work best. Similarly, a red M&M is the classic choice for Rudolph’s shiny nose. Finally, vanilla frosting acts as the edible glue that holds it all together. You can use canned for ultimate ease, or a simple homemade buttercream. The frosting also adds a sweet contrast to the rich chocolate, making every bite heavenly.
You won’t need any special equipment to create these holiday brownie treats. Standard baking tools are all that’s required to bring these festive little reindeer to life. Having everything ready before you start makes the process smooth and enjoyable. So, let’s take a quick inventory of your kitchen tools to ensure you’re set up for success.
A 24-cup mini muffin tin is the most important tool for this recipe. Additionally, lining the cups with paper liners is crucial for easy removal. I also give the liners a very light spritz of non-stick spray to guarantee a clean release every time. You’ll also need a large mixing bowl, a rubber spatula for folding the batter, and a tablespoon cookie scoop. The scoop isn’t mandatory, but it makes portioning the batter so much easier and cleaner.
For the decorating phase, a piping bag is your best friend. It gives you precise control over where the frosting goes. If you don’t have one, a small resealable plastic bag with a tiny corner snipped off works just as well. You’ll also need a wire cooling rack to allow the brownie bites to cool completely before decorating. Otherwise, the frosting will melt and the decorations will slide right off!
Now for the fun part—let’s bake! This process is straightforward, but a few key tips will ensure your Reindeer brownie bites turn out perfectly every time. First, always preheat your oven properly for even baking. Then, take care not to overfill the muffin cups, as the brownies will rise. Finally, patience is key when cooling; decorating warm brownies is a recipe for messy reindeer!
Start by preheating your oven to 350°F (175°C). Then, line your mini muffin tin with papers and give them a light spray. In a large bowl, combine the brownie mix, eggs, oil, and water. Use your spatula to stir until the batter is just combined and no dry streaks remain. Be careful not to overmix! Next, scoop a tablespoon of batter into each prepared cup, filling them about 3/4 full. Bake for 12-15 minutes. You know they’re done when the tops are set and a toothpick inserted comes out with a few moist crumbs.
Once baked, let the pan cool on a rack for 5 minutes. This allows the bites to firm up slightly. Then, gently transfer them from the pan to the wire rack to cool completely. This step is non-negotiable for clean decorating. While they cool, you can get your decorations ready: separate your candies and have your pretzels and frosting standing by. If your kitchen is warm, you can even pop the frosting in the fridge for a few minutes to firm up before piping.
This is where your festive brownie bites truly become reindeer! The decorating process is simple but so rewarding. I love setting up a little assembly line with all the components. It makes the work go quickly and is a blast with helpers. Remember, each reindeer has its own personality, so don’t worry if they’re not all perfectly identical. Their charm is in their uniqueness!
Once the bites are completely cool, fill your piping or bag with vanilla frosting. Pipe a small dollop, about the size of a pea, onto the center of each brownie bite. This dab of frosting is what will hold your decorations securely. Immediately, gently press two pretzel twists into the frosting on the top sides to form the antlers. They might be a bit fragile, so handle them with care. Next, add two brown candies below the antlers for the eyes.
The final touch is the most iconic: the red nose! Press one red candy-coated chocolate just below the eyes to complete Rudolph’s face. Give each candy a gentle press to make sure it’s adhered to the frosting. And just like that, you have a whole herd of delicious reindeer! If you’re making other S’mores Bars, these make a delightful platter companion.
You’ve created a masterpiece, and now you need to know how to keep it fresh and fabulous. These easy reindeer desserts are best enjoyed at room temperature. However, they can be made a bit ahead of time, which is a huge win during the hectic holidays. Proper storage is key to maintaining their texture and ensuring the decorations stay put.
Firstly, always store your decorated brownie bites in a single layer in an airtight container. If you need to stack them, place a layer of parchment paper between them to prevent scratching the frosting and decorations. They will stay fresh at room temperature for up to 3 days. For longer storage, you can freeze them undecorated. Simply bake and cool the brownie bases, then freeze them in a container. Thaw and decorate on the day you need them.
These bites are perfect on their own, but they also shine as part of a larger dessert table. Arrange them on a festive platter alongside other Christmas baking recipes like Peach Upside-Down Cakes for a variety of flavors. They also pair wonderfully with a glass of cold milk for the kids or a hot coffee for the adults. They are the ultimate grab-and-go festive party snacks for any holiday open house.

While the classic version is always a winner, it’s fun to get creative! Maybe you have dietary restrictions or just want to mix things up. Fortunately, these Reindeer brownie bites are wonderfully adaptable. Here are a few ideas to customize your holiday brownie treats to suit your family’s tastes and needs.
For a gluten-free version, simply use a certified gluten-free brownie mix and pretzels. To make them dairy-free, check that your brownie mix and candy chocolates are dairy-free, and use a plant-based frosting. If you can’t find small pretzel twists, pretzel sticks broken in half can work in a pinch for antlers. For a different flavor profile, you could use a Brown Butter Brookie base for a chocolate-chip cookie twist.
Why not make a whole reindeer games? Use white frosting for a snowy effect on the brownie base before adding the face. You could use different colored candies to create a whole cast of reindeer characters. For an extra festive touch, sprinkle a little edible glitter on the frosting before it sets. They are your canvas, so have fun with it!
Homemade gifts from the heart are my absolute favorite part of the season. These easy holiday desserts are not just for eating at home; they make incredibly thoughtful and festive gifts. Packaging them beautifully shows your loved ones you care. They are a wonderful alternative to a traditional fruitcake or tin of cookies.
Place a few bites in clear cellophane bags tied with a red or green ribbon. You can also use small holiday-themed boxes lined with parchment paper. For a neighbor gift, arrange them on a cute paper plate covered with festive cling wrap. Add a personalized tag, and you have a gift that is sure to be appreciated. They pair beautifully with a bag of gourmet coffee or hot chocolate mix.
If you’re known for your holiday cookie trays, these bites are a must-have addition. Their whimsical design always stands out. Combine them with other homemade goodies like Peanut Butter Bars and classic Plum Torte slices for a tray that has something for everyone. The variety of textures and flavors will make your gift truly spectacular and memorable.
Absolutely! You can bake the brownie bases up to 2 days in advance. Store them undecorated in an airtight container at room temperature. Then, simply decorate them the day you plan to serve them for the freshest look and taste.
Pretzels can be delicate. Firstly, handle them gently when pressing them into the frosting. If you’re still having issues, try using slightly larger pretzel twists or even pretzel sticks snapped in half. You can also dip the end of the pretzel in the frosting first to lubricate it before pressing it in.
Of course! A simple homemade buttercream or cream cheese frosting works beautifully. Just make sure it’s thick enough to hold the decorations in place. If it’s too soft, chill it for a short while before piping.
The key is that light spritz of non-stick cooking spray on the paper liners before adding the batter. This creates a barrier and ensures the brownies release cleanly every single time.
They are perfect for kids’ holiday baking! Children can help with stirring the batter (with supervision) and will love decorating the reindeer faces. It’s a fantastic and fun holiday activity for the whole family.
While a red M&M is classic, you can get creative! A red Smartie, a red jelly bean, or even a small red sprinkle would work. The goal is just to have that pop of red for Rudolph’s iconic nose.
So there you have it, friends—my heartfelt guide to creating these utterly charming Reindeer brownie bites. This recipe is more than just a list of ingredients and steps; it’s an invitation to slow down and savor the joy of the season. These bites are a testament to the fact that the most beloved holiday traditions often come from the simplest, most heartfelt moments in the kitchen. They are easy, forgiving, and bursting with festive charm. I hope this recipe becomes a staple in your home, creating sweet memories and delicious moments for many Christmases to come. Now, preheat that oven, gather your little elves, and get ready to make something magical. Happy baking!

Welcome to Mac Recipes! I'm here to prove that amazing home-cooked meals don't need to be complicated. From weeknight dinners to weekend treats, I create recipes that fit into your busy life—delicious, doable, and always worth making.
More About Me