Banana Brown Sugar Upside Down Cake
This post may contain affiliate links.
Read our Disclaimer.
Leave a Comment ★★★★★
Is there anything better than the smell of a warm, homemade cake filling your kitchen? For me, it’s pure, sweet nostalgia. Whether it’s a weeknight treat or the finale to a special Sunday dinner, a simple, from-scratch dessert has always been my comfort. I started making this scrumptious banana upside down cake years ago, and let me tell you, it has never once let me down. It perfectly combines the homey comfort of a classic vintage fruit dessert with the gooey, caramelized goodness we all crave. If you have a few spotted bananas sitting on your counter, you are moments away from creating a truly unforgettable homemade banana cake dessert.

Table of Contents
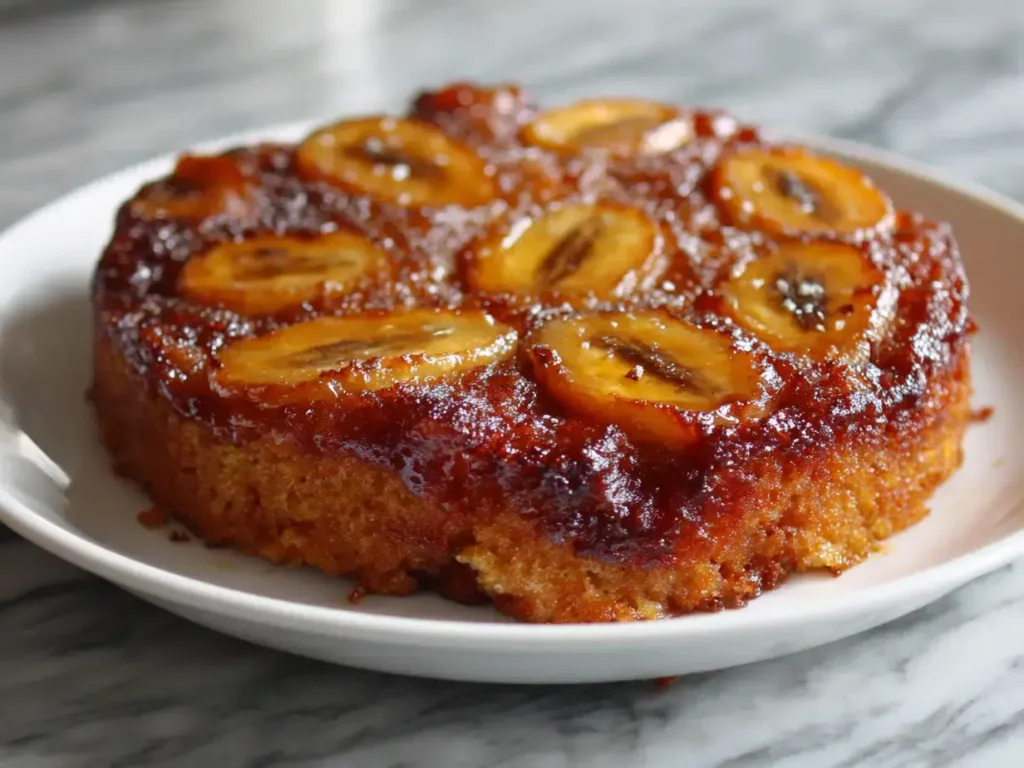
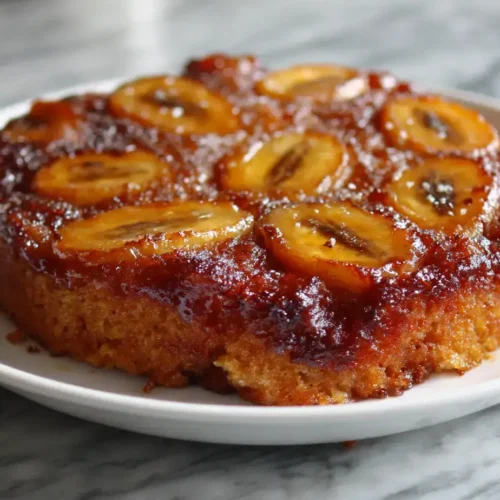
This isn’t just another cake recipe. My version of this easy banana upside down cake delivers a magical combination of textures and flavors that will have everyone asking for seconds. First, a sticky, rich caramel layer made with brown sugar and butter forms the base. On top of that, we arrange ripe bananas, which caramelize into sweet perfection as they bake. Finally, a supremely moist and tender vanilla cake bakes right on top, creating a dessert that is stunning when flipped over.
We’ve all been there. You buy a bunch of bananas with the best intentions, and a few days later, they’re speckled and almost too soft. Do not throw them away. In fact, those are the best bananas for baking. Their high sugar content and intense banana flavor are the secret weapons in this ripe banana dessert. They break down beautifully, infusing the entire cake with their sweetness and creating an incredibly moist banana cake that is simply irresistible.
One of the joys of this brown sugar banana cake is its simplicity. You won’t need any fancy or hard-to-find ingredients. Everything is likely already in your pantry and refrigerator: flour, sugar, eggs, butter, and that lonely carton of sour cream. Speaking of sour cream, it’s the unexpected hero. It reacts with the baking soda to give the cake a beautiful lift while simultaneously guaranteeing a tender, rich crumb that pairs wonderfully with the gooey topping.
Gathering your ingredients before you start, a method chefs call “mise en place,” is the first step to baking success. For this homemade banana cake dessert, using the right components and ensuring they are at the proper temperature is non-negotiable. Here’s what you’ll need to create your masterpiece.

The glorious topping starts with two simple ingredients. Use unsalted butter so you can control the salt level in your dessert. You will divide the total amount, using half for the caramel and half for the cake batter. For the sugar, light brown sugar is essential. Its molasses content is what creates that deep, rich, and gooey caramel sauce that defines a great upside down banana cake. Make sure to pack it firmly into your measuring cup for accuracy.
The cake batter is a straightforward vanilla cake, but a few ingredients make it special. All-purpose flour provides structure. Both baking powder and baking soda are used for maximum rise and a light texture. Room temperature eggs and sour cream are critical; they emulsify and incorporate into the batter much more easily than cold ingredients, leading to a smoother, more uniform, and incredibly moist banana cake. The sour cream, in particular, adds a delightful tang that balances the sweetness.
You don’t need a kitchen full of specialty gadgets to make this banana upside down cake. A few trusty basics will see you through to a perfect result. Having the right tools on hand makes the process smoother and more enjoyable, much like when you’re whipping up a batch of my favorite fudgy brownies.
A 9-inch round cake pan is the ideal size for this recipe. I highly recommend a light-colored metal pan, as dark pans can cause the edges to overbrown before the center is done. You will also need a small saucepan for melting the butter and brown sugar into caramel. For mixing, a set of nesting bowls is perfect—a medium one for dry ingredients and a larger one for creaming the butter and sugar. An electric hand mixer is a lifesaver for creating a light and fluffy batter, though you can certainly use a sturdy whisk and some muscle power.
A rubber spatula is indispensable for scraping every bit of batter out of the bowl and for spreading it gently over the bananas. You will also need a wire cooling rack to allow air to circulate around the hot cake pan, which stops the cake from steaming and getting soggy. Finally, a simple paring knife for slicing the bananas and running around the edge of the pan before the big flip is the final key tool.
The most nerve-wracking part of any classic upside down cake is the moment you flip it onto a plate. With a little preparation, you can ensure a flawless release every single time. A well-prepared pan is your best insurance policy against a stuck cake, making the difference between a beautiful presentation and a crumbled mess.
Start by thoroughly greasing your 9-inch cake pan with softened butter or a non-stick baking spray. Ensure you get into every corner and up the sides. While some bakers swear by parchment paper, I find that for this application, a well-greased pan is sufficient and one less step to worry about. The key is to be generous without leaving huge globs of butter behind. The goal is a thin, even layer that will help the cake slide out after its brief cooling period.
Once your caramel is poured into the prepared pan, it’s time for the bananas. Slice them into consistent, ¼-inch thick rounds. This ensures they all cook at the same rate. Arrange them in a single, pretty layer over the caramel. You can do a simple circular pattern starting from the outside and working in, or just scatter them evenly—they will taste delicious no matter what. This layer is what makes your finished banana caramel cake so visually stunning.
This step is where the magic begins and is simpler than you might think. You are not making a candy thermometer-style caramel; you are simply melting butter and brown sugar together to form a lush, bubbling sauce that will become the iconic topping of your banana upside down cake. This process is very similar to creating the base for a beautiful peach upside down cake.
In your small saucepan, melt the designated portion of butter over medium heat. Once it’s melted and foamy, add the packed light brown sugar. Now, stir continuously with a wooden spoon or heatproof spatula. You’ll cook this for just 1 to 2 minutes. The mixture will begin to bubble and will start to look less gritty and more smooth. It will smell absolutely heavenly. Do not walk away during this short process, as the sugar can go from perfect to burnt surprisingly quickly.
You know the caramel is ready when the brown sugar has fully dissolved into the butter and the mixture is smoothly pourable. It should have a glossy, liquid consistency. Immediately pour it into your greased cake pan and use the back of a spoon or tilt the pan to spread it into an even layer that covers the entire bottom. Acting quickly is important here, as the caramel will begin to set as it cools in the pan.
This cake batter is a classic creamed method batter, which is a foundational technique for many wonderful banana baking recipes. The goal is to incorporate air into the butter and sugar, which helps give the cake its light structure. Taking your time here pays off in the texture of the final cake. It’s a satisfying process, much like the careful layering required for a decadent churro cheesecake.
In your large mixing bowl, combine the remaining softened butter and the granulated sugar. Using your electric mixer on medium speed, beat them together for a full 2 to 3 minutes. You are not just mixing; you are creaming. The mixture is ready when it becomes noticeably paler in color and has a light, fluffy texture. This step is crucial for creating a cake with a fine crumb, so don’t rush it.
Beat in the eggs one at a time, making sure each is fully incorporated before adding the next. Then, mix in the vanilla extract. Now, you will alternate adding the dry ingredients and the sour cream. Start by adding half of the flour mixture, mix until just combined, then add all of the sour cream, mix, and finish with the remaining flour. Mix only until the last streaks of flour disappear. Overmixing at this stage can lead to a tough cake, so fold gently with a spatula for the final incorporation.
The transformation in the oven is a beautiful thing to watch. Your skillet banana cake (though we’re using a pan) will rise, turn a gorgeous golden brown, and fill your home with an incredible aroma. Then comes the moment of truth: the flip. With a steady hand and a little courage, you will reveal the beautiful caramelized banana topping you created at the very beginning.
Place your cake in the preheated 350°F (175°C) oven on the center rack. Bake for 35 to 40 minutes. The cake is done when the top is golden brown and the edges begin to pull away slightly from the sides of the pan. The most reliable test is the toothpick test: insert a toothpick into the center of the cake. If it comes out with a few moist crumbs attached, it’s perfect. If it comes out with wet batter, it needs more time. If it’s completely clean, it might be slightly overbaked.
This is the signature move. Let the cake cool in the pan on a wire rack for exactly 15 minutes. This allows the structure to set slightly, but the cake and caramel are still warm enough to release. Do not let it cool completely in the pan, or the caramel will solidify and stick. After 15 minutes, run a thin knife or an offset spatula around the edges to ensure nothing is stuck. Place your serving plate upside down on top of the pan. Using oven mitts, firmly grasp both the pan and the plate and flip them over in one confident motion. Lift the pan away to reveal your beautiful sweet banana treat.
Now for the best part: enjoying the fruits of your labor! This banana upside down cake is wonderfully versatile. It can be a homey weeknight dessert, an impressive offering at a potluck, or a special treat for a holiday brunch. And if you have any leftovers (a big if!), they store beautifully for a next-day snack.

This cake is magnificent served slightly warm. The caramel is at its gooiest and most luxurious. I love serving a simple square on its own, but it truly becomes a showstopper when paired with a scoop of vanilla bean ice cream or a dollop of freshly whipped cream. The contrast of the warm cake and cold, creamy ice cream is absolute heaven. It’s a dessert that stands proudly on its own, much like the classic chocolate Easter nest cake.
Once completely cooled, you can store any leftover cake in an airtight container at room temperature for up to 2 days. For longer storage, wrap individual slices or the whole cake tightly in plastic wrap and then foil and freeze for up to 3 months. To reheat, simply warm a slice in the microwave for 15-20 seconds, or place it in a 300°F oven until warm throughout. This will bring back that fresh-from-the-oven softness and make the caramel deliciously saucy again.
For the best results, stick with light brown sugar. Its moisture and molasses content are essential for creating that classic, gooey caramel texture. Dark brown sugar will work but will give a stronger, more molasses-heavy flavor. I do not recommend using granulated sugar, as it will create a harder, more brittle caramel layer.
This usually happens if the pan wasn’t greased thoroughly enough or if the cake cooled for too long before inverting. Next time, be very generous with the butter or baking spray on the pan sides. Also, be sure to only let it cool for 15 minutes—set a timer! Running a knife meticulously around the edge is a critical final step.
Absolutely! You can substitute a 1:1 gluten-free all-purpose flour blend for the regular flour. Just ensure the blend contains xanthan gum, which helps mimic the structure that gluten provides. All other ingredients remain the same.
Plain, full-fat Greek yogurt is the best substitute and will work beautifully. You could also use an equal amount of buttermilk. The goal is to have a cultured dairy product that adds tang and tenderness to the crumb.
Yes, chopped pecans or walnuts are a fantastic addition! Simply sprinkle a handful over the caramel layer after you’ve arranged the bananas and before you pour on the batter. They will toast as the cake bakes, adding a wonderful crunch.
Yes, it’s the same beloved concept! A pineapple upside down cake uses pineapple rings and often maraschino cherries, while this version celebrates the humble banana. The method for creating the caramel layer and the cake batter technique are virtually identical, making it easy to master both classics.
I truly hope this banana upside down cake becomes a new favorite in your home, just as it is in mine. It’s a testament to how a few simple ingredients can be transformed into something extraordinary with a little bit of love and patience. This cake is a warm hug on a plate, a celebration of ripe fruit, and a guaranteed crowd-pleaser. So preheat that oven, grab those spotty bananas, and get ready to create a memories. Don’t forget to check out other family-friendly desserts like these easy s’mores bars or these irresistible peanut butter bars for your next baking adventure. Happy baking!

Welcome to Mac Recipes! I'm here to prove that amazing home-cooked meals don't need to be complicated. From weeknight dinners to weekend treats, I create recipes that fit into your busy life—delicious, doable, and always worth making.
More About Me